Showing posts with label Decor. Show all posts

Friday, January 27, 2012

Egg Carton Decor

I saw this brilliant idea months (maybe even longer) ago and I have been wanting to make it ever since, especially since I have a knack for saving/hording silly things (like egg cartons, cearal boxes, toilet paper rolls, etc. ..), I just can't help it, I see great potential in these little things, and usually something comes together for the projects (while many other times they just finally end up in the garbage, I don't hold on to them FOREVER now, that would just be unhealthy, and then I'd be the next feature on that crazy hoarder show where their house is insanely over run by crap, I could never let my house get that bad...don't worry :)

To see the original idea from "Simpsonized Crafts and Then Some", you can go HERE. But to see how I put mine together, read on, because mine is a little be different.


If you are the kind of person that doesn't like to scroll all the way to the bottom, here is a finished product look, right at the beginning. Now to see how it came together, keep reading on.

 I gathered my egg cartons ( I think it took me two 18 count egg cartons for this whole project), then ripped the parts off, yes ripped. I tried cutting at first, and it made me really hate this project and I even stopped for a little while because I hated how it tore up my hand to manoeuvre the scissors around all that awkwardness. So yes, I ripped them, and it was so much easier, so much faster.
 Then I flattened them like so. .. .
 And then cut the excess off. If you do it like the original post, I don't think she cut off as much.
 Then, before I started gluing, I mapped out how the pieces would best fit. If you start from the middle and go out, it worked best. I also did half circles for the edges and sides of the circle.

Sorry I don't have more pictures for the rest of the process. But after I glued I painted the color I wanted. I did two coats of the red and went in all the cracks and such, I don't think the original post did, and it gave it a sort of vintage sort of look. So either works. Then I had this handy pearl necklace that broke a long while ago and I still hadn't fixed it, so I used these pearls and glued in the empty holes.

 Then you may also noticed that the middle one isn't actually a circle but a square diamond look. I didn't realize till my finalizing stage that the shapes were different for the cartons I was collecting, so I made it work this way, and the ones that circle the outside part are also the square shape. So either way works, just use what you got!
Then for a final backed-up look. Surprise! I actually made two of them. Then I put some flowers in the middle that my husband gave me for Valentines day last year. And then for an early sneak peek, my music note blocks I made that I've been meaning to post on for a while but haven't yet.

There you have it for this lovely week. Hope you have a super day! Thanks for all your support and attention, it is greatly appreciate!

Until next time!

Friday, December 9, 2011

Christmas is in the Air!

That's right, the Christmas Spirit is in the air, can you feel it? I just love this time of year, it just makes me feel so giddy and good feely inside. Now the trick is to make these feelings last all year long!

I don't know what its like at your place, but one of the first things on my agenda after Thanksgiving was to start on the decorations for Christmas and really create a peaceful enviroment for this wonderful fun time of year!

As a side note: I am also trying to "Up" my blog a little bit with better pictures and such, so any input on how you think it looks would be great.

Now, on to the decorations. . . .
 I saw this cleaver idea from the Dating Diva's, and had to try it out. So far it's been a hit at our house and my hubby is loving it. I am thinking this is gonna be a fun tradition we'll keep up for years to come, especially when our little girl will be old enough to help participate.

In case you don't feel like checking out the original idea from the Dating Diva's on their Spouse Countdown, this is the gist of the idea. You make 25 cards or envelopes, or however works best for you. Then put a note for each day.
 I had this fun shinny gift bag that I thought would be fun to write on. so I cut 25 of them. . .
 Then put my own little "heart" into it, by putting my finger print twice to make a heart shape. Then for each day I put either of the three: 1. a nice memory we had together, 2. something that I love and adore about him, or 3. an activity that I think would be fun to do together. The activity part took a little extra planning and thinking ahead than the others, because my husband is busy working a lot, I needed to make sure the activities were on days he wouldn't be too overwhelmed by it all or that we'd even have time for it that day. Overall it has been going great!
 Remember when I made that fun fall blanket on the couch? Well on the back I made it with fun Christmas like squares.
Then we mustin forget the stockings! The two on the ends our my husband's and mine, that my sister made for us for our first Christmas married, and the one in the middle is my little girl's that I made last year. I love these stockings because they are very similar in style to what we had growing up, that my Grandma made for everyone. Since a house fire that occurred several years ago in my youth, having these stockings are all the more treasure-able because they bring back so many memories!
 Yeah for the tree! Maybe this year for the day after Christmas sales we'll upgrade to a little bit taller tree, we'll see. . . .
 Little villages are a must at this house. Another precious memory treasure that I love having around!

 Then thanks to Pinetrest, I found this cleaver idea from the Vintage Junky. The best part about these lovely flakes is they are in the corner near our heater vent, so each time it kicks on, it makes the snowflakes sway and spin, just slightly enough it is fun to watch, especially for my little girl.
 Thanks again to Pintrest (they'll be getting a lot of thanking from me from now on). I found the cleaver idea of the white sticks from Indie Fixx. I just collected a bunch of twigs, painted them white, and put them in old cream soda bottles I held onto. I put them on our dinner table and also on our kitchen table, which you can see a few pictures down.
 Again, Pintrest idea. From Make and Takes.  You just get a picture frame, put a fun scrapbook paper in the back, and you can write on the glass with dry erasable markers. I first had it as this fun to do list, but then I changed it to. . .
 This fun Christmas tree that has the lovely scripture in it. (also a Pintrest idea, from Two and Under). I love that this is erasable, so each season I can put different quotes or scriptures, or whatever I want. And I can also always change the background too! I love it when things are easily changed around!
 Then my bulletin board in my kitchen, remember how I had for the Fall? Well, I thought it would be fun to have a switch-or-roo again and make it Christmas-y (I know, it's not a word, but you get the idea, right?)
 Then, remember where I had my scarecrows set up for the fall? Well I also changed it around with putting this little tree that I 've had since my single days, and also added some leftover fun village pieces, to add a little Christmas touch to my kitchen!
 Remember the Fall Wreath I made for this door? Well in my laziness in not wanting to make another one, I just dressed it up a little and added some more red, green, gold and poinsettia flowers. Then added our fun bells to the door nob.
 Then we put our regular wreath on our back door, to greet all those who may enter there!
 Here's the lovely white sticks on our kitchen table, I like the subtle winter fun feel they give to a room. Seeing them gives me a fun smile inside.
 Then, remember for fall how I had leaves hanging? Using the same strings we tied these beautiful snowflake ornaments that I got a few years back. It gives a fun sparkle to the room!
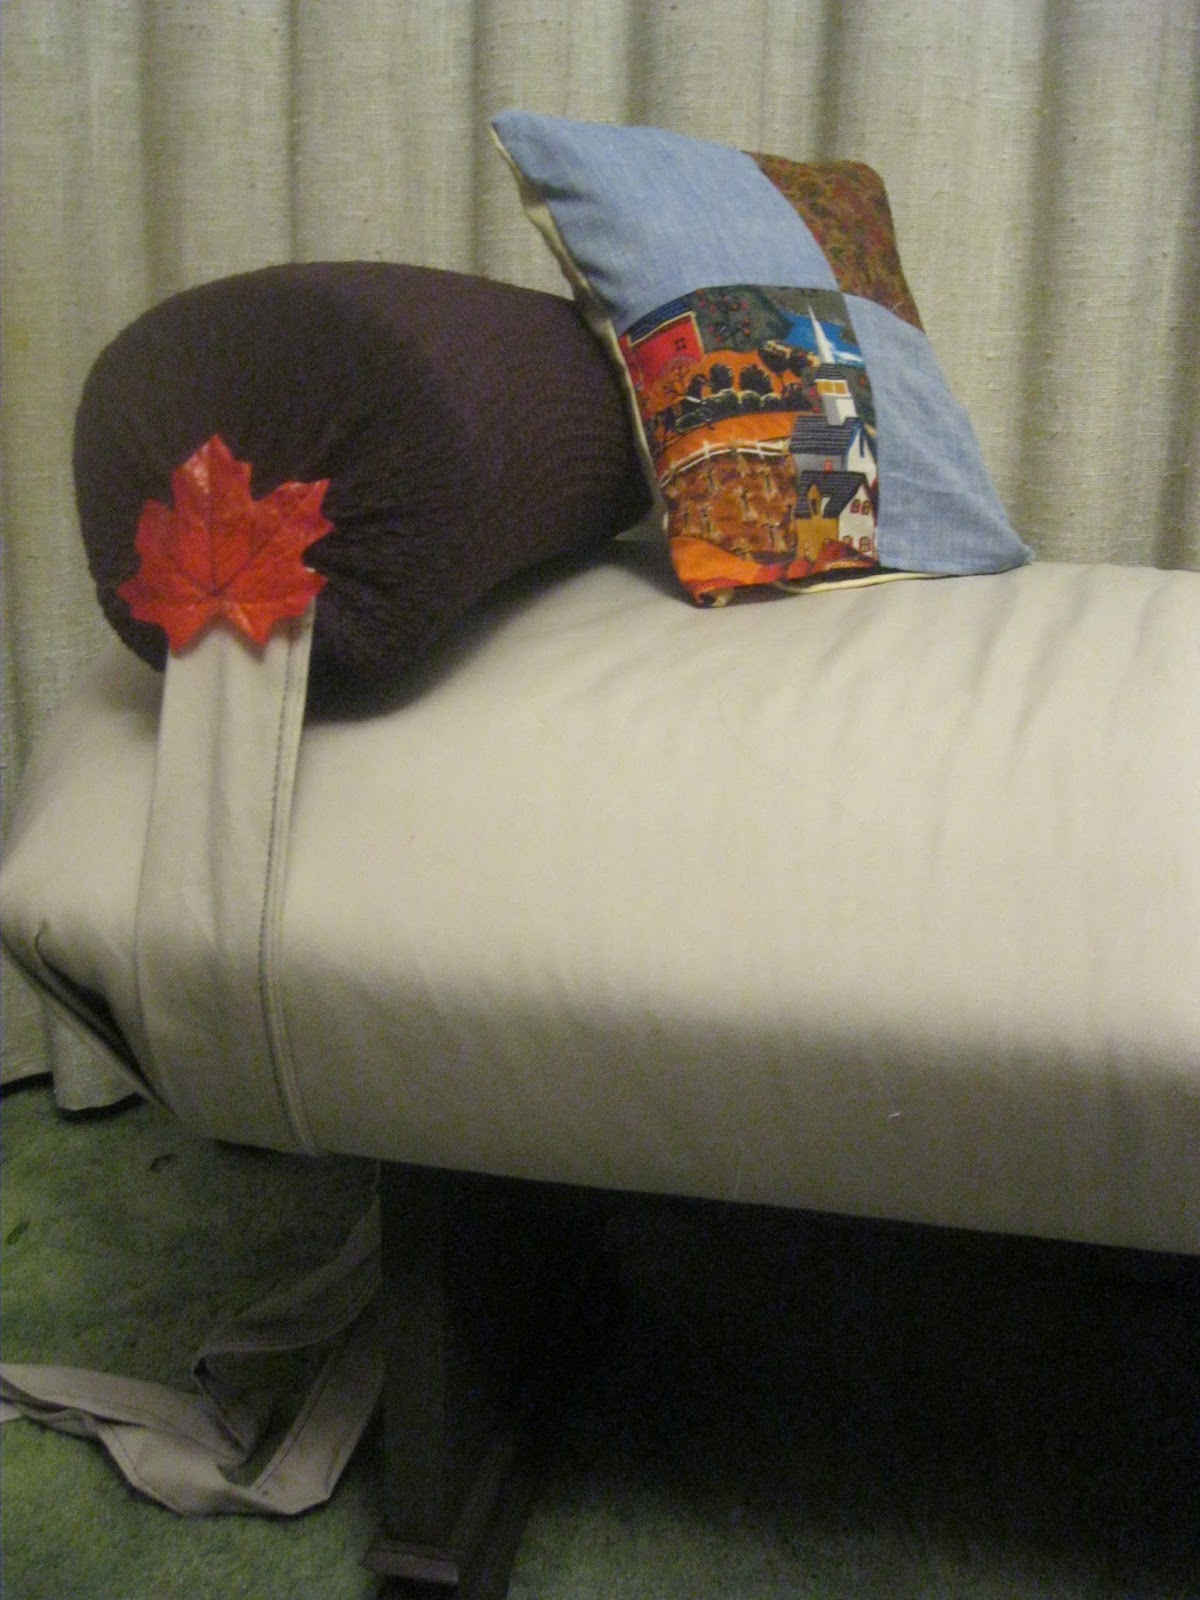
 Then remember my lovely window seat bench? Remember how I had fun dressing it up a little for fall with fall pillows and leaves on the end of the brown pillows? Well I had to keep up and do it for Christmas too!
 Then, again much thanks to Pintrest, I saw this idea from Saving Money, Living Life. Plus if you have little ones, it is a great way to still have ornaments up but away from little fingers. I am fan!
 And we mustin forget the mistletoe! Always adds to a fun extra spirit, for this great time of year! :)
Then to finish it all off for today's post, our lovely nativity. I found this lovely set at the local thrift store for only $2. It's so simple yet it tells it all. The wonderful story of our amazing Savior's birth. I also added a fun manger sort of background in the same picture frame that I put the Fall picture background. I love being able to change things around. Since this nativity set is a little more on the fragile side (it's already had one casualty, that was thankfully an easy fix), I saw this fun wood block nativity that I am working on (will post on it soon!), so I can feel more comfortable with my little girl playing with it, especially since it's such a wonderful blessed event, I want her to be able to become familiar with it in as many ways possible. Awe.. . .again, I just love this time of year!

Well, that's it for today. Remember the fun pumpkin salt shakers I made for fall time? Well I made some fun snowman ones for winter, so sharing that and any other fun projects I got going is up for next orders! :) But before all that, I will be back tomorrow for another lovely "Sun-Up Saturday" where I get to share my random, hopefully en-lighting, thoughts on life.

Thanks again for stopping by and I hope you have a wonderful rest of your day, this wonderful time of year!

Wednesday, November 16, 2011

Fall stuff

I know the feel and sort of "idea" of Fall is fast becoming behind us and is moving very much closer to a more Winter/Christmas feel (especially here with all our lovely snow), but I have finally finished all my "Fall Decor" that I wanted to make this year, just in time to start making my Winter decorations, which I am super excited to get cracking on. But of course won't actually put any of it up until at least AFTER Thanksgiving. There is a time and a place for things, and I am one for strongly believing that holidays/seasons fit into those categories. Speaking of, I saw these two pictures on Facebook, and I just had to share:


So, there. I have officially finished my Fall decor just in time to change it here in a few weeks, but oh well, at least I have something going up my sleeves for next fall!

Ok, enough chatter, on to what I actually came here to show you. . . .

 Remember how I put up this material on my bulletin board?
 And then put some of the same material in a picture frame as a background for my little tree?

 And then used some of the same material to make pillow covers for my window bench?


Well, to finish it all off, I made. . . .


 Some more matching pillow covers for one couch (have I mentioned I like to be matchy matchy?), and finally, last but not least.. . .

Used my last remaining scraps and put together a little "throw" sort of thing with the matching "fall village" material, and threw in some other fall colors I had around. Then on the reverse side I made it "Christmas" like, so in a few weeks I can just flip it over. And then if we get really bored/ambitious, we might do "Turkey Hand prints" on the blank tan squares, just for fun!

Now I am set and ready for a fun a haul of making random winter decorations on the side. I have also been working on some fun books for my little girl along with some toys, which I will be sure to share soon!

My hubby's birthday is tomorrow, a whoppin 24! And for safety of trying to keep his presents a secret from him, I will show you what I made him for next weeks posts, I already struggle keeping gift secrets from him, I probably shouldn't make it harder on myself, just in case he would randomly look here before then.

So keep in touch for some fun new things ahead, I can tell you are already excited to come back, right?? :)

Well thanks for stopping by, and until next time!!

Friday, October 21, 2011

Fall Wreath and other things....

Tomorrow is the last day for "The Forsaken Petal's" Giveaway, so don't forget to go check it out and enter it. I found out a little more details on it, it is $40 worth of software that you can do scrap booking on your computer, it looks pretty amazing, so you should check it out! And don't forget to check out the blog in of itself as well, it is great to get some intellectual perspectives about writing and life, if you are into that :)

Now on other notes. . . .

So I think I might have a slight flavor of ADD or something, or at least for crafty things :) I have a really hard time starting a project and finishing it in one shot in short time frames unless it HAS to be done for a particular reason, which also puts me in the category of a procrastinator too :)
So you know how I mentioned last week that I would finish my Halloween costumes along with the wigs for them in order to show you this week? Ha ha, well that didn't happen, my "Crafty ADD" as I like to call it, kicked in and I got carried away with other crafty things I have wanted to work on. And since my procrastination will kick in this weekend and early next week, I will have the costumes done soon along with the wigs, especially since Halloween is just around the corner! :)
So here is what has been distracting me this past week. . .
 I got these random scraps of material that were in the "Fall" color scheme. . ..
 Then using some old dead glow sticks (I know, I am crazy for saving EVERYTHING, I must get it from my Dad, yikes!) I linked them together to make a larger circle with the little loop things they come with. . .

Then I cut the scraps in longish strips and tied them like crazy on the glow stick loop, like so. . .

Then I added a few fake leaves I had to add a little more natural look to it, I used the polka dotted material to tie the leaves on, then. . .
 using this lovely empty cardboard from our cereal (don't you just love Raisin Bran? My bowels sure do! :), I made. . .
 This lovely "J" for our last name initial, and then I painted it . . .
 Wall-ah! And I decided it would be best to hang it on the inside of our house since the weather can be PRETTY temperamental here, and I didn't want it to get ruined
 Here is a closer up shot, I am still debating in my head if I like the red, cuz it tends to blend in too much it is hard to see, who knows, I might go to white on it, what do you think?
 Then I thought I would add a little taste of fall to my little bench here I made a while ago. . .
 I turned the strap on the arm pillows around, put sticky Velcro on it and added leaves to it instead of the flower. And since I used Velcro I can take it off and add some other fun decor next holiday time, like maybe a poinsettia will look fun there come winter time? Then I also made new pillow covers for the little pillows, they have some of the same material as what I used for the picture frame and bulletin board I shared earlier HERE.
Then to top it all off I decided it would be fun to having hanging or "Falling" leaves on our curtains that are hung with fishing string, it is Fall after all! :)

Okay, so there we have it for the week! I will get a crackin on finishing my costumes and wigs this coming week, but I probably wont share them with you till after Halloween so you can get the full affect look, can't you just not wait till then, cuz you are just so excited!!?
But as for next weeks sharing I will share with you a little fun with date ideas, in my Hubby's and I "Fall Ball" we just had, it was so great, I know you are just dying to hear about it now, right? Well come back next week so you can get the details!
Thanks again muchly for coming by, it means a lot! I hope you have a wonderful day!!

Friday, October 14, 2011

Halloween Costume Part I

It is the lovely month of October which means we get to be a little extra creative and dress up and indulged into mounds of candy. Aside from all the weird creepy side to Halloween that some portray, I have always loved Halloween and dressing up and seeing others creative dress up ideas as well.
I especially love to make our costumes (go figure, since I like to make a lot of everything else :), so in my brain storming of what the lovely winner dress up idea will be for the year I also had to keep in close range of my creative skills, in that as much I'd like to be really great at making something from nothing, I am still really lacking.
OK, long story short, the lovely winner this year is "The Flintstone Family"! My little girl was actually the main inspiration for this idea because of her weird hair, she has really short hair everywhere except this really long chunk on top, which I put up in a little pony tail sometimes so she can still see, and well, you guessed, she looks like the little pebbles girl :)
How could this cuteness not be inspiration? I just love her!

So far I have finished her little outfit, and my husband's outfit, now I just need to get cracking on my costume and I am also daring to venture in making wigs for us too, yikes! We'll see how this one will turn out, I have never made a wig before, but I thought it would be fun to try since my husband's hair is dirty blond and mine is brown, which is defiantly not the hair colors of the Flintstones (and we didn't feel like dying or spraying our hair, which I guess could still be a last resort option if this doesn't work). Don't worry, I will be sure to post at how this one turns out.

Since I want to do a more grand-uous post of us fully in costume for the big day, I won't be sharing too much of costumes, so they will look more amazing in the end picture, but for the sake of showing you how I got it all together, I will show them to you and how I made them, but I won't show you with us all in full uniform, so it will look more lovely as we approach this lovely holiday. I know, I am silly, and weird, I don't need to be reminded of this.

OK, first things first, my little girl's outfit:
 I went to the local thrift store and found this bath robe that was in this lovely leopard print (don't worry, I washed it very well!), and I cut it to her size, made straps, and then made a jagged look the bottom, here she is making sure she'll fit it (and I will share the full affect pictures closer to Halloween, don't worry! :)
Since we practically live in the Arctic, we have to plan around REALLY cold weather, so I thought it would be fun to make her some little slippers to go with it, here is the cut outs before I sewed it all together.. . .

 Having it wrong side out, I have it pinned and ready to sew.. . .
 After sewing the sole of the slipper to the rest, I wanted to put elastic around the leg area, so i used a safety pin to loop it around, and then I sewed it up the back of the heel
 Trying it on to make sure it'll fit, it'll work like a charm!
 The finished booties. . . .
 My little girl is all set to go!
 Here is my husband's outfit. I also got his supplies at the local thrift store, I got two orange shirts that looked very similar in shade. Then I cut the arms and neck area off one and sewed it to the bottom of the other. Then I painted the black triangles on and then made jagged cuts on the sleeves and bottom (best part of this costume idea is there is no need for hemming!! Yeah! Which is one of my LEAST favorite things in sewing!)

Since this post is in the spirit of Halloween, I thought I would also share some more recent decorations I have made this week. I got this idea from my sister, Keri, on her creative blog HERE. I made some fun candle glowing jars, see how they turned out. . . .
 Before. . .


 After. . . I think I like how my sister's turned out better, she is a much better artist than I am, but I think they'll work, and here is the back of them. .. .

 I used apple sauce jars, since I have a bazillion just hanging around, we love our applesauce! I also liked the roundish look with these jars :)
 Remember the cute little pumpkins I made? Well we finally painted them with cute little faces, and believe it or not, but my hubby actually WANTED to help me with this one :) It was a fun date night!


Now that I have you looking this way, I want to also mention my brother-in-law's blog, The Forsaken Petal. He gives great insight for those of you who are into writing (and for someone like me, it is nice to get a refresher on different physcology sort of things, I think this blog is more for than just writers). He has a masters in Physcology, so he uses this wisdom as a twist to help you understand your characters as you write about them, pretty cool, huh? (or for me, it's nice to learn more about myself!) Well you should check it out, because it's pretty amazing, and to top it all off even more he is doing a giveaway, HERE, where if you win you could win some mula towards My Memories Suite, which looks like a really great online/printing scrap booking, and who doesn't love capturing memories in cute little books with WAY less work? So you should check it out and join the giveaway, and enjoy his blog while you are at it (and don't forget to mention me :D


Okay, now that I have jumbled ALL over the place with fall and Halloween and crafty sort of stuff, I will end here. Remember how I said I am gonna try to make wigs for our costumes? Well here is my start. From my lookings around online it suggests to use a beanie hat as the base, so I made some hats. . . now that I got your curiosity stirring there will be more update to how this will turn out so be sure to come back!

Thanks again for stopping by this way, and sorry for all the jumbled sharings, I guess jumbling is what I do best!

Until next time. . .

Pin It!