Showing posts with label Cooking. Show all posts

Thursday, May 17, 2012

Smore Cake Pops!

In getting ready for my sister's wedding in June, I offered to make some cake pops as treats for the reception. So until then I have been putting in some practice on making the goods.

The first time I tried it the basic way where you make a cake, mash it and mix it with frosting and then form into balls. I am not going to lie, I wasn't very impressed with this way of making them, and for some reason the idea of doing it this way made the whole task seem overwhelming. Maybe I didn't pick a good cake recipe, or a good frosting recipe, or didn't pick good chocolate to coat it with it all, but I just didn't like how it all turned out, especially the taste. I think the mix of cake and frosting in the middle with chocolate on the outside made the whole bit almost overwhelming and way too rich for my liking. From this one experience many months ago it has taken me a long time to want to practice making them again...
Until I saw this beauty for only $15 at Walmart:

Sorry this pic is blurry, I got it right from the walmart website, I felt lazy and didn't want to take a pic of the actual one I bought, but it looks just like it though :)
 Getting this lovely thing for such a good deal, I couldn't resist giving the pops another practice round. So finding out that today was my neighbor's birthday, I thought it would be a perfect day for a new adventure.

Now even though this practice round is "Smore" flavored, I might not actually be making them like this for the wedding (unless she'd like them now after seeing them :) since I am going for Coral colored ones to match her colors for the wedding. But either way, I figured this round would be fun and new, and would at least give me the dipping practice for making them pretty and such.

I must saying getting this little machine was a great investment, and I am positive I will use it more than just her wedding. It was fast and easy, and I liked that I didn't have to mix the cake with frosting, making it too rich, but left it with a nice fluffy middle flavor. The only complaint so far is that they didn't turn out completely round when they were done, but that could have also been the recipe I tried, because it might not have had a chance to be fluffy enough to rise to the top mold. I will have to keep giving it a good practice. Especially since I actually enjoy eating these and will probably practice much more.
So long story short. I made "Smore" cake pops. I used THIS yellow cake recipe for the batter, although I halved the recipe (which I am glad I did, because even cut in half it made a lot). Then after making all the balls I put them in the freezer to get firm and easy to dip. Then from a suggestion from a friend I poked them with a fork instead of the sticks so that the ball wouldn't slide around like it did to me before, then gave it good dip in the melted chocolate. Before the chocolate got firm I sprinkled it with graham cracker crumbs and mini marsh mellows (that I cut into fourths). And Wall-ah! Yummy Smore cake pops! (and for this round I put them in mini cup cake liners, instead of on sticks, mostly because I am cheap and didn't want to use my sticks yet, I am saving them for the wedding. Plus the cup cake liners gave it an elegant chocolate sort of look, right? :)

And the best part of this whole process, was my husband asked me if I got this idea from pintirest. Ha ha, oh he knows me too well. But believe it or not, there are still SOME creative thoughts left in this universe and I did put the idea of it all together by myself...although I am sure there is a good chance someone out there still thought of the idea too. Either way they turned out yummy and I can't wait to try making more again!

Thanks for stopping by!
Until next time!

Friday, May 11, 2012

Oatmeal Muffins (gluten free and Diabetic friendly!)

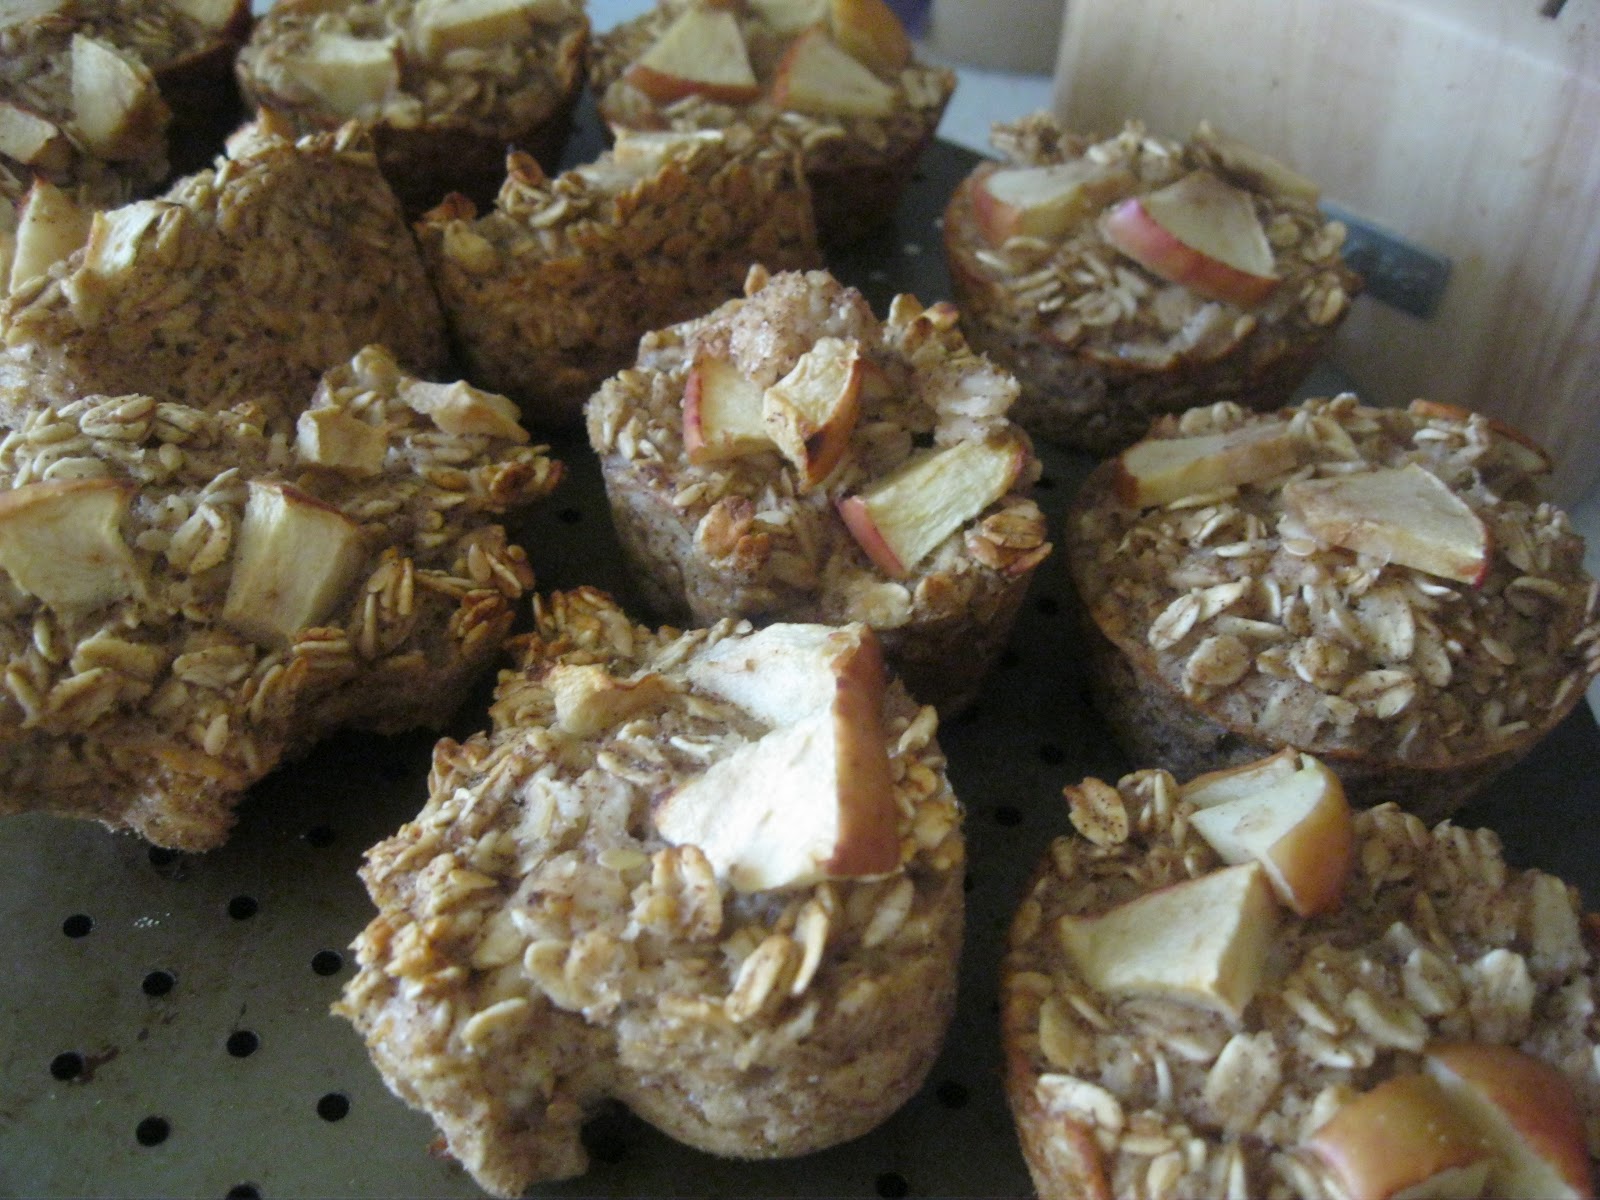
A ways back I shared these lovely muffins, but these ones are a little different and are more on the breakfast sweet side. I found this lovely recipe on pintrest and had to give them a try.

I don't know what your mornings are like, but I am very out of it the first 2 hours or so after waking up, especially when waking up is entailed in the hours of 6-8 in the morning like it does for us. I am just not a morning person. So to try and give my husband a better breakfast than just cereal like what we've been doing for a while, I tried these muffins, and so far they are a great hit!

They came from this website. And the great idea of them is after you make them, you can throw them in the freezer, and thaw them out the night before eating them, and then add milk or water to them in the morning, throw them in the microwave for about 60 secs and now you have oatmeal for breakfast! And because you made them, you know exactly what is in them, compared to those pre-packed oatmeal things, and they don't take as long as making regular oatmeal from scratch.

 I followed the recipe exactly...except instead of adding nuts or chocolate chips on top, I added slices of fresh apples (we just really like apples in our oatmeal, so it seemed fitting!) And then instead of their alternative sweetener, I just used sugar, so I guess if you follow my way, it wouldn't entirely be diabetic friendly. So if you want to try it out, check the website Here. I am being lazy and didn't want to post the recipe, plus, they deserve all the credit anyway, and could use the real faithful viewing of people wanting to try their goodness out :)
Overall, we are great fans, especially me, because now I feel a little more better about not being a lazy wife and can give my family a change of scenery in the breakfast department without having to do too much extra work (especially when I out of it in the morning). To make sure the muffins didn't freeze together, I individually wrapped them in plastic wrap, and then popped them in a freezer safe container. Now when we want oatmeal, we just get them out the night before (and even if we didn't I am sure we could even microwave the morning of, and they'd still turn out!)

Then as a portion size heads up, we thought two would be a good amount to eat per person, but we could barely get them down, they are so filling! So I would say one is plenty for an adult and because they are so packed with goodness, you will be full for hours!

Anyway, thanks again for stopping by, hope you enjoy a lovely weekend ahead!

Until next time!

Tuesday, April 10, 2012

Pizza Pin Wheels

 I saw these lovely things at this website, and knew that I must give them a try. They are quick and easy, and make great little snacks throughout the day, or on the go, or even in the freeze for quick last minute times (but if you are like me and my family, they probably will get eaten long before ever making it to the freezer for a later treat), or for really desperate times, they make a fun lunch or dinner too!

Here is the copy and pasted recipe, but with some of my own usual changes

Pizza Pin Wheels!
  • 1 (13.8 ounce) can Pillsbury® refrigerated classic pizza crust (I decided to make my dough, using THIS recipe, the same one I used for my Fry Bread.)
  • 1/2 teaspoon garlic salt
  • 1 teaspoon dried basil
  • 1 cup shredded mozzarella cheese (we don't usually have this kind of cheese around our house because it is more expensive, so we just use cheddar)
  • 1/4 cup shredded Parmesan cheese
  • 1/2 cup sliced pepperoni, chopped (another thing we don't really have on hand, but we use lots of other fun toppings, anything you like, works!)
  • 1 cup marinara or pizza sauce (we didn't use sauce for dipping, but put them in the rolls, and we made our own sauce with a 8 oz tomato sauce can, and added Italian seasonings)

Directions

  1. Preheat oven to 425 degrees. Press pizza dough into a large rectangle.
  2. Sprinkle dough with garlic salt, basil, cheeses and pepperoni. Starting at the short end, roll dough up tightly to form a log. Slice into 1-inch pieces.
  3. Place rolls on lightly greased baking sheets. Bake for 10 minutes or until browned on top. Serve with warm marinara sauce for dipping.
 Here is our lovely wheels coming together:
 As seen, I added other kinds of toppings, we like lots of flavor on our pizza (or with whatever we might have on hand), so why not in the pin wheels too. Here we added pineapple and olives, yum!
 Rolled it up when it was all done
 looks like so,
 Then cut the slices, careful, it can get a little messy :)
 Sprayed the pan, and plopped them on, as you can see, this round made 13, if I had more counter space I probably could have stretched the dough to make more, but I didn't, obviously.
 After about 10-15min at 350, all cooked, and pretty!
Ready to eat, enjoy, and wish you had more when they are all gone!

Thanks again for stopping by!

Thursday, March 29, 2012

Bean Burgers

Only a few days left, the giveaway closes at midnight mountain standard time on Sat night, March 31st, so don't forget to join in! You can go at the top of the page, or go HERE.

In many other attempts to have better alternatives to not so healthy beef, I came across this recipe on pintrest, and had to give it a try. We didn't have all the ingredients on hand when we made this, so maybe it would taste much different if we followed it exactly. But here is the recipe copied and pasted right from the A Good Appetite website. And as usual, my input, or what we did differently is in purple. Enjoy!


Black Bean Burgers(adapted from Bon Appétit July 1995)

1 14oz can black beans, rinsed & drained (since we buy our beans dry, this part we just pressure cooked our beans)1/3 c red onion chopped (we didn't have red onions, but did yellow)1/4 c bread crumbs2 T
Bacon Chipotle Sauce (or your favorite salsa, which we did, our favorite, is homemade!)1 t ground cumin

Smash the black beans with a fork or potato masher. Stir in the remaining ingredients. Form into 2 or 3 patties. Cook on a well oiled grill or griddle 3 minutes per side. The burgers should be warm through.

Serves 2 -3
 Here was our beans, cooked and ready after the pressure cooker
 We mixed in the salsa with our little hand blender thing
 Then for a little extra flavor we chopped and added some lettuce
 As seen here as well as the bread crumbs,
 Then formed the patties, ready for cooking.


Now with the inspiration of another blog, also found on pintrest, at Instructiables, we thought it would be fun to try the burgers in "Waffle Pockets"
 So we also made dough, using the same bread dough recipe HERE, or like the other website, you could use the ready made crescent roll doughs.  After we made the dough, we rolled it out and cut in a shape that would fit well on our waffle iron.
 Then placed the dough in, put the burger and little cheese in it, closed off the dough and closed the lid. We let it cook for a little longer than a normal waffle time, or till around when the dough no longer looked doughy.
 Here is the lovely things, since this post we have also tried the waffle idea with pizza ingredients like suggested in the original website, and we have also tried the yummy Tuna Burgers, and they all turned out so yummy! These would be great grab and go meals!
 Then we also wanted to give the burgers an official try as well in their normal form, here they are almost done cooking. We didn't put a ton of grease on the griddle like the recipe suggested, we just sprayed with cooking spray, I am not a fan of over doing it on the oil.
The we slapped it on some bread, added some yummy lettuce and tomatoes, and baked french fries on the side.

Now a little disclaimer, if you try these at home, do not expect a full on "hamburger" taste. I don't know what I was thinking when I was expecting that flavor in my first bit. That doesn't mean these aren't yummy, they just certainly don't taste like a perfectly yummy hamburger, at least in the way you'd expect. But still tasty.

That's all for today, again don't forget the giveaway, HERE, I will announce the winner Monday morning! Have a super great weekend everyone! We have the great privilege of hearing from living prophets speaking this weekend, something I can't wait for, and certainly don't want to miss out on, check out more details HERE!

Until next time!

Thursday, March 15, 2012

Momma Fry Bread

Today's yummy food sharing I thought I would share a classic that has been a part of my family for YEARS. As long as I can remember growing up for dinner on occasion we would have fry bread. And I am not positive, but I think my Mom also had this growing too, so its been in the family for a while. Then also being a native to Arizona, we also heard people call them "Navajo Tacos," because the Navajos in AZ would make something very similar to these, but much bigger, like a tortilla size. And last but not least, I have also heard of people from Utah call them "Scones" all though I absolutely hate that title, (just a silly pet peeve of mine, nothing against you personally if you like to call them that name), because if you look up the real true honest scone, they are more like a biscuit you eat with jam, don't believe me, google it yourself, or even check out this wikipedia link, and let me rest my case.

Back to the fry bread...
 They are oh so yummy and also very versatile. But the only down side, is yes, they are "fried" thus being called "FRY" bread. So that little disclaimer can make them a little not as healthy as if it was "baked" bread, and I don't know if you are this way, but sometimes fried food gives me heartburn, not fun. But despite all this, they are still very yummy, and I think would be fine on more rare occasions.

One of my all time favorite part about making these is that you can use a regular bread recipe and it will make you yummy fry bread. For many years I used my mom's classic bread recipe, but in recent years or so I have been using a new recipe, which is the one I will share if you would like to use instead of any other bread  recipe you have up your sleeve.

So here it is:

Whole Wheat Bread
(This amount makes about two loafs of bread, one loaf worth is plenty of fry bread to feed my little family of three, so base your making needs off that)
3 cups hot water
1 &half Tbs yeast
1Tbs Salt
1/3 cup oil ( I always like to do half applesauce, half oil)
1/3 cup honey or sugar
1/4 cup Gluten flour
6-7 cups of whole wheat flour

Combine all the ingredients except the flour. Let it set for about 10 mins. Then slowly add the flour till it is well blended in a dough like form. Then knead by hand or in a machine for about 6 mins.

Or I have also used this Pizza dough recipe and it made the pieces of fry bread really extra fluffy and bubbly (Which is my all time favorite, because then you can open it and stuff it with goods, like a pita pocket or something!). So that recipe is here, which I recently found at THIS website. And this recipe is directly pasted from the website.

Basic Pizza Doughyield: 2-12 inch pizzas, approximately 1 lb. of dough
Ingredients:
1 cup warm water
2 1/4 teaspoons active dry yeast
1 tablespoon honey {or sugar}
2 teaspoons salt
2 tablespoons olive or canola oil
3 cups bread flour {give or take 1/2 cup…depending on the heat & humidity}

Directions:
In a large mixing bowl, preferably that of a stand mixer, stir yeast and honey into warm water. Sit for 5-10 minutes or until bubbles form and mixture starts to foam. This tells you that the yeast is alive and kicking. Pour in salt, oil and half the flour and mix. Once that flour is incorporated, start adding flour in bit by bit until you get the pizza dough to the consistency you want: slightly tacky, but when you touch it it doesn’t stick to your hands. Once you reach this stage, turn the mixer on high to knead for 6 minutes. Turn a timer on and walk away! Resist the temptation to stop earlier than 6 minutes! The dough should be smooth and easy to work with. And the bowl should be clean! Lightly grease the bowl & the dough so it doesn’t dry out, cover with plastic wrap and let it rise 1-2 hours. That’s it!


 After you have made your dough, you can let it rise for a little while, or just jump right in to make them (which sometimes I do if I am crunched on time to get dinner going). The next step is to roll out the dough on a lightly greased surface with a rolling pin to about 1/8 inch thick and then cut into strips as big or small as you'd like, I like to make mine about the size above, which is like 2inches by 4 inches or so, but the size doesn't really matter that much. Before or during this part, put your oil in a frying pan and turn it to a medium heat to get it started warming up.
 When the oil is hot, carefully start putting the pieces of dough into the pan. Fry a few minutes on each side till it has a nice golden brown sort of look. I would give you an exact amount of time, but each time I do it, it is different, so you just have to kind of figure out what is best for your and your stove and your dough.
You don't have to, but after they are done I like to let them cool a little on a cooling wrack (with a paper towel underneath to catch the oil drips), to keep it from getting too moist in a bowl, and to also hopefully get some unnecessary excess oil off.
After a few minutes you can load them in a bowl ready to serve.

Now in my recent much lacking of taking better pictures, ideally I would have more pictures to show you how to load up the fry bread and how it looks most yummy to eat, but since I failed I will just explain. For our family these goods taste oh so yummy with a layer of re-fried beans, then diced tomatoes, chopped lettuce, and grated cheese (kind of the same sort of things you'd eat with a regular taco), or you can also add olives, onions, whatever you have on hand or would like to eat that is in that sort of "taco" category. But that is what makes these so great is they can be pretty versatile, so doesn't really matter entirely what you eat them with. Oh and another favorite at our house is to eat them with a little honey or powdered sugar on top. They really are so good!

So that's all I have for today except to announce that we've finally decided the lovely prizes for the 100th Venture giveaway, April will be making a lovely adorable Apron, and I will give $10 worth of Bare books to the winner to pick anything they'd like from this wonderful Bare book website. The giveaway will start Monday,  March 19th, and I will have a new separate tab at the top of the page that you can go to for the details on it. So don't hesitate to join in on the fun!

Until next time!

Thursday, March 8, 2012

Tuna Burgers!

Let me direct you to a new yummy favorite of ours.

 We like our meats every now and then, but after watching this video from Jamie Oliver's Food Revolution:

I have had an extremely hard time wanting to buy let alone eat ground beef from the store (especially fast food), and well, we are just too cheap to buy nicer, safer meats straight from a butcher, plus I wouldn't know where to find one anyway. So for awhile we have been avoiding beef, but will occasionally still eat chicken.

Then one day, in a need for more flavor and recipes in our regular eating I came across this old recipe I got from a one night class, called "Dollar A Day Meals" we took a few years ago. They also have a website, which is where I will be copy and pasting their recipe (but the one I use is from the packet from the class, but the recipe is still one in the same). To check out the website for other meal ideas (because they all are amazing!) or read the actual recipe you can go HERE.

So back to our meat delema, I tried this recipe and it has entered our life as a new lifesaver in satisfying our meat craving (our "meaty" American culture has corrupted us :). We love a good burger, and it has been lonely and tasteless without them, so when we came across this, tweaked it a little, I think we have our new burger satisfactions. And even straight from my husband's mouth (who probably loves meat more than I do), said "I would be okay if we never bought beef again, those are so yummy, we should make them more often!"

So with that being said, try it if you like, or just read to enjoy, but here is the recipe and lovely pictures. And not to mention that it is probably a safer burger, I would imagine the calories are much lower, I personally haven't done the numbers, but I imagine they'd be pretty good!

Okay, on to the recipe, again, this is copy and pasted right from the recipe at Dollar A Day Website, and my add-ins are in purple, enjoy! (oh and a little side note, I usually double this recipe to feed both my husband and I, and my little girl will eat a little (she isn't a big eater), so based on your family size, you may also need to double or triple according to your own needs.

Crusty Tuna Patties
dollaradaymeals.com

(We just call them Tuna Burgers, but to each your own :)

1 can tuna, drained (can save liquid to make sauce; recipe below)
1 large egg
1 T. dry milk powder
1 tsp. oil
1/2 tsp. lemon pepper (since we don't have lemon pepper, we do a dash or pepper and lemon juice, and still works pretty good)
1/4 tsp. garlic salt
half stalk celery, minced
3 T. minced onion
2 to 4 T. oil for cooking (I don't like cooking with a ton of oil, so I don't use this part, I will just cook them on my skillet with a little of cooking spray, and it still works great)

Mix tuna, egg, dry milk, oil, lemon pepper, garlic salt,  celery, onion.  Heat pan on medium;  add oil  for  cooking (again, we just spray it).  Form 8 small patties in hot oil using a spoon (We like to make the patties a little bigger, so they can be more like a burger for a sandwich, we usually make 4, two for each of us, after we've doubled the recipe, but again, to each your own, the size of the burgers don't really matter, it's the taste :).  Cook 4 minutes on each side.   Makes 2 to 3 servings.  Top with sauce if desired.

Sauce for tuna patties: drained tuna water + water to equal 1/2 cup; set aside. Mix in jar:  3 T. dry milk powder, 1 T. unbleached flour, 1/4 tsp. lemon pepper  Add water/tuna water mixture, put lid on jar and tighten; shake until smooth. Then pour into small sauce pan, heat to medium high,  stirring constantly until thick,  stir/cook for 1 minute.  Take off heat,  add up to 1/8 tsp. dill weed  and couple shakes garlic salt, stir.  Cover, let sit 2 minutes. (The sauce is a yummy addition, but it is still pretty good without it!)
©Janet Marie Huff/dollaradaymeals.com

 Here are two of the lovely things cooking on our skillet
 The completed pattie, we also added some lettuce tomato, and little slice of cheese, along with the regular bread to make it a complete burger! :)
 We also like to toast our bread for a little extra crunch!
And last but not least, here is the sauce we made, it makes a bunch, we only drizzled a little on the burger, it gave it a nice juicy flavor, but again, it is still pretty yummy without it.


So there you have it for this week! I hope you have a wonderful day and thank you for stopping by!

Until next time!

Friday, March 2, 2012

Graham Crackers

Holy Whoppers, I am coming close to 100 Ventures, I just might have to do something special for it...I will have to put a good think on that, maybe I will do another giveaway or something, stay tuned :)

On to regular blogging business, earlier this week I shared my favorite yummy Bean Fudge (Dip) that goes excellent with these yummy graham crackers.

In my daughters constant snacking stage and always wanting crackers or something in the "independent" realm (aka foods she can eat without making a HUGE mess around the house) I wanted to try making crackers. So in my Pintrest browsing I found these jewels from Smitten Kitchen's blog. I am not nearly as particular with the crackers "looking" just the real deals, I just wanted it to somewhat taste like them, or at least taste pretty yummy.
 Thus the easy star shape from one of my cookie cutters won me over. If you want to make it look more like the real ones, check out the Smitten Kitchen's blog where this recipe came from, or if you just want the basics, read on for the recipe.

So here it is, I cut and pasted right from her blog. And of course added my own two bits in purple.
Enjoy!

Home Made Graham Crackers

Makes 10 4 x 4.5-inch graham crackers or 48 2-inch squares (with my small star shape cutter (that is about 1inch-ish, I ended with over a 100 crackers)

2 1/2 cups plus 2 tablespoons (375 grams) unbleached all-purpose flour (a swap of 1/2 cup with whole wheat flour or 1 cup whole wheat pastry flour works well here, too)
1 cup (176 grams) dark brown sugar, lightly packed
1 teaspoon (6 grams) baking soda
3/4 teaspoon kosher or coarse sea salt (4 grams)
7 tablespoons (3 1/2 ounces or 100 grams) unsalted butter, cut into 1-inch cubes and frozen
(we used about 5 tbs of butter, and 2 tbs applesauce)1/3 cup (114 grams) mild-flavored honey, such as clover
5 tablespoons (77 grams) milk, full-fat is best
(we used our regular low fat milk)2 tablespoons (27 grams) pure vanilla extract
Topping (optional) (We didn't do any sort of topping and it was still pretty yummy!)3 tablespoons (43 grams) granulated sugar
1 teaspoon (5 grams) ground cinnamon


Make the dough: Combine the flour, brown sugar, baking soda, and salt in the bowl of a food processor fitted with the steel blade or in the bowl of an electric mixer fitted with the paddle attachment. Pulse or mix on low to incorporate. (we used our regular electric hand mixer and it worked great) Add the butter and pulse on and off on and off, or mix on low, until the mixture is the consistency of a coarse meal.
[Alternately, if you don't have a food processor or electric mixer, you can cut the ingredients together with a pastry blender. Just make sure they're very well incorporated.]
In a small bowl, whisk together the honey, milk, and vanilla extract. Add to the flour mixture and pulse on and off a few times or mix on low until the dough barely comes together. It will be very soft and sticky. Lay out a large piece of plastic wrap and dust it lightly with flour, then turn the dough out onto it and pat it into a rectangle about 1-inch thick. Wrap it, then chill it until firm, about 2 hours or overnight. Meanwhile, prepare the topping, if using, by combining the sugar and cinnamon in a small bowl and setting aside.

Roll out the crackers: Divide the dough in half and return one half to the refrigerator. Sift an even layer of flour onto the work surface and roll the dough into a long rectangle about 1/8 inch thick. The dough will be sticky, so flour as necessary. Trim the edges of the rectangle to 4 inches wide. Working with the shorter side of the rectangle parallel to the work surface, cut the strip every 4 1/2 inches to make 4 crackers. (again, we didn't do anything special with the shape making other than using a simple cookie cutter)
Place the crackers on one or two parchment-lined baking sheets and sprinkle with the topping. Chill until firm, about 30 to 45 minutes in the fridge or 15 to 20 minutes in the freezer. Repeat with the second batch of dough. Finally, gather any scraps together into a ball, chill until firm, and re-roll.
Adjust the oven rack to the upper and lower positions and preheat the oven to 350°F.

Now, if you care to decorate, read on more, but we didn't and still enjoyed them very much, so to each your own! :) 

Decorate the crackers: Mark a vertical line down the middle of each cracker, being careful not to cut through the dough (again, this is for the traditional cracker shape). Using a toothpick or skewer (I like to use the blunt end of a wooden skewer for more dramatic dots), prick the dough to form two dotted rows about 1/2 inch for each side of the dividing line.

Baking: Bake for 15 to 25 minutes, until browned and slightly firm to the touch, rotating the sheets halfway through to ensure even baking. [The baking time range is long because the original recipe calls for 25 minutes but my new oven -- which I suspect runs crazy hot but have yet to confirm with the actual purchase of an oven thermometer -- had them done in way less. Be safe, check them sooner. Nobody likes a burnt cracker!](ours were done after about 10 mins, so yes, like she says, really watch them!)


They stored very nicely in Mason jars, we didn't cook the whole batch our first...and well almost every time after we made these (I did manage to bake one whole batch at one point, but it's only happened once). After cooking the first batch and the other half in the freeze we didn't end up baking them, because let me tell you, they have an all new secret that will take you breath away!
  The dough is also amazing all on its own! And because there are no eggs, you don't have to be paranoid about Salmonella. In fact we love it tons better in just dough form, that we are really lucky now if it ever gets past the dough stage into the cracker stage.

Then for a little extra fun one time we decided we would toss them in with a batch of our homemade ice cream!
 These lovely cookie dough balls...combined with...
This lovely homemade ice cream, equals a super winner (in my book). Now a small disclaimer, the first time we tried combining the dough with the ice cream, we accidentally made the balls a little too floury. I personally didn't notice it, or mind it, but it bothered my husband. So if you ever do try it this way, just keep light on the flour.

So maybe this post is more about the dough than the crackers, but either way they are all so yummy!
So, back to a cracker note, if you do manage to let the dough pass the dough stage and transform into crackers, they really are so good in this Bean Fudge dip, or just to eat on their own lonesome.

Well that's all for now, I hope you have a wonderful weekend ahead because you deserve it!

Until next time!

Monday, February 27, 2012

Pinto Bean Fudge

Sorry for not getting this post in last week, my spurts of getting things done can be so random and unpredictable sometimes. I really need to manage my time better, the venture of my life.
But here we have a wonderful yummy recipe. As you may have noticed from the title it is Bean Fudge. Yep that's right. Sounds weird, I know, believe me, I know. But you can't taste the beans at all, just simply yummy goodness. I got this recipe from this recipe book below:
A lovely book we got as a wedding gift. And now to the recipe. And again, if you know my usual routine, I put in the actual recipe word for word, but then like to add my own little two cents, which will be, as always, in purple coloring.
Pinto Bean Fudge (Dip)
(I usually double the recipe every time I make it, mostly because I don't like just using 1 cup of beans)
1 Cup Pinto Beans (cooked)(sometimes I throw in other beans like black or white beans too, but whatever I add in, I always make sure it is still the 1 cup (or 2 for doubling)
1/4 c Milk
1/4 c Butter
1/2 c Cocoa powder
2 tsp. Vanilla
2 c powdered Sugar 
In a blender, puree cooked beans and milk until creamy. Melt butter in a small sauce pan. Stir in cocoa until well blended. Add whipped beans and vanilla and stir. Gradually stir in enough powdered sugar to make a thick, creamy mixture. Spread in a buttered pan. Chill 1-2 hours. (This recipe is a little on the vague side, and I am not sure if they meant it to be an actual solid like fudge, but every time I've made this, which is several times, I can't seem to get it to firm up like your normal fudge, so that's why I inserted my "dip" at the title, because that's what we end using it for, but either way, it is still very yummy! Please let me know if you ever try it and can get it to "firm" up! :)
I would think it would go well with any kind of cracker that isn't flavored too strongly in the salty cheesy sort of category. Pictured here I dipped with a graham cracker I made, which are also so yummy, which yes, it's your your lucky week...I will share more on it towards the end of this week too, Yahoo!

But even more tastier, and probably even healthier, it is an amazing dip for fruit, especially ones like strawberries or apples (like seen above).

I know I probably say each food I share is so yummy and one of my all time favorites, but this one really is up that category for me!

Anyway, hope you enjoy and have a superbly wonderful day!

Thanks for stopping by and until next time!

Thursday, February 16, 2012

Granola Bars

This week's yumminess is Granola Bars. In my many moments on, yes, you guessed it, Pintrest, I saw a link to This website for a recipe of the goodness. I couldn't help but try it out and now that I have I don't think I will ever go back to the store bought kind again. Yep, they were that good!

And of course, my usual self had to make my own little adjustments (there are a few recipes I actually follow exactly, I promise ;), so my little input is in purple, or you can follow it exactly, either way I think they are super yummy!

Granola Bars
4&1/2 c rolled oats (regular, not quick)
1 c flour ( I like to use whole wheat flour)
1 tsp baking soda
1 tsp vanilla
2/3 c butter, melted (I did half butter, half unsweetened applesauce, to make it a little healthier)
1/2 c honey (The first time I didn't do exactly this amount, cuz I ran out, it was probably close to a 1/3 or so, and it still turned out good, and since it worked this way the first time, I kept it up for other times as well, just to hold off on the sweetening)
1/3 c brown sugar, packed
1/2 c mini chocolate chips (raisins, craisins, other dried fruit, whatever you like!)
Combine all ingredients but the chocolate chips (or whatever you are putting in). Mix and then add the chocolate chips in and mix again. Press into a greased pan. Bake at 325 degrees for 18-22 minutes. Enjoy!!


**this is a basic recipe. . . if you like other things, try putting them in and make it your own recipe! Nuts, seeds, coconut, peanut butter. . . the options are endless!**
We have tried the many other variations with coconut, almond slivers, chocolate chips, peanut butter, and raisins and they were all great and yummy!!


Here it is pressed and rolled flat into the pan, ready to be cooked!
 And here it is all done and cut up, ready to be eaten. And another fun thing about this, is because we had it in a bag, some of the bars were broken up a little and made really yummy granola cereal!

And last but not least,  a pic of my little princess enjoying the goodness. These have been great little snacks for her as well as us!

That's all! Join me again for a Sun-Up Saturday this week! Have a super day!

Thursday, February 9, 2012

Radish Chips

I know it sounds kinda different, maybe even weird, but let me tell you...they are so yummy! Again, again and much again, I found this lovely gem of a recipe on pintrest, where else these days? When I saw it I knew that I must try it because we get many radishes on occasion from our bountiful basket load and I never know what to do with them, eventually leading them to their sad gloom being tossed in the trash because they end up going bad. But thanks to this recipe, we will never have another radish go bad in this house, at least not if I have anything to say about it!

So here is my lovely pictures. . .
 This is the pre-cooking stage
And the lovely treats all finished. Now my little disclaimer, I know they don't look that pretty, or maybe even that tasty looking, I blame my not so great photo skills, my dying camera, and the fact that I never can make something look just like the original, if you want to see the other dude's beautiful chips go Here, and ooo and awe at how yummy they look, and then try the recipe and actually indulge in the yummyiness...
http://memebase.com/2011/07/18/memes-cookie-monster-cupcakes/
I think of this picture just about EVERY time I make something (and feel so giddy inside too while thinking of it), I just "Nail" things really good :)

Okay, okay, now on to the recipe. I copied and pasted the exact directions I got from the original "Simple Food Comfort" and then of course I changed things around (I just can't help it), so those will be in purple.

Radish Chips
  • Approximately 20 radishes, cleaned and ends trimmed (we definitely don't get this many, we usually do about 5, mostly because that's how many we get for bountiful)
  • 1 tbsp olive oil (we do much less again, because we didn't have 20 radishes, so we did about 1/2 tsp)
  • 1 tsp curry powder (we didn't have this, so we didn't use it :)
  • 1/4 tsp tumeric powder (again, we didn't have this, we just don't own very many extravagant spices :)
  • 1/4 tsp garlic powder
  • 1/4 tsp paprika (again, another we didn't use)
  • generous pinch of salt
  • pinch of cracked black pepper
Preheat your oven to 350 degrees.
In the meantime slice your radishes approximately a 1/4 inch thick, adding them to a microwave safe bowl. When you are done slicing, cover the bowl with plastic wrap and place in the microwave for about 40 seconds to soften them up.
Remove the plastic wrap, drain any liquid, and add them to a larger bowl. (we didn't really have much liquid in the bowl when we did this the first time, so our second time we didn't do this part and it still worked just fine)
Add the olive oil, and seasonings. Mix well to coat all of the radishes.
To a baking sheet lined with parchment paper, add the sliced radishes. Cook for approximately 15 minutes, then take out and flip, reduce the heat to 225 and cook for another 20 minutes.
Keep an eye on them and check the texture. You will notice they will begin to shrink in size and crisp up. This is what you need. Remove from the oven, plate and serve. (The original mentions that they are nice and crispy like chips, but due to our old ghetto oven, it would either burn them or put out early when they were still a little chewy, but they still tasted yummy even though chewy).

So there you have it! A new yummy addition that will make you mouth water (maybe)!

Hope you have a wonderful new day with lots of happy feelings and maybe some yummy radishes in your tummy :)

Wednesday, April 27, 2011

Favorite Oatmeal Muffins!

One of my favorite things about being graduated from college but my husband still isn't is that we still get to be close to the college- I can have the benefits of the college without being tortured by them by being one of their students :)

Well this lovely school offers community classes, usually 1-2 night classes that offer great fun or advice without strapping you down with homework- you just get to go, learn, have fun and then your done! Last year they offered a one night class called "Meals on a Dollar a Day." The teacher for this little class was Janet Huff, author of "Basic Essentials Cookbook"- which more details can be found HERE, or by clicking on her link on the left hand side of my blog. In her cookbook she has over a thousand different recipes that are great because they are not only yummy, but they are super healthy because it consists of trying to use grains, lentils and the like in their simplest healthiest forms before preservatives and processes have ruined their value. Anyway- long story short, she has yummy recipes and she taught this class. Not only did she write this cookbook but she came up with a 30 day-dollar a day plan that is not only cheap, but provides yummy healthy meals. She heard of someone taking on this challenge before her but their meals consisted of a lot of Ramon or mac and cheese. Though those foods might be somewhat yummy and are very cheap- as for health benefits this plan wasn't very realistic so she wanted to come up with the same plan but make it healthy. So with lots of work, prayer and dedication she was able to put a plan together and they are filled with GREAT yummy healthy recipes! For more details about this plan and the recipes you can go HERE.

Again long story short (sorry for all the long stories! :) One of my all time favorite recipes that she has in this plan are her yummy Oatmeal Muffins- can you say DE-lish!?

Even though I learned of this recipe a while ago, I made them again last week and thought I would share the wealth (especially since I actually took a picture this time!). For this recipe you can click on the above link and click on "Cowboy Chowder" and it is the side dish that goes with it, or you can click HERE, or you can just read below:

Favorite Oatmeal Muffins by Janet Huff
1/4 cup dry milk powder
1 cup dry quick oatmeal (we use regular oats and they work just fine too!)
1 cup water
1 T. vinegar
-----------------
1 egg
2 T. sugar
1/3 cup oil (we like to do half oil and half apple sauce- replacing oil with apple sauce is a nice simple way to make it a little more healthy and it doesn't change the end result that much-hardly noticeable!)
-----------------
1 and 1/4 cup of unbleached flour**
1/2 tsp baking soda
1/2 tsp. sea salt
1 tsp. baking powder

Preheat oven to 400 degrees. Grease a 12-muffin tin. In a large bowl: mix dry milk and oatmeal. Add water, vinegar; let sit a few min. Then add egg, sugar, oil; stir. Add flour, baking soda, salt, baking powder. Stir all with a fork JUST to moisten. DO NOT over mix. Spoon batter evenly in greased muffin tins. Bake 15-20 min. Done when tops bounce back to touch. Makes one dozen.

**I like to use 1 cup unbleached flour + 1/4 cup whole wheat flour for more grains/nutrition.

So there you have it! And here is a lovely picture as promised:
Don't those look super yummy!? Just looking at them makes me want to make them again! :)
 One of my favorite things about these muffins, besides them tasting super good, is they can go with just about ANY meal and I also recently discovered they taste super good with the marmalade I made back in venture #9:
Remember this fellow? If not you can refresh your memory HERE and read all about it! :)

Another great muffin recipe from Janet Huff in this meal deal-o is her CORN BREAD MUFFINS which also tastes super yummy with the marmalade.

Anyway, long story short, I made some yummy muffins, I shared them with you here, and now I think you should try the recipe out- you won't regret it!

Until next time!....

Friday, December 3, 2010

Homemade Bagels

I don't know about you, but I love having that feeling of learning how to make something from scratch that I would have normally bought at the store. You normally buy it because you had no idea in the first place how to make it, but then you finally found out how and it ended up tasting ten times better than the store bought version, and you know it is healthier too! I absolutely love this feeling, so much!! And this probably partly what I have become such a fan of this book:
 I got this recipe book as a wedding gift, but didn't "venture" through it till recently, and now that I have browsed through it, I don't know why I haven't done it sooner, cuz I just love the recipes in here, and will prob share some more recipes that are from it. This book is full of fun ideas of how to make things from scratch, especially things you'd have in your food storage like wheat, rice, beans, etc. It is so great to have cuz it gives great ideas that I'd prob never think of making out of those basic simple supplies we've be encouraged to store.

So long story short- I love the feeling of accomplishment in making yummy healthy food, that ends up being super cheaper in the long run, and here is my first "sharing" of one of my new favorite yummy recipes: Whole wheat Bagels!
Here is the recipe straight from the book:

Whole-Wheat Bagels
1 pkg (2 and half tsp.) yeast
1 and half Cup warm Water
¼ cup brown sugar
4 and ½ whole-wheat flour
Baking Soda

Combine yeast, warm water, and sugar. Let stand 5 min. Add flour and beat with dough hook until smooth (I just used a fork), or knead on floured surface 6-7 min until smooth. Let rest 5-10 min. Meanwhile, fill a saucepan ¾ full with water. For every cup of water, add 3 tsp. Baking soda. Bring water and soda to a boil. Divide dough into 12 pieces. Shape each piece into a flattened round disk (we used a large rimmed cup as a “cookie cutter” to cut out the disk shape). Press thumbs into center and pull dough outward to make a center hole. Drop each bagel in boiling water for about 10 sec. Remove with a slotted spoon (or a fork). Place bagels on a greased baking sheet. Bake at 450 for 8-9 min or until browned.

Here is what ours looked like when we were done, they turned out a little smaller than what you'd get at the store, but they were oh so yummy!
 They worked great for a breakfast meal, or for a lunch/dinner meal they worked really great in making "Pizza Bagels!" as seen below:
This bagel we used our "heart" cookie cutter to get this shape, but to make into the pizza all we did was cut them in half, added tomato sauce (if you don't like the sauce to be as bland you can add Italian seasoning), cheese, and we added some chopped onions, bell peppers, and tomatoes- but you could really add what ever you want- that's the joy of making things on your own at home!

Anyway, hope you have a wonderful day! Till next time....

Pin It!