Showing posts with label Hubby Gifts. Show all posts

Tuesday, January 31, 2012

A Year of Dates

Thanks April for posting! It is great to see your mad skills! :)

So for my craft sharing this week I thought I'd share a little in the dating realm. I don't know if you and your hubby or boyfriend are anything like us, but we have the darnedest time trying to come with dates on a monthly basis, let alone weekly. So when I saw this idea on Pintrest I couldn't resist putting my own together. The idea from Pintrest originally came from Find Joy in the Journey.

And an ahead apology that I didn't do this post before the beginning of the year in case you'd want to do it too, but even if you do want to do it, you could still make it a years worth, just start with Feb, or even March, and hey, this could also be a great Valentines Gift, eh?

So the idea is pretty basic. You get 12 manila folders and label for each month of the year (whenever you start the year, it wouldn't matter, and you could even do six months if you wanted). Then you load each envelop with at least one specific date that you could do for that month. This can take a little extra time and planning out, especially if you can think of specific events that happen only in certain months, maybe you could get tickets for that event and save it in the envelop? Or get gift cards at certain restaurants, so that money is set aside just for that date for that particular restaurant. You options are endless based on the town you live in, and if you have a hard time like we do to get out of the house because we don't like to have scrounge for a babysitter, you can also plan the dates to be at home. So to give you a little more of an example of how this works, this what I did:

 I had a little extra cash from Christmas time, so I went to the dollar store and bought a bunch of random things, or games, or cookie mixes, or magic tricks, or poppers, or coloring books and then I got a few gift cards for a few of our favorite places. I know a lot of these items are cheesy and cheap, but I am pretty sure they will still add for some great fun.
 Then I laid the folders out along our couches, Jan- Dec, and then "mapped" it out for each activity that we could do for each month. Then with the little bit of cash I had left over I added to some envelops to help add to extra fun if we wanted to use it. (I also subtracted all the cash that I put in the random months from our budget, so that when we open each envelop with a little extra cash, it will be like a little bonus, we wont have to factor into our budget, like winning a little lottery...kind of :-)
I tried putting items that best fit that sort of month, like the candles in this picture I put for Feb, so we could do a candle lit dinner, wherever we'd like, in relating to Valentines day. Or for Jan, I put in a little cash so we could go Ice skating (which we actually went sledding instead, since we haven't done that yet together, and the crappy $5 sled didn't last more than 10 runs, beware of the cheap sleds at walmart!!).

So far this has been a great addition to our date life, since we are such boring people that need a little extra spark and spice and random to our date ideas. The great thing about this is you can make it match you and your significant other in any way you'd like. And you don't necessarily have to spend a lot, or even at all, just plan ahead. For reference on this little project, I spent about $30 at the dollar store (which I really probably could have spent MUCH less, I was just getting a little carried away!) And then I spent around $20 on random gift cards, and then had a little left over cash to disperse between other months. You don't have to spend this much, or you can spend more all depending on what sort of things you'd like to venture out and do with your man!

So anyway, there you have it! A lovely gift that goes a long way!! Oh and a little side note, I also made a date idea box (sorry, no picture, I will try to add one soon, if I remember :). I just got a recipe box and filled it (LITERALLY!) with date ideas on 3x5 cards. I wrote each idea small on the top of the card, so that when we do the dates, we can write about how it went, as like a journal sort of thing too. I googled, pintrest, and even facebook-ed to friends for cheap date ideas and filled up the box, I have probably over a 100 ideas in there, maybe one of these days I will just make a new post on just on that, and I can share the lovely list I put together in case you'd like to do this too. It has been fun and handy to have around so that when we get in the stump of what to do, we just pick a card, any card!

Okay, that's all I have for today! Thanks for stopping by and I hope you have a wonderful day!

Until next time!. . . ..

Tuesday, November 29, 2011

Birthday Blis!

My handsome hubby had his birthday for the year, so here are some goods I put together for him on this blessed occasion. Since my little girl's birthday is exactly a month apart from my hubby, and we were greatly honored to have the presence of his parents for the weekend too, we did a party for the both of them!
 Michael's parents brought his childhood Legos as an early treat so we can play with them now, and then Addie can join us when she isn't in the "put EVERYTHING in her mouth" stage. So with a little bit of a Lego theme, I made Lego shaped cakes! I know, I know they look horrible, and well...just WEIRD looking, but like they say, practice makes perfect, and I still need lots of practice in the cake realm! I heard that marsh mellows work really great for the top, but I didn't feel like running to the store at the time, so I just used some extra part of the cake, so they turned out super weird, I know. Then to accommodate my mother-in-law's health, and trying to not give my little girl too much sugar, too early in her life, I use the carrot cake recipe and sugar free cream cheese frosting recipe from THIS website. The only added "sweetener" was from applesauce and apple juice, and it turned out pretty yummy if I don't say so myself! :)
 Then my poor hubby had to work on his actual birthday, so I made him these fun little "time passer" cards. I made a card for every hour that he would be at work, and at that hour he could read another card, on the back I put cheesy birthday jokes or facts, or something I adore about him. It was a fun way to let him know I am still thinking about him on his special day, even if it had to be spent mostly at work.
 And of course I mustin forget the decorations! And we had to get a helium balloon for Addie, EVERY TIME we go to the store and she sees those floating up above she will laugh or smile or try and reach for them, so it was very fitting to get!
 Then for a fun, memory capturing present, I put together the hand picture. The easiest sentimental present I've ever made. I just got my little girls hand and put mine on top of our scanner, and pressed "copy" and wall-ah! Any easy picture that captured my little girl's hand, the hardest part was making sure she didn't move too much. I saw this brilliant idea in my pinetrest scanning one day and couldn't resist trying it out, and this was probably my husband's favorite gift by far!
 Then I got him some olive oil for giving blessings, he was getting low on his supply.
 The poor guy keeps trying to wear shorts to bed for pajamas, and it is FREEZING at night, so I got him some long PJ pants!
 Then also repaired his camel pack bag upon his request as a birthday gift,
 Along with repairing his messenger bag, he was excited to have them all ready for school soon!
 Then he got an atomic watch from his parents and. . .
 A fun little armor statue thing for the "Whole Armor of God" parable, also from his parents.
 Then my real work of birthday preparations was put to the test in making this little book, which I will share in more detail in my next post. This was sort of a joint present, a fun book that he can read to little Addie, and it is a "touchy feely" book, which she LOVES!

 Then for Addie's presents, we got her this fun bike/walking scooter thing, she loves being able to get around the house even more effectially than just wall and couch surfing!
 And of course I had to put all the presents in a big fun box, cuz boxes are always so fun to be in!
 Then Michael's parents got her this fun little doll house that makes sound effects for the door bell, telephone, bath tube, washing machine, and of course the toilet!
 Michael also got her this fun toy lion from work for free (yeah!), it makes fun sound effects too! Then I also made her a pillow pet, seen above, which I will also share details on in a near future post!

It was a great fun day, celebrating my two most favorite people in the whole world! I am so blessed to have such gems in my life!

Anyway, thanks for stopping by! Since I didn't post last week due to Thanksgiving busy-ness, I will post twice this week, lucky you! :)

Until next time!

Monday, October 31, 2011

Let's have a Ball!

I love the fall time. I am not sure the reasons for it, but there is just such a special feeling about it. Going off these fun special feelings, our family is starting a fun new tradition.
We were discussing it over on how fun it would be to have our own family annual ball. And what a better time to do it than the fall!

I think the idea of this whole Ball idea clicked for us based on our very first date together way back in high school (it was for a school dance...nonetheless in the fall!)
Then we had our own special dance at our wedding (almost in the fall...)
Then our first full year here at school we went to a Mascaraed Ball, and yes, it was in the Fall!!
Back when I was big and preggo!
With lots of fun decorations!...

So since we have a history with dancing in the fall, and now with a little kiddo (so its harder to get out), we thought it would be fun to make an official family tradition but at home! So here is this years First Jacob Fall Ball in action. . .
This year I actually made it as a surprise, or at least the decorations part, so I timed a decoration run while he was at work, for how long it would take me to put it all together, so for the real night I would know how long I would need while I had Michael run to the store and get something....then SURPRISE! (and it only took me like 7 minutes to whip it all together. . .not bad eh?)
Then here is the decorations of the actual night. ..
You can't have a Ball without a disco ball! I made this by making a paper mache balloon, let it dry, then I wrapped it/glued tin foil on, then I cut up old CDs and glued them on, Wall-ah! A lovely disco ball we can now use for other future balls too!
Then I spread our lovely dance floor with fake rose petals that I got for a $1 at the dollar store, and cut out with construction paper flowers and hearts


Then to have some more fun in reminiscing of our past, since we had a carriage at our wedding. . . .
I made a little carriage as part of the decorations and we also looked at the book Michael made to propose to me with inside our carriage. All I did for this was get large white poster board, cut them out like wheels, then I put our big exercising ball on our dinning table and threw a fitted sheet over the top to hold the ball in place and to give it a fun rounded sort of look. . . .
What do you think? I also thumb tacked sheets to the ceiling to give some fun draping looks (I know its a little cheesy, but that's why its at home for just our family :)
Then remember our little bench? I took off the leaves from my fall decorations and Velcroed hearts to it, then I also tapped stars to the leaves I hung.
Then also at the dollar store I found this lovely plastic glass set and little miniature Sparkling Cider (which worked great since I really don't like soda type stuff, this little thing was the perfect size!)
Then I displayed our lovely crowns, from our wedding, and we wore them later for fun!
I also made us little white sign things. . . . I can't think of what they are called, but you know, the things Miss America wears, well I made some for us too, just for fun! :)

It was "Royally" a fun night! This year Addie didn't join us for our Fall Ball cuz I think she is too little to enjoy and she was in bed, but come next year and on, this won't just be a fun date night, it will become a family event!

Anyway, so there you have it! Sorry for not posting this last week, it got a little busy trying to cram on finishing our costumes. .. which I finally finished! And will also share those with you this week too! Thanks for stopping by and I hope you have a wonderful day!

Wednesday, August 10, 2011

Pillows

For today's "We-flecting Wednesday" I want to share another little favorite of mine that very much falls into a similar category of favorites as curtains do, like my previous post. I really like pillows. I never really cared so much for them growing up, other than using the one for my head at night. But now that I am older and have my own place I love how they can really add to a room (mostly beds or couches). They can really make the difference in a plain room, or a comfortable, welcoming and inviting room, and I always love a comfy feeling, especially on a couch or bed.

Since decor pillows are well, super expensive in my book, I love to make them. So here are some fun pillows that I have made in the past, and they are still in current use. Some of these I have made more recently, while others we've had for a while.
 Remember this lovely bench that my hubby and I put together, back in THIS venture? Well I thought it would be fun to show off these pillows again, since I am on the subject. I love that the pillows can be switched around to different positions to add a little extra variety and change once in a while to the room
 Using the same pillows  seen up above, plus two more of the patched square ones, I like to add them to our couches at times to give them a little color and life, plus.. . . . .
 I like how using the pillows can give our living room a sense of unity and matchy matchy to our couches, even though they don't fully match. We also got two free pillows with the futon (which is the solid brown ones), so mixing them all together adds a nice little touch to the room. I just really like pillows!
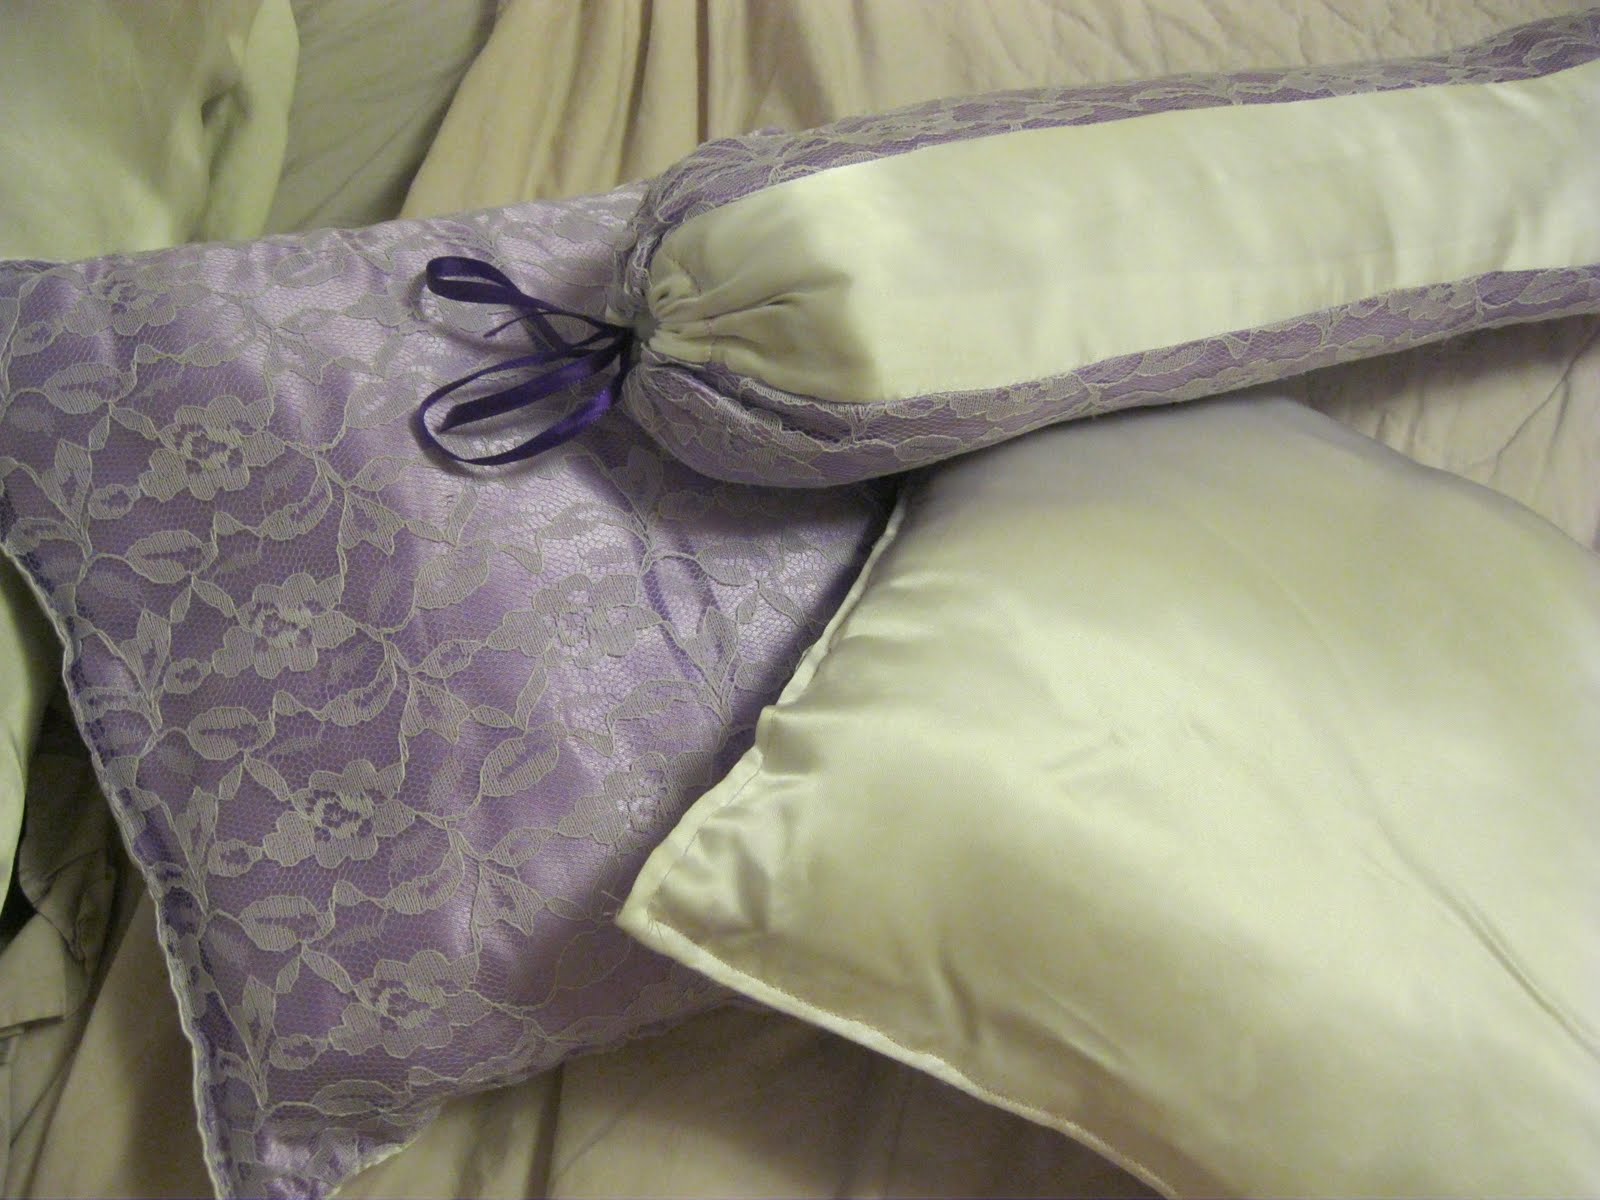
 Then in our bedroom I made these lovely purple ones and the body pillow case, a while ago, and they match the same curtains you saw in the previous post. They aren't super fancy, or super big, but just enough to satisfy my pillow crave and make the bed look that much more complete and nice :)
 Here is a little closer look at them. I really like the long tub like pillows, so easy to make and they also work as a great pillow to rest between my legs when my back is hurting at night, so this one is not just for fancy looks! Yeah for pillows!
Then on a final and less fancy pillow note, check out our own personal pillows! I got a two pack of pillows and decorated the "I love Michael" pillow, and added different things on it for why I love my hubby and then had it on his bed waiting for him that night to greet him with some nice thoughts. Then I also very obviously with a little of inconspicuousness, left the blank pillow case (that soon became my pillow case) along with the left over fabric paints in an area my hubby could see and make one for me so that we would have matchy matchy pillow cases. They are nice reminders why we like each other :) not that we necessarily need a reminder. If you don't have a significant other this could be a fun idea for a little kiddo or a good friend (in a non-creepy stocking sort of way).

So there we have it for this lovely Wednesday. Thanks for stopping by and I hope you have a super great day!

Until next time! . . . .

Wednesday, August 3, 2011

Plaster of Paris Party

OK, so maybe its not exactly a party, but I thought it would be fun to keep with the letter "P" in the title. But anyway, for today's "We-flecting" Wednesday I am gonna share a little sweetness with my experiments with plaster of Paris.

I have always heard of the stuff, but never really knew what it was for or exactly how to use it. But I had some guess that it was some kind of clay, molding sort of stuff. I bought my first box of it shortly after we were married about two years ago. My husband was working full time at the time and even though I was looking for work, I still had lots of free time of not knowing what to do. So I tried filling my time with new crafty experiments, and the plaster of Paris was a part of this experiment boredom stage.

The box I bought didn't really have any specific instructions on what to do with it, and we didn't have Internet at the time that I could just google stuff- so I just dived into experimenting.

I poured a bunch of the stuff in a bowl and added water. I tried making it into a shape, but it didn't really work that way (maybe you can mold it like this, but from my experimenting it is more of a "pouring" type molding not so much "shaping and forming it in your hands" type molding).

So long story short, I ended up getting this awkward ball, like I have pictured below. Since I didn't want it to go to waste- I painted it like the world and then I gave it to my hubby with a note next to it saying "You Mean the Whole World to Me!" Thus making my awkward sour experimenting gone sweet!

 What do you think?

Then after discovering a little more about how plaster of Paris works I decided to make another little treat for my hubby (the non edible one of course). I googled how to make play dough, and used THIS recipe, except I didn't use food coloring just in case to not dye my plaster of Paris (and just a little warning, this recipe uses ALOT of salt, it kinda threw me for a loop to see all that salt gone from our supply). I used the dough to make a mold and then I poured the plaster of Paris in. It worked much better this time, what do you think?

"I give you my heart so we may not be apart"- He has this at his desk at work- fun huh?
I stuck my hand in the play dough, and the play dough was in a topple ware dish. I had to pour the plaster of Paris in quickly after removing my hand because the dough I made was quick to returning to it normal form, so just a little heads up if you try this at home. And then the heart I made separate and then glued it on the hand. I used a heart shaped cookie cutter to get the heart shape and then I pressed down in the middle of it. Again I had to go quickly because the dough liked to form back up, it was very tedious, but worked well in the long run. When I thought of doing this, I wanted to make my hand shape open enough to put the above globe to fit inside it, but I didn't make my hand big enough- so I ended up making the heart instead, it still worked out, right?

Anyway, that's that folks for this lovely Wednesday, thanks for stopping by and I hope you have a great rest of your day!

Until next time. . . .

Wednesday, July 27, 2011

Mirror Frosting

In today's "We-flecting Wednesday" I thought I would share a little treat that relates to my wonderful Hubby and I (in a fun honoring of our 2 Year Anniversary this weekend). I made him this mirror as a gift back when we were still engaged.

Sorry if it is hard to see the image well, but it is some mountians with a storm on the side and leading to the top of the mountain is an LDS temple
In case you are curious, the inspiration I got for the design for this mirror is from the following little story. It was from a Devotional given at Brigham Young University-Idaho on Janurary 13, 2009 by President Kim B. Clark. In praying and deciding of whether or not I should marry Michael, this talk keep coming to mind and is what ultimately gave me the peace and assurance that I should marry him. So from this inspiration I made the mirror for Michael, and it is a nice reminder in our home that when times are tough, if we look to the right "mirror" things will always work out. Ok, so now to the part of the talk that I am refering to, so you won't be as confused to what I am talking about. The part of the talk that stuck out to me is this: (if you want to read the rest fo the talk, you can read it HERE)

"We may experience a thousand different things that rob our minds of peace. At their root, however, is a gap between what we want our lives to be and what we are afraid is going to happen. Consider, for example, the parable of the two mirrors:
 
The King of the land sent one of his sons and one of his daughters off on an important journey to establish peace in the land.
 
prince and princess
 
The brother and sister set off and followed the King's directions carefully. Then, unexpectedly, there arose a great storm. The wind blew, the rain was heavy, and swirling debris obscured the path. The son and daughter took refuge in a small hut. In the hut were two mirrors beckoning for their attention and focus. Each mirror showed them a vision of the future with them in the picture.
 
The first mirror was full of darkness and swirling fog. The son and daughter saw themselves in despair, lost, hungry and cold, unable to complete the journey. The mirror seemed to whisper, "Turn back; it's hopeless; give up."
 
looking into a mirror of a storm
 
The second mirror was bright and clear. They could see the storm, but they saw themselves making their way through it, completing their journey and establishing peace.
 
looking into mirror of peace
 
The second mirror seemed to whisper, "Carry on; walk in the light; the way is sure; you can do it." They chose the second mirror, left the hut with confidence, fought their way through the storm, and completed their journey.
 
You and I are often like the son and daughter. We keep the commandments and make progress in our journey of peace. But we encounter storms of life that bring uncertainty, anxiety, and stress.
 
stormy mirror of fear
  
When the storms come, the same two mirrors beckon for our attention. The first mirror is the mirror of fear; its perspective is the fallen world. When we look into the mirror of fear, we see a future that is dark and unhappy, full of failure, self-doubt, and even despair. The mirror of fear is the mirror of the adversary who whispers, "Things are going to be bad. It's not going to work. It's all your fault. You're not going to make it. Give up."
 
peaceful mirro of hope and faith
 
The second mirror is the mirror of hope and faith. It is the mirror of Christ; its perspective is eternal. In that mirror we see ourselves as beloved, valiant spirit children of Heavenly Father, here on earth to gain the experiences of mortality and to learn to be obedient and faithful. The Spirit whispers that the Savior, who has all power over all things, loves us and will help us through anything that happens. If we look into the mirror of Christ, trust in Him and in His timing, we will face our storms with hope and stop the cascade of fear.
 
This is what the Savior meant when He said,
These things I have spoken unto you, that in me ye might have peace. In the world ye shall have tribulation: but be of good cheer; I have overcome the world.16"
So there is the little story behind the mirror I made. I love this story, it is such a great reminder how important it is to have a good perspective with everything we experience in life.

Then if you are curious to how I made the mirror it's your lucky day, becasue I will tell you. I smiply bought the mirror I wanted to use. Then I put contact paper over the entire mirror. Then I traced out the design I wanted to be etched on and then using an exacto knife I cut the contact paper but left the opposite of my design on the mirror.
Then I used this lovely stuff. I used a paint brush and put it on over the mirror on the areas that were exposed still. I let it set for I think 3 mins (but is says on the instructions how long), and then washed it off giving the mirror the lovely look that it has. The longest part was etching the design into the contact paper. Oh and beware if you try this at home, this frosting mirror stuff stinks really bad- like a really bad case of rotton eggs, just a little warning.

So there you have it, this lovely Wednesday. I hope you have a wonderful rest of the day and don't forget to join the giveaway (I will be giving away 15 alligator clips), it will end tomorrow at Midnight and I will announce the winner for my "fun find" on Friday!
You can enter the giveaway HERE.

Thanks! And Until next time!. . . .

Pin It!