For today's "We-flecting Wednesday" I want to share another little favorite of mine that very much falls into a similar category of favorites as curtains do, like my previous post. I really like pillows. I never really cared so much for them growing up, other than using the one for my head at night. But now that I am older and have my own place I love how they can really add to a room (mostly beds or couches). They can really make the difference in a plain room, or a comfortable, welcoming and inviting room, and I always love a comfy feeling, especially on a couch or bed.
Since decor pillows are well, super expensive in my book, I love to make them. So here are some fun pillows that I have made in the past, and they are still in current use. Some of these I have made more recently, while others we've had for a while.
Remember this lovely bench that my hubby and I put together, back in THIS venture? Well I thought it would be fun to show off these pillows again, since I am on the subject. I love that the pillows can be switched around to different positions to add a little extra variety and change once in a while to the room
Using the same pillows seen up above, plus two more of the patched square ones, I like to add them to our couches at times to give them a little color and life, plus.. . . . .
I like how using the pillows can give our living room a sense of unity and matchy matchy to our couches, even though they don't fully match. We also got two free pillows with the futon (which is the solid brown ones), so mixing them all together adds a nice little touch to the room. I just really like pillows!
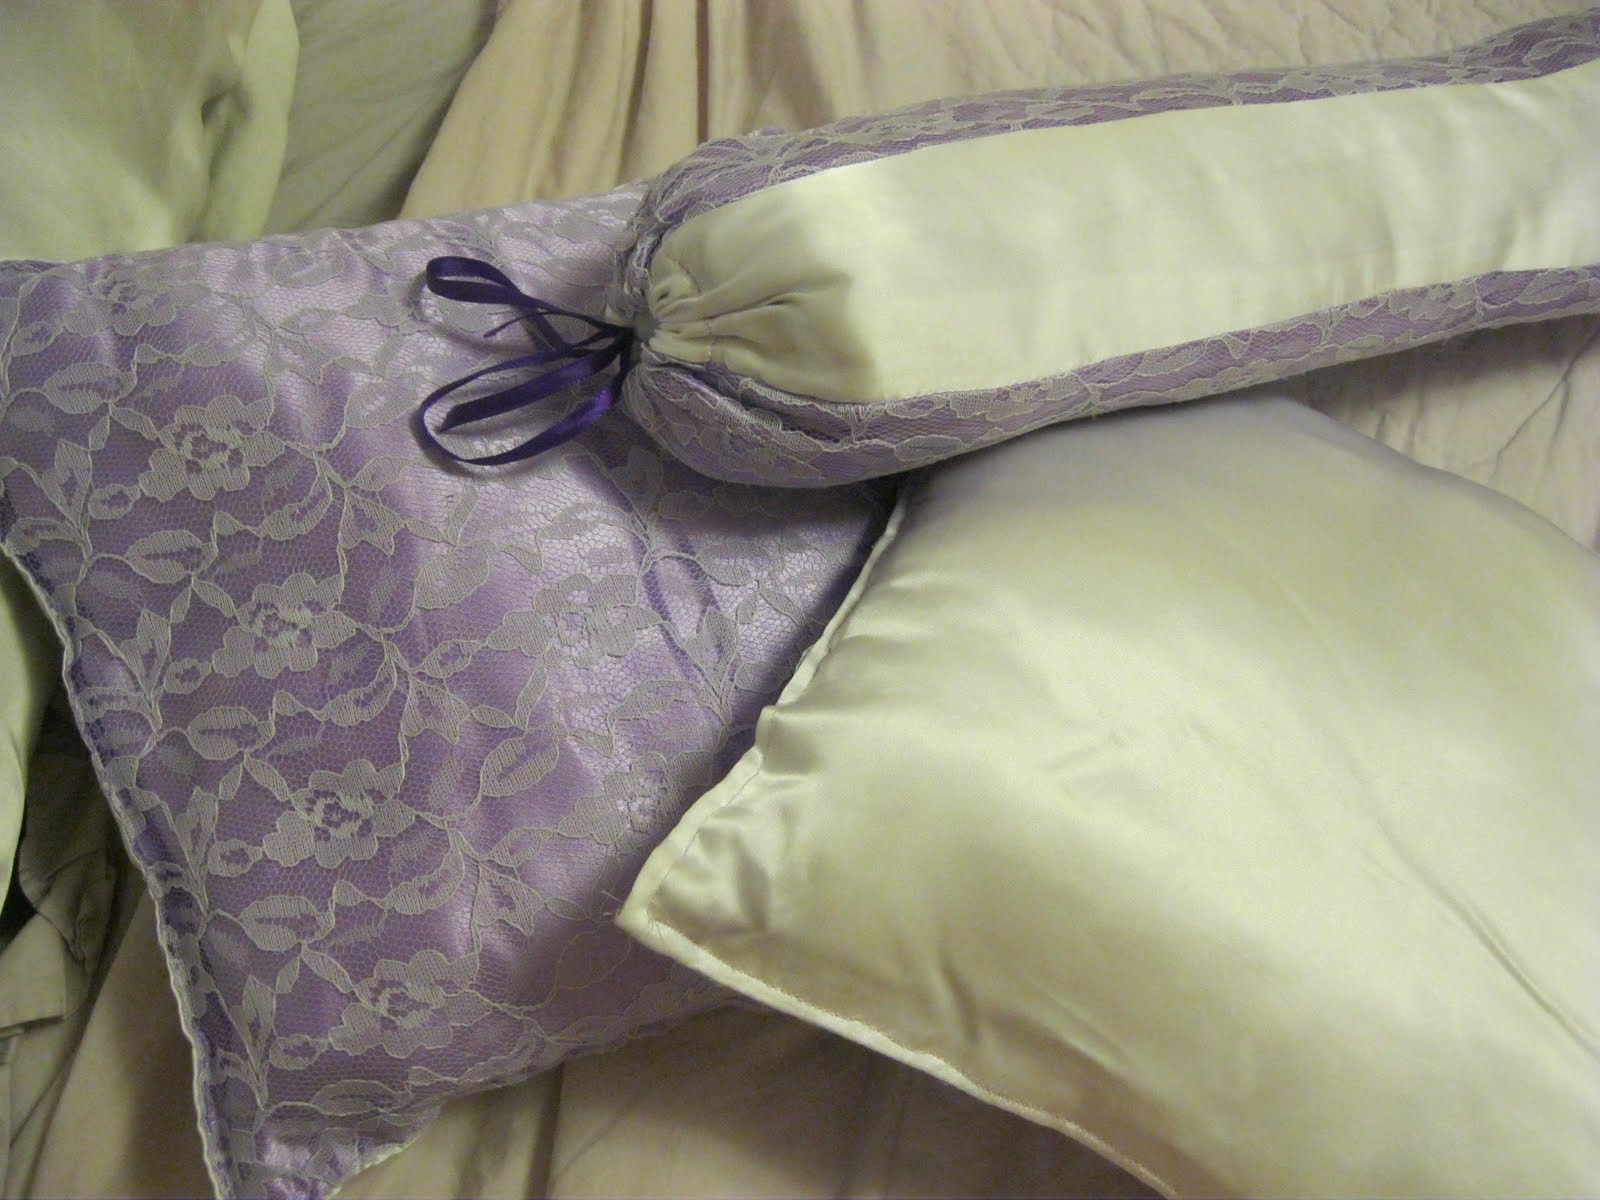
Then in our bedroom I made these lovely purple ones and the body pillow case, a while ago, and they match the same curtains you saw in the previous post. They aren't super fancy, or super big, but just enough to satisfy my pillow crave and make the bed look that much more complete and nice :)
Here is a little closer look at them. I really like the long tub like pillows, so easy to make and they also work as a great pillow to rest between my legs when my back is hurting at night, so this one is not just for fancy looks! Yeah for pillows!
Then on a final and less fancy pillow note, check out our own personal pillows! I got a two pack of pillows and decorated the "I love Michael" pillow, and added different things on it for why I love my hubby and then had it on his bed waiting for him that night to greet him with some nice thoughts. Then I also very obviously with a little of inconspicuousness, left the blank pillow case (that soon became my pillow case) along with the left over fabric paints in an area my hubby could see and make one for me so that we would have matchy matchy pillow cases. They are nice reminders why we like each other :) not that we necessarily need a reminder. If you don't have a significant other this could be a fun idea for a little kiddo or a good friend (in a non-creepy stocking sort of way).
So there we have it for this lovely Wednesday. Thanks for stopping by and I hope you have a super great day!
Until next time! . . . .
Showing posts with label We-Flecting Wednesday. Show all posts
Wednesday, August 10, 2011
Wednesday, August 3, 2011
Plaster of Paris Party
OK, so maybe its not exactly a party, but I thought it would be fun to keep with the letter "P" in the title. But anyway, for today's "We-flecting" Wednesday I am gonna share a little sweetness with my experiments with plaster of Paris.
I have always heard of the stuff, but never really knew what it was for or exactly how to use it. But I had some guess that it was some kind of clay, molding sort of stuff. I bought my first box of it shortly after we were married about two years ago. My husband was working full time at the time and even though I was looking for work, I still had lots of free time of not knowing what to do. So I tried filling my time with new crafty experiments, and the plaster of Paris was a part of this experiment boredom stage.
The box I bought didn't really have any specific instructions on what to do with it, and we didn't have Internet at the time that I could just google stuff- so I just dived into experimenting.
I poured a bunch of the stuff in a bowl and added water. I tried making it into a shape, but it didn't really work that way (maybe you can mold it like this, but from my experimenting it is more of a "pouring" type molding not so much "shaping and forming it in your hands" type molding).
So long story short, I ended up getting this awkward ball, like I have pictured below. Since I didn't want it to go to waste- I painted it like the world and then I gave it to my hubby with a note next to it saying "You Mean the Whole World to Me!" Thus making my awkward sour experimenting gone sweet!
What do you think?
Then after discovering a little more about how plaster of Paris works I decided to make another little treat for my hubby (the non edible one of course). I googled how to make play dough, and used THIS recipe, except I didn't use food coloring just in case to not dye my plaster of Paris (and just a little warning, this recipe uses ALOT of salt, it kinda threw me for a loop to see all that salt gone from our supply). I used the dough to make a mold and then I poured the plaster of Paris in. It worked much better this time, what do you think?
I stuck my hand in the play dough, and the play dough was in a topple ware dish. I had to pour the plaster of Paris in quickly after removing my hand because the dough I made was quick to returning to it normal form, so just a little heads up if you try this at home. And then the heart I made separate and then glued it on the hand. I used a heart shaped cookie cutter to get the heart shape and then I pressed down in the middle of it. Again I had to go quickly because the dough liked to form back up, it was very tedious, but worked well in the long run. When I thought of doing this, I wanted to make my hand shape open enough to put the above globe to fit inside it, but I didn't make my hand big enough- so I ended up making the heart instead, it still worked out, right?
Anyway, that's that folks for this lovely Wednesday, thanks for stopping by and I hope you have a great rest of your day!
Until next time. . . .
I have always heard of the stuff, but never really knew what it was for or exactly how to use it. But I had some guess that it was some kind of clay, molding sort of stuff. I bought my first box of it shortly after we were married about two years ago. My husband was working full time at the time and even though I was looking for work, I still had lots of free time of not knowing what to do. So I tried filling my time with new crafty experiments, and the plaster of Paris was a part of this experiment boredom stage.
The box I bought didn't really have any specific instructions on what to do with it, and we didn't have Internet at the time that I could just google stuff- so I just dived into experimenting.
I poured a bunch of the stuff in a bowl and added water. I tried making it into a shape, but it didn't really work that way (maybe you can mold it like this, but from my experimenting it is more of a "pouring" type molding not so much "shaping and forming it in your hands" type molding).
So long story short, I ended up getting this awkward ball, like I have pictured below. Since I didn't want it to go to waste- I painted it like the world and then I gave it to my hubby with a note next to it saying "You Mean the Whole World to Me!" Thus making my awkward sour experimenting gone sweet!
What do you think?
Then after discovering a little more about how plaster of Paris works I decided to make another little treat for my hubby (the non edible one of course). I googled how to make play dough, and used THIS recipe, except I didn't use food coloring just in case to not dye my plaster of Paris (and just a little warning, this recipe uses ALOT of salt, it kinda threw me for a loop to see all that salt gone from our supply). I used the dough to make a mold and then I poured the plaster of Paris in. It worked much better this time, what do you think?
![]() |
| "I give you my heart so we may not be apart"- He has this at his desk at work- fun huh? |
Anyway, that's that folks for this lovely Wednesday, thanks for stopping by and I hope you have a great rest of your day!
Until next time. . . .
Wednesday, July 27, 2011
Mirror Frosting
In today's "We-flecting Wednesday" I thought I would share a little treat that relates to my wonderful Hubby and I (in a fun honoring of our 2 Year Anniversary this weekend). I made him this mirror as a gift back when we were still engaged.
| Sorry if it is hard to see the image well, but it is some mountians with a storm on the side and leading to the top of the mountain is an LDS temple |
In case you are curious, the inspiration I got for the design for this mirror is from the following little story. It was from a Devotional given at Brigham Young University-Idaho on Janurary 13, 2009 by President Kim B. Clark. In praying and deciding of whether or not I should marry Michael, this talk keep coming to mind and is what ultimately gave me the peace and assurance that I should marry him. So from this inspiration I made the mirror for Michael, and it is a nice reminder in our home that when times are tough, if we look to the right "mirror" things will always work out. Ok, so now to the part of the talk that I am refering to, so you won't be as confused to what I am talking about. The part of the talk that stuck out to me is this: (if you want to read the rest fo the talk, you can read it HERE)
"We may experience a thousand different things that rob our minds of peace. At their root, however, is a gap between what we want our lives to be and what we are afraid is going to happen. Consider, for example, the parable of the two mirrors:
The King of the land sent one of his sons and one of his daughters off on an important journey to establish peace in the land.
The brother and sister set off and followed the King's directions carefully. Then, unexpectedly, there arose a great storm. The wind blew, the rain was heavy, and swirling debris obscured the path. The son and daughter took refuge in a small hut. In the hut were two mirrors beckoning for their attention and focus. Each mirror showed them a vision of the future with them in the picture.
The first mirror was full of darkness and swirling fog. The son and daughter saw themselves in despair, lost, hungry and cold, unable to complete the journey. The mirror seemed to whisper, "Turn back; it's hopeless; give up."
The second mirror was bright and clear. They could see the storm, but they saw themselves making their way through it, completing their journey and establishing peace.
The second mirror seemed to whisper, "Carry on; walk in the light; the way is sure; you can do it." They chose the second mirror, left the hut with confidence, fought their way through the storm, and completed their journey.
You and I are often like the son and daughter. We keep the commandments and make progress in our journey of peace. But we encounter storms of life that bring uncertainty, anxiety, and stress.
When the storms come, the same two mirrors beckon for our attention. The first mirror is the mirror of fear; its perspective is the fallen world. When we look into the mirror of fear, we see a future that is dark and unhappy, full of failure, self-doubt, and even despair. The mirror of fear is the mirror of the adversary who whispers, "Things are going to be bad. It's not going to work. It's all your fault. You're not going to make it. Give up."
The second mirror is the mirror of hope and faith. It is the mirror of Christ; its perspective is eternal. In that mirror we see ourselves as beloved, valiant spirit children of Heavenly Father, here on earth to gain the experiences of mortality and to learn to be obedient and faithful. The Spirit whispers that the Savior, who has all power over all things, loves us and will help us through anything that happens. If we look into the mirror of Christ, trust in Him and in His timing, we will face our storms with hope and stop the cascade of fear.
This is what the Savior meant when He said,
So there is the little story behind the mirror I made. I love this story, it is such a great reminder how important it is to have a good perspective with everything we experience in life.These things I have spoken unto you, that in me ye might have peace. In the world ye shall have tribulation: but be of good cheer; I have overcome the world.16"
Then if you are curious to how I made the mirror it's your lucky day, becasue I will tell you. I smiply bought the mirror I wanted to use. Then I put contact paper over the entire mirror. Then I traced out the design I wanted to be etched on and then using an exacto knife I cut the contact paper but left the opposite of my design on the mirror.
Then I used this lovely stuff. I used a paint brush and put it on over the mirror on the areas that were exposed still. I let it set for I think 3 mins (but is says on the instructions how long), and then washed it off giving the mirror the lovely look that it has. The longest part was etching the design into the contact paper. Oh and beware if you try this at home, this frosting mirror stuff stinks really bad- like a really bad case of rotton eggs, just a little warning.
So there you have it, this lovely Wednesday. I hope you have a wonderful rest of the day and don't forget to join the giveaway (I will be giving away 15 alligator clips), it will end tomorrow at Midnight and I will announce the winner for my "fun find" on Friday!
You can enter the giveaway HERE.
Thanks! And Until next time!. . . .
Wednesday, June 29, 2011
Red, White and Blue!
Yep that's right! The fourth of July, the celebration of our country's independence- the big bang fire work day is just around the corner! So for this "We-flecting" Wednesday I thought I would share in a little fun with some white and some blue, and then a little more recent venture that I am actually currently working on for the up coming big day!
I made this skirt and tie for our wedding. We wore our little matching polka dot attire for while we were at our luncheon so we wouldn't spill food or anything of the likes on our lovely wedding dress and tux. But It has the fun patriotic colors in it that could be great fun to wear for the big day (although we wont this year).
This skirt is pretty simple to make, I simply cut out 6 panels, they start out smaller at top and get larger on the bottom and I basically just cut out enough to fit around my hips. I honestly can't remember how much material it took me to make this, and if you can't tell I had to tweak it a little anyway cuz I didn't have enough of one so I used two variations of polka dots and staggered it. I would recommend doing a zipper on the side, but I was lazy and didn't on this one, so it is a little snug and tricky to slide into over my big rump. If you want more details on how to make a skirt like this let me know and I would be glad to help and sorry for not showing it off more stylishly- if you haven't noticed I have been a lazy photographer lately- sorry! :)
Here is my husband's lovely tie (and my toes, but don't mind them), I made him to match me. I made it the same sort of way as I made the tie for my lovely husband for his father's day present which you could read about HERE. I love to be matchy matchy, especially for special occasions- it makes me feel all giddy and happy inside.
So there is this lovely polka dot funness- and because of their blue and white nature I suppose they could always be back up matchy matchy for future patriotic holidays and then all we would have to do is throw in some red to our attire and we are set!
But since I am trying to get a little ahead on my game for our matchy matchy this year, this is what I got going up my sleeve and you are more than welcome to copy if you want to as well.
I got my little girl a regular white onesie, I am using one of my husband's old regular white t-shirts, and then I am making a little white tank top shirt to wear over another shirt, and on all of them I am gonna to paint matchy matchy "I love USA" on it. So far I have finished my little girl's and this is how it turned out.
I use this picture (I got it HERE from a google search):
I wanted to spice it up a little, so I made the heart a flag instead of just a regular red heart, now to wait for it to dry...
And wall-ah! Here is my little girl's shirt. I am still debating how ambitious I feel, but I might make her a cute jean and red and white polka dot skirt to go with it, or I just might be lazy and use her regular jean skirt that she already has, either way I will put up pictures of our all fun matchy matchy next week after the festivities (probably on Tues though, cuz Monday I am gonna play with my family and friends ALL day!)
On other patriotic festive thoughts, I am also debating on a fun red, white, and blue sort of treat I want to make, here is what I am down to in my decission process:
Doesn't this just look so yummy? And I love the fruit idea on top, maybe we'll make this, but still not sure.
We made this cake about a year ago, it is a Jello Cake (idea also from the same Lindsey), it is so yummy (that is if you are the kind of person that really likes super moist kind of cakes), all you do is bake the cakes like normal, when it is done, preferably more cooled off, stab it with a bunch of holes with a tooth pick, then on the side make up your jello and pour it into the holes soaking up the entire cake. Then put it in the fridge and let is set up inside the cake. It is simply a most marvelous flavor- also another delema if we should make this cake again (but decorate it more festive like though).
Or these jello cups look fun and festive too (although I probably wont go to all the extra work to make them look this fancy).
Or we might cancel these all together and make some peach cobbler (even though its not red, white and blue) with homemade ice cream (we are getting 25 lbs of peaches this Saturday, so it would be a great way to use some of them up!)
Either way I hope it gives you some ideas for this lovely holiday coming up if you are in need of ideas, and I will be wracking my brain (or more like my cravings) and see what we come up with. And I will most likely share some pictures of all the happenings.
Anyway, that's all for today on this We-flecting Wednesday. I hope you have fun preparing for the fun holiday coming up, and I would love to hear about all your plans or even fun traditions you do- this is such a great fun time of the year!
Thanks for stopping by and until next time!. . . . .
I made this skirt and tie for our wedding. We wore our little matching polka dot attire for while we were at our luncheon so we wouldn't spill food or anything of the likes on our lovely wedding dress and tux. But It has the fun patriotic colors in it that could be great fun to wear for the big day (although we wont this year).
This skirt is pretty simple to make, I simply cut out 6 panels, they start out smaller at top and get larger on the bottom and I basically just cut out enough to fit around my hips. I honestly can't remember how much material it took me to make this, and if you can't tell I had to tweak it a little anyway cuz I didn't have enough of one so I used two variations of polka dots and staggered it. I would recommend doing a zipper on the side, but I was lazy and didn't on this one, so it is a little snug and tricky to slide into over my big rump. If you want more details on how to make a skirt like this let me know and I would be glad to help and sorry for not showing it off more stylishly- if you haven't noticed I have been a lazy photographer lately- sorry! :)
Here is my husband's lovely tie (and my toes, but don't mind them), I made him to match me. I made it the same sort of way as I made the tie for my lovely husband for his father's day present which you could read about HERE. I love to be matchy matchy, especially for special occasions- it makes me feel all giddy and happy inside.
So there is this lovely polka dot funness- and because of their blue and white nature I suppose they could always be back up matchy matchy for future patriotic holidays and then all we would have to do is throw in some red to our attire and we are set!
But since I am trying to get a little ahead on my game for our matchy matchy this year, this is what I got going up my sleeve and you are more than welcome to copy if you want to as well.
I got my little girl a regular white onesie, I am using one of my husband's old regular white t-shirts, and then I am making a little white tank top shirt to wear over another shirt, and on all of them I am gonna to paint matchy matchy "I love USA" on it. So far I have finished my little girl's and this is how it turned out.
I use this picture (I got it HERE from a google search):
as my basic format. I opened it in a word document and sized it to the dimensions I wanted them to be on our shirts. I sized it to a good 5x4.5inches and it turned out quit nicely. Then I printed it. Then I tapped the lovely freezer paper over the top of it and etched out the design as kinda seen below.
From the brilliant idea of a good friend Lindsey, I etched out the design with the waxier side down, so that when I was ready to paint, all I had to do was iron it on to ensure a nice bleed free paint jobI wanted to spice it up a little, so I made the heart a flag instead of just a regular red heart, now to wait for it to dry...
And wall-ah! Here is my little girl's shirt. I am still debating how ambitious I feel, but I might make her a cute jean and red and white polka dot skirt to go with it, or I just might be lazy and use her regular jean skirt that she already has, either way I will put up pictures of our all fun matchy matchy next week after the festivities (probably on Tues though, cuz Monday I am gonna play with my family and friends ALL day!)
On other patriotic festive thoughts, I am also debating on a fun red, white, and blue sort of treat I want to make, here is what I am down to in my decission process:
Doesn't this just look so yummy? And I love the fruit idea on top, maybe we'll make this, but still not sure.
We made this cake about a year ago, it is a Jello Cake (idea also from the same Lindsey), it is so yummy (that is if you are the kind of person that really likes super moist kind of cakes), all you do is bake the cakes like normal, when it is done, preferably more cooled off, stab it with a bunch of holes with a tooth pick, then on the side make up your jello and pour it into the holes soaking up the entire cake. Then put it in the fridge and let is set up inside the cake. It is simply a most marvelous flavor- also another delema if we should make this cake again (but decorate it more festive like though).
Or these jello cups look fun and festive too (although I probably wont go to all the extra work to make them look this fancy).
Or we might cancel these all together and make some peach cobbler (even though its not red, white and blue) with homemade ice cream (we are getting 25 lbs of peaches this Saturday, so it would be a great way to use some of them up!)
Either way I hope it gives you some ideas for this lovely holiday coming up if you are in need of ideas, and I will be wracking my brain (or more like my cravings) and see what we come up with. And I will most likely share some pictures of all the happenings.
Anyway, that's all for today on this We-flecting Wednesday. I hope you have fun preparing for the fun holiday coming up, and I would love to hear about all your plans or even fun traditions you do- this is such a great fun time of the year!
Thanks for stopping by and until next time!. . . . .
Wednesday, June 22, 2011
Books Part IV
On this "we-flecting" Wednesday, I thought I would share some books that I made in the past little while.
The first book we made when we were engaged. I had to make a children's book for a class, so we put this together and made it in a way that we could share it with our children. The second book I made for Michael for Father's day last year while I was still pregnant with our little girl. I hope you can read them, and I hope you enjoy!
Sorry if you couldn't really read them because of my lacking picture taking skills. But hope you enjoyed. The second book I also made with poster board and cut it down to smaller book size and then both of them I covered with contact paper to give a more durable seal to last through our little kiddos. Anyway, hope you enjoyed and until next time!
Oh and P.s. my sister sent me some adorable pics of things that she made for her hubby for fathers day, I will try to put them up tomorrow, if not then maybe Friday. If you have any fun father day stuff you put together, I would love to see how it went for the man on his big day, and it would be fun to share here how it all went too! Anyway, until next time! Thanks for coming by!
Wednesday, May 18, 2011
Feet Clapper
Today's "We-Flecting Wednesday" feature is actually something my little brother made, and then I thought I would finish up on the art work from last week since there was a lot.
My little brother, what a great kid. He is graduating from high school next week, how did this come up so quickly? What an awesome guy, it will be a pleasure and an honor to see the kinds of things this kid will do with his life- I know he'll do great things!
Well in a somewhat honor of him graduating I thought I would share a little fun of something he made a few years back and I will honor him with it at his graduation- the feet clapper- by "clapping" my congrats to him throughout the night when they call his name and such (we gotta be the loudest, most annoying group in the crowd to make sure he knows he is loved by his crazy family!).
And to top of the whole collection, this was a flower I painted. It was a fun way of doing it. We had to water color paint on the table and then "stamp" the paper onto it to capture the picture, this is how it turned out!
My little brother, what a great kid. He is graduating from high school next week, how did this come up so quickly? What an awesome guy, it will be a pleasure and an honor to see the kinds of things this kid will do with his life- I know he'll do great things!
Well in a somewhat honor of him graduating I thought I would share a little fun of something he made a few years back and I will honor him with it at his graduation- the feet clapper- by "clapping" my congrats to him throughout the night when they call his name and such (we gotta be the loudest, most annoying group in the crowd to make sure he knows he is loved by his crazy family!).
![]() |
| Don't you just love the hair toes? |
I snatched this great prize at a family white elephant gift exchange many years ago. I know it might have been kinda cheating because I already grabbed it knowing what it was (because I saw him make it earlier on in the day), but I thought it was fun and cool, I wanted it, and I got it!
All he did was trace his feet onto some wood (really thin wood, I can't remember the name of it, I know it's not ply wood, but something like that). Then he cut it out with I believe a Jig saw (sorry if you don't have one, he used my sisters, maybe a local hardware would let you cut stuff out? Or maybe it could be done with a thick cardboard of some kind). Then he painted it, drilled the two holes to tie the strings through, and now when you hold the handle and shack it, it makes a "clapping" sound! Yeah for clapping feet! And congrats to my little bro- we are so proud of you!!
Now to finish of the post by sharing the rest of the art work. This last little bit is kinda one project. We were given a blank packet with 26 squares in it and we were supposed to draw different designs or pictures for each letter of the alphabet, here is what I came up with, hope you enjoy!
![]() |
| A: "Ark" |
![]() |
| B: "Batters up!" |
![]() |
| C: "Chillies" |
![]() |
| D: "Dork" |
![]() |
| E: "Elf" |
![]() |
| F: "Fat" |
![]() |
| G: "Goose" |
![]() |
| H: "Hat on His Head" |
![]() |
| "I: Ill" |
![]() |
| J: "Jump roping Jack" |
![]() |
| K: "Karate Boy, hehehe" |
![]() |
| L: "Lazy" |
![]() |
| M: "I've lost my Marbles!" (ya, I am not the best speller) |
![]() |
| N: "Nuts!" |
![]() |
| O: "The Odd Octopus!" |
![]() |
| P: "Peace Dude!" |
![]() |
| Q: " Quarter back" (like my proportions?) |
![]() |
| R: "Rino" |
![]() |
| S: "Superman!" |
![]() |
| T: "Teeth" (lovely yellowish ones at that!) |
![]() |
| U: "Universe" |
![]() |
| V: "Vampire! SSS, I eat you!" |
![]() |
| W: "Windex" |
![]() |
| X: "X-Men" (Wolverine here to be exact :) |
![]() |
| Y: "Yo- yo Man!" ( I just couldn't settle for the normal old yo-yo) |
![]() |
| And lastly, Z: "Zipper!" |
Thanks again for stopping by! See you all on Friday for my fun finds!!
Until next time!....
Subscribe to:
Posts (Atom)