I have been meaning to post this, but I just have had some many other goods I wanted to share I let myself get carried away, and now it is almost a month past Easter. Oh well, at least this little sewing project doesn't have to be something you can only make for Easter.
So remember my cute little girl in her cute little Easter Dress? Well I made a skirt to match. I love this pattern/style of a skirt, it is so easy to make. Maybe I am getting a little carried away with this statement, but I think just about anyone could make it and you wouldn't need a pre-made pattern.
Okay, so I kind of used this older skirt as a pattern (remember when I shared more on it HERE). But Even though you might not have a skirt like this to start with, I think any skirt would do.
The idea of this skirt is to make panels, or sections and them sew them together until you get a complete circle. So if you have a skirt that has a good length you'd want, use that as your guide, then fold it about four times, and in a triangle sort of shape (not exactly triangular, but at least make it so it is skinnier at top and a little bigger on bottom to give yourself a more flared look). The idea of using another skirt as your guide is to make sure you cut it the right length, if you think you can figure it out without the guide then you are all set.
After cutting out the first panel, I cut out 5 more, and used the first cut as my guide for the rest, to make sure they were all the same size. If you do use one of your skirts, make sure to cut a little more extra on bottom to allow for seams.
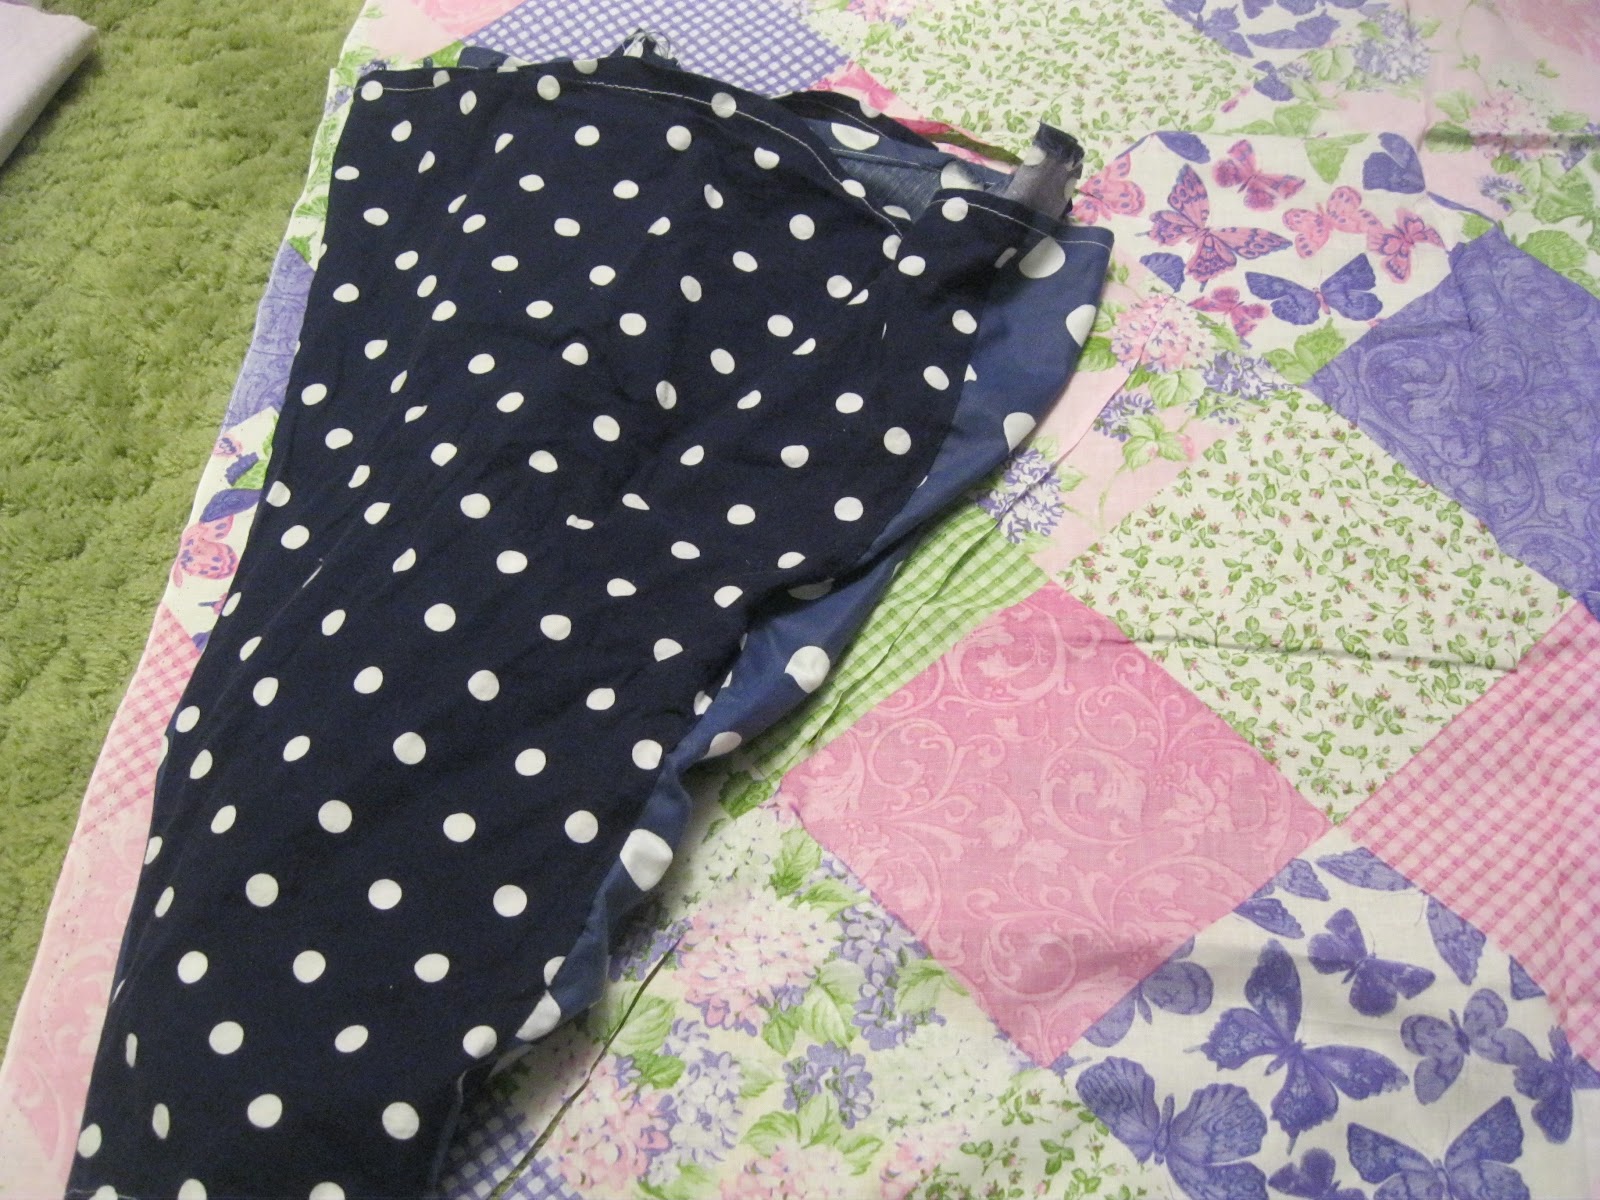
Sorry for the bunching on the side, my little girl was trying to "help" me. But here I have all the panels sewed together, making sure you sew right sides together. Then to complete the circle, you take one edge, line it up with the opposite edge, still have right sides together, so that the outside of the skirt will be inside of the circle. (I hope that makes sense) Then sew the last side making a complete circle, or your skirt complete.
Then a little trick I noticed on pintrest, you can use the bottom of an old shirt as the top brim for a skirt. Which I think is a brilliant idea, because I HATE sewing in zippers. So here I cut the amount I wanted for the band.
Made sure it fit well around my waist.
Then pinned it to the top of the skirt, having right sides together. Then sewed it on.
Then I had a little extra tulle from my girl's dress, so I add a little fluff on the bottom, but I don't normally add stuff to this kind of skirt, so if you make this, it's all in your own desires which way to go :)
And wall-ah! The finished skirt, complete to match my little girl.
And now me already ready and wearing it. I was going to get a full on picture with me and my little girl together, but the day was just crazy and my husband was busy with church responsibilities, so it just never came together. But it was fun having a little matching buddy for the wonderful Easter Sunday.
Well that's all for now. I hope you have a wonderful day! And again sorry if I didn't explain this process better, let me know if you have questions!
Until next time!
Showing posts with label Skirt. Show all posts
Tuesday, May 1, 2012
Friday, November 4, 2011
Yaba Daba Do! (Flinstone Costumes)
Now that Halloween has come and gone I thought I would share with you how it all worked out in putting the lovely costumes together. For starters, here is how our wigs turned out. . . and remember this is my first time trying to make a wig, so please keep kind thoughts, cuz I know they didn't turn out super great :)
First I made these lovely hats, if I were to do a wig again, I would make them a little bigger, and I would have made them into a color that matched the wig's hair better, then. . . .I wrapped yarn around a pillow several times, tied them off on one end and then cut, to give a nice chunk of "hair". . .then. . .
I tied them on the hat, repeating several times over, the first top layers I made much longer. . .
Then when the top and back area was done, I made smaller layers by wrapping around my hand, like below, and put it in the front bangs area and then on layers underneath
Wrapping away!
Here are some layers underneath. . .see why it would have been a much better idea if I had made the original hat in black? It would have been much less to hide!
The finished product! I did have to trim a little after he had it on, but I still can't get over how he looks more like a Jamaican Fred with the "Dread" like hair.. . .oh well. . .at least. . .
He is super cute! I am so glad I got him, even if he can be a little nerd :)
Then my wig was a little more, well ALOT more tricky because Wilma has her hair in a pony tail. So I tied all my hair chunks on the bottom so I could then pull them back into a pony tail and then made sort ones for bangs as well . . .
Like so, and I cannot even count on both my hands how complicated this was to pull the pony tail back. I know it is deceiving, like it would be just as simple to pull back your own attached hair, but it turned to be much more complicated, I am not sure how to explain, but just take my word for it, if you try this at home, just be prepared for a little more of a challenge (unless I just have issues! :)
Our finished products! I made my outfit of some random white material I had around the house, made a top part and then made the bottom by making panels and sewed them all together. I also made myself some tan colored sleeves so it will still be modest and also so I wouldn't freeze! Again, best part, BY FAR, in making these costumes was I didn't have to hem the bottoms, have I mentioned how I really don't like to hem?
She wasn't so happy at first, but at least she's so cute, right?! This was right before going to my husband's work where we went trick or treating, it was right after her nap but before her snack time, can you tell? :)
This was after it all, she was much happier and was so excited to see Daddy at work for a few minutes!
Remember these cute little matching slippers I made!? Well silly me made them a little TOO early in the month cuz they wouldn't fit on her feet right before going. I guess the elastic I put in the ankle area was just a little too tight, oh well, at least we just went to his work, indoors, instead of outside all night!
So there you have it! We hope you had a Happy Halloween! We sure had a great time! :)
Until next week!
Friday, September 30, 2011
Shirt Skirt
Several months ago my friend Kilie shared with me this shirt skit idea from "Aqua Seventy Six" and I have been meaning to try it out ever since, but have now finally gotten around to it. So here it is. I made a skirt from one of my hubby's old dress shirts, here is how I did it. . . .
And of course I had to thrown in a picture of me wearing it (sorry for the poor picture mirror quality, I was alone at the time I finished and couldn't figure a better way to get a shot :)
So there you have it! I am excited to try it out for church (since that's the only time I will indulge myself into wearing skirts). What do you think!?
Thanks for stopping by! I hope you have a wonderful evening and don't forget to join me next week, I have been working on fall decorations and our Halloween costumes, so whichever one I finish first I will share with you next week! :)
Until next time!. .. . .
Wednesday, June 29, 2011
Red, White and Blue!
Yep that's right! The fourth of July, the celebration of our country's independence- the big bang fire work day is just around the corner! So for this "We-flecting" Wednesday I thought I would share in a little fun with some white and some blue, and then a little more recent venture that I am actually currently working on for the up coming big day!
I made this skirt and tie for our wedding. We wore our little matching polka dot attire for while we were at our luncheon so we wouldn't spill food or anything of the likes on our lovely wedding dress and tux. But It has the fun patriotic colors in it that could be great fun to wear for the big day (although we wont this year).
This skirt is pretty simple to make, I simply cut out 6 panels, they start out smaller at top and get larger on the bottom and I basically just cut out enough to fit around my hips. I honestly can't remember how much material it took me to make this, and if you can't tell I had to tweak it a little anyway cuz I didn't have enough of one so I used two variations of polka dots and staggered it. I would recommend doing a zipper on the side, but I was lazy and didn't on this one, so it is a little snug and tricky to slide into over my big rump. If you want more details on how to make a skirt like this let me know and I would be glad to help and sorry for not showing it off more stylishly- if you haven't noticed I have been a lazy photographer lately- sorry! :)
Here is my husband's lovely tie (and my toes, but don't mind them), I made him to match me. I made it the same sort of way as I made the tie for my lovely husband for his father's day present which you could read about HERE. I love to be matchy matchy, especially for special occasions- it makes me feel all giddy and happy inside.
So there is this lovely polka dot funness- and because of their blue and white nature I suppose they could always be back up matchy matchy for future patriotic holidays and then all we would have to do is throw in some red to our attire and we are set!
But since I am trying to get a little ahead on my game for our matchy matchy this year, this is what I got going up my sleeve and you are more than welcome to copy if you want to as well.
I got my little girl a regular white onesie, I am using one of my husband's old regular white t-shirts, and then I am making a little white tank top shirt to wear over another shirt, and on all of them I am gonna to paint matchy matchy "I love USA" on it. So far I have finished my little girl's and this is how it turned out.
I use this picture (I got it HERE from a google search):
I wanted to spice it up a little, so I made the heart a flag instead of just a regular red heart, now to wait for it to dry...
And wall-ah! Here is my little girl's shirt. I am still debating how ambitious I feel, but I might make her a cute jean and red and white polka dot skirt to go with it, or I just might be lazy and use her regular jean skirt that she already has, either way I will put up pictures of our all fun matchy matchy next week after the festivities (probably on Tues though, cuz Monday I am gonna play with my family and friends ALL day!)
On other patriotic festive thoughts, I am also debating on a fun red, white, and blue sort of treat I want to make, here is what I am down to in my decission process:
Doesn't this just look so yummy? And I love the fruit idea on top, maybe we'll make this, but still not sure.
We made this cake about a year ago, it is a Jello Cake (idea also from the same Lindsey), it is so yummy (that is if you are the kind of person that really likes super moist kind of cakes), all you do is bake the cakes like normal, when it is done, preferably more cooled off, stab it with a bunch of holes with a tooth pick, then on the side make up your jello and pour it into the holes soaking up the entire cake. Then put it in the fridge and let is set up inside the cake. It is simply a most marvelous flavor- also another delema if we should make this cake again (but decorate it more festive like though).
Or these jello cups look fun and festive too (although I probably wont go to all the extra work to make them look this fancy).
Or we might cancel these all together and make some peach cobbler (even though its not red, white and blue) with homemade ice cream (we are getting 25 lbs of peaches this Saturday, so it would be a great way to use some of them up!)
Either way I hope it gives you some ideas for this lovely holiday coming up if you are in need of ideas, and I will be wracking my brain (or more like my cravings) and see what we come up with. And I will most likely share some pictures of all the happenings.
Anyway, that's all for today on this We-flecting Wednesday. I hope you have fun preparing for the fun holiday coming up, and I would love to hear about all your plans or even fun traditions you do- this is such a great fun time of the year!
Thanks for stopping by and until next time!. . . . .
I made this skirt and tie for our wedding. We wore our little matching polka dot attire for while we were at our luncheon so we wouldn't spill food or anything of the likes on our lovely wedding dress and tux. But It has the fun patriotic colors in it that could be great fun to wear for the big day (although we wont this year).
This skirt is pretty simple to make, I simply cut out 6 panels, they start out smaller at top and get larger on the bottom and I basically just cut out enough to fit around my hips. I honestly can't remember how much material it took me to make this, and if you can't tell I had to tweak it a little anyway cuz I didn't have enough of one so I used two variations of polka dots and staggered it. I would recommend doing a zipper on the side, but I was lazy and didn't on this one, so it is a little snug and tricky to slide into over my big rump. If you want more details on how to make a skirt like this let me know and I would be glad to help and sorry for not showing it off more stylishly- if you haven't noticed I have been a lazy photographer lately- sorry! :)
Here is my husband's lovely tie (and my toes, but don't mind them), I made him to match me. I made it the same sort of way as I made the tie for my lovely husband for his father's day present which you could read about HERE. I love to be matchy matchy, especially for special occasions- it makes me feel all giddy and happy inside.
So there is this lovely polka dot funness- and because of their blue and white nature I suppose they could always be back up matchy matchy for future patriotic holidays and then all we would have to do is throw in some red to our attire and we are set!
But since I am trying to get a little ahead on my game for our matchy matchy this year, this is what I got going up my sleeve and you are more than welcome to copy if you want to as well.
I got my little girl a regular white onesie, I am using one of my husband's old regular white t-shirts, and then I am making a little white tank top shirt to wear over another shirt, and on all of them I am gonna to paint matchy matchy "I love USA" on it. So far I have finished my little girl's and this is how it turned out.
I use this picture (I got it HERE from a google search):
as my basic format. I opened it in a word document and sized it to the dimensions I wanted them to be on our shirts. I sized it to a good 5x4.5inches and it turned out quit nicely. Then I printed it. Then I tapped the lovely freezer paper over the top of it and etched out the design as kinda seen below.
From the brilliant idea of a good friend Lindsey, I etched out the design with the waxier side down, so that when I was ready to paint, all I had to do was iron it on to ensure a nice bleed free paint jobI wanted to spice it up a little, so I made the heart a flag instead of just a regular red heart, now to wait for it to dry...
And wall-ah! Here is my little girl's shirt. I am still debating how ambitious I feel, but I might make her a cute jean and red and white polka dot skirt to go with it, or I just might be lazy and use her regular jean skirt that she already has, either way I will put up pictures of our all fun matchy matchy next week after the festivities (probably on Tues though, cuz Monday I am gonna play with my family and friends ALL day!)
On other patriotic festive thoughts, I am also debating on a fun red, white, and blue sort of treat I want to make, here is what I am down to in my decission process:
Doesn't this just look so yummy? And I love the fruit idea on top, maybe we'll make this, but still not sure.
We made this cake about a year ago, it is a Jello Cake (idea also from the same Lindsey), it is so yummy (that is if you are the kind of person that really likes super moist kind of cakes), all you do is bake the cakes like normal, when it is done, preferably more cooled off, stab it with a bunch of holes with a tooth pick, then on the side make up your jello and pour it into the holes soaking up the entire cake. Then put it in the fridge and let is set up inside the cake. It is simply a most marvelous flavor- also another delema if we should make this cake again (but decorate it more festive like though).
Or these jello cups look fun and festive too (although I probably wont go to all the extra work to make them look this fancy).
Or we might cancel these all together and make some peach cobbler (even though its not red, white and blue) with homemade ice cream (we are getting 25 lbs of peaches this Saturday, so it would be a great way to use some of them up!)
Either way I hope it gives you some ideas for this lovely holiday coming up if you are in need of ideas, and I will be wracking my brain (or more like my cravings) and see what we come up with. And I will most likely share some pictures of all the happenings.
Anyway, that's all for today on this We-flecting Wednesday. I hope you have fun preparing for the fun holiday coming up, and I would love to hear about all your plans or even fun traditions you do- this is such a great fun time of the year!
Thanks for stopping by and until next time!. . . . .
Subscribe to:
Posts (Atom)