Showing posts with label Money Saving Monday. Show all posts

Friday, May 4, 2012

Sensory Fun!

It has been so fun to watch my little girl grow, especially as of late seeing how much more coordinated and curious she is becoming. Back in college I got my associates in Professional Preschool Education and a Bachelors in Child Development. And as much as we covered things on younger children, my real hands on work ended up being the preschool age realm.

Now I know my little girl is still a ways from being that official preschool age of 3-5, but it has been fun to see how she is becoming more and more curious with playing with things and exploring them in realms that I learned in college.

So long story short, I thought it would be fun to put together a Sensory Table for my girl like we always had for the children in preschool. They were always a hit in my classes, because they loved feeling and exploring with their hands. Their senses at these young ages are so alert and ready to explore, so having things in a more contained environment (a table or bucket) can not only be fun for the kiddo, but for the adult, because then there isn't as much mess.

I saw these cute tables at Amazon, here and here, but as much as they looked great and fun, they also looked way out of my price range. So then I went to my next best option- the thrift store!

 I found this watermelon wooden basket thing for $2, and it has worked great, having the bigger, currently unused toys below, and it turned out to be the perfect dimensions to fit these little pink buckets neatly inside. When my little girl was born, she had her first bath in one of these little pink buckets in the hospital, and when you go home, they let you keep the bucket. Well I also saw lots of these at the store, I guess new local parents didn't feel a need to keep them. I probably didn't entirely "need" to get them all, but I thought it wouldn't hurt to get them just in case they brake, or to use for other variety of things. Long story short, the little buckets were only 50cents each!
 Then I found a little packet of summer "Sand toys" at the dollar store. She scooped those beans in and out of the small red bucket for close to an hour, and she loved every second of it!

Since I hate wasting food (even the dry stuff, we actually don't buy canned beans, we use the dry ones for our cooking, because they are lots cheaper and healthier!), I saved these beans in an empty #10 can, and we will only use them for her to play with. I plan on using these beans over and over, so that way they get a good use out of them, and they aren't entirely being wasted after one playing use. I think I will do the same with Rice and maybe even Flour (I know, a little risky, but I think she would LOVE playing with flour, and feeling the textures, and just having so fun!).
 Then since the watermelon basket was wood, I didn't want it to over do it's wear with water getting on it, so I found this random metal cage thing for $1, which works great for when she wants to do more water sensory fun. I think she had fun with the idea of playing with water and her bath toys without actually taking a bath (even though she loves baths, I think she liked the change!)
So total, with everything I bought for this fun little adventure in sensory explorations, I only spent $6, including the new toys. And she couldn't be more content loving this new set up!
Sure beats the $40 plus from the tables on Amazon especially since all these items are pretty compact-able and easy to stow away when they aren't in use, where the fancy official ones looked big and bulky, and I don't think I would know where to put it!

Now if you try this at home, I know you won't be able to find the exact set-up that I have, but stretch your mind a little, be a littel creative, and if you really want something for your kid, I know you could figure it out with random odds and ends either in your own stash of things, or putting things together at the thrift store. If you do, it will feel great saving the money, and letting your kid have a blast playing and exploring with their senses!

That's all for today!
Until next time!

Monday, August 15, 2011

Can, Can, can you do the Can Can?

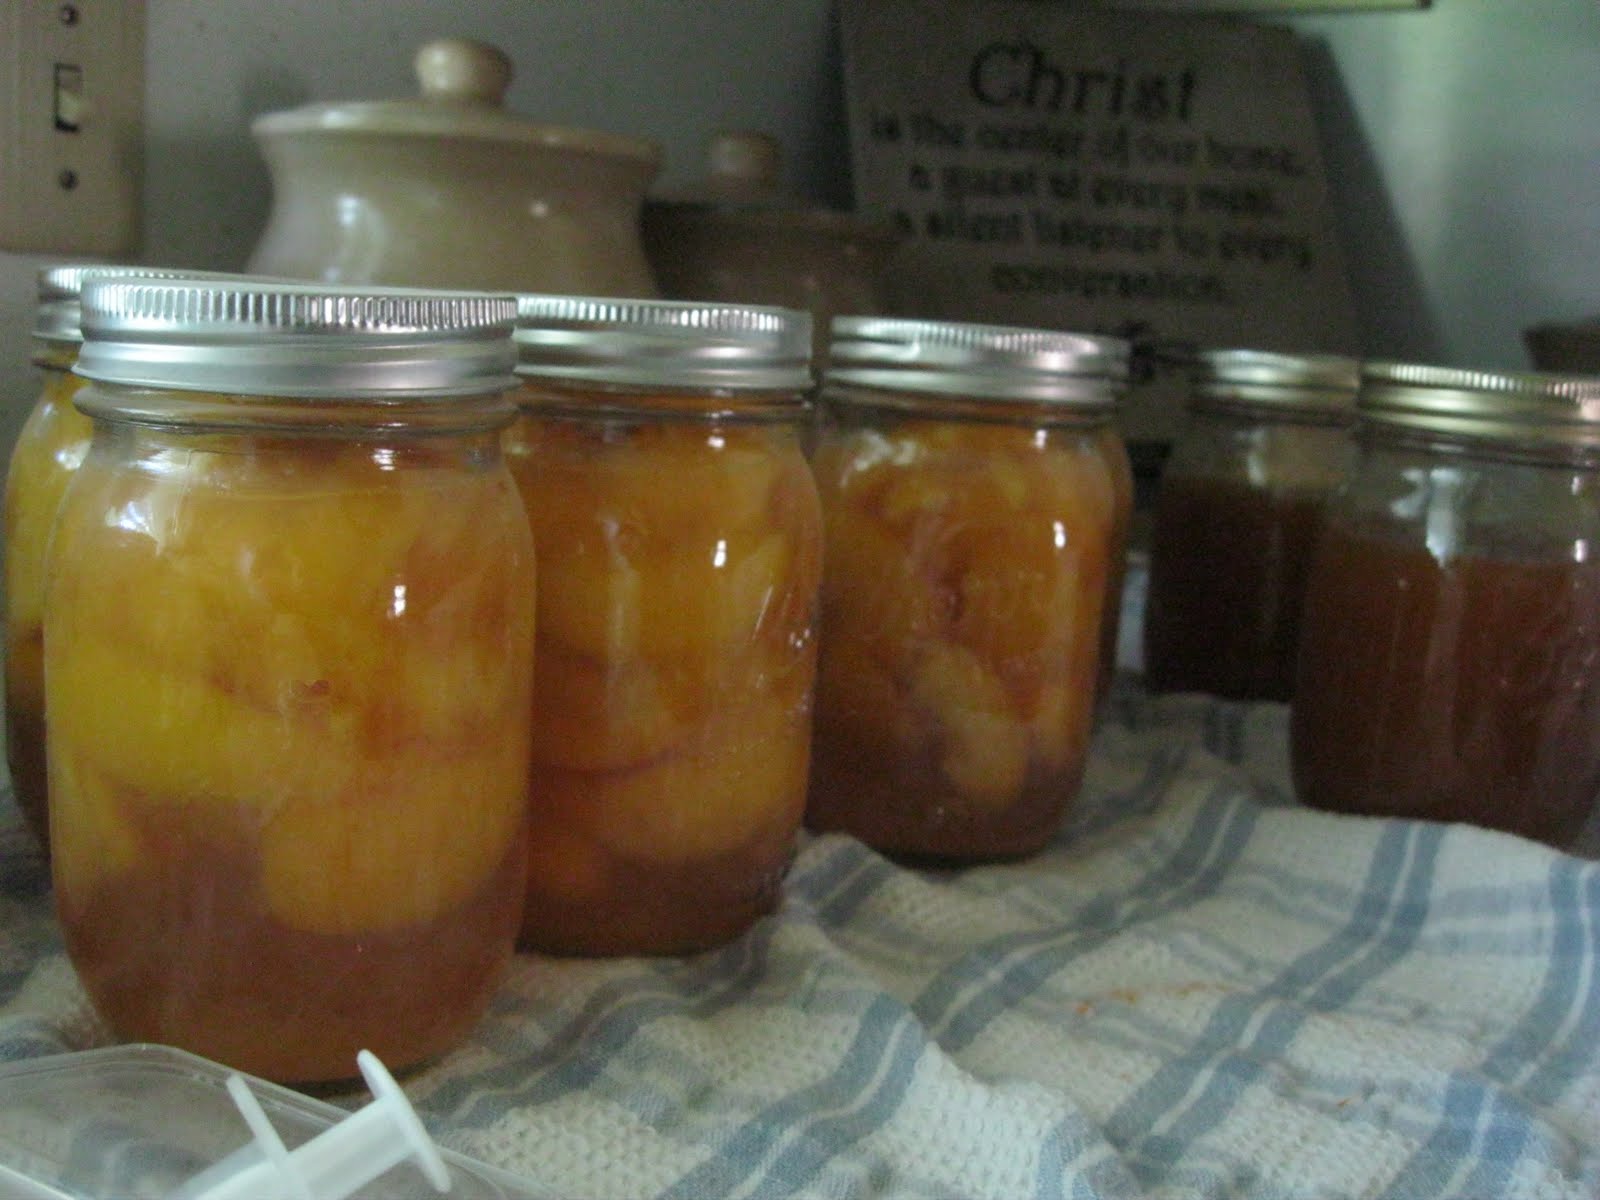
We did some more canning! This is our second go at it. Our first time was the lovely Orange Marmalade we did earlier this year when oranges were more in season. But this go at it we did some peaches! We did this little venture a little while ago, but I have been a little busy and slacking and haven't been able to post on it till now. We got 25lbs of peaches for about $12-15 (I am sorry, but I really can't remember the exact amount). And we got them through Bountiful Baskets, as one of their extra bonus sides. If you haven't heard of it you should really check them out, we LOVE getting our produce from them!

So here is some fun photos from our round two canning experience:

Here are the lovely things, oh so yummy and ready to go!
 After much pealing, slicing and dicing and preparing, they are now REALLY ready!
 Jars all ready and set!

 And there they go, formulating into yummy canned peaches!
 We also made some peach jam- oh so yummy! Did I mention this was so yummy!?
 The finished products!
 Then we had so many peaches and they were going bad fast, so we pureed some and froze them in little cubes for my little girl to eat as well
 Then we also diced some into little mushy bit sized cubes so that when she is a little older and is more into finger foods she can eat these too (we froze them as well so they will last)
 Then to more officially use up these yummy peaches and keeping them from going bad, we made some yummy homemade ice cream and. . . .
Peach cobbler to go with it! It is was super delightful!

Anyway, that's it for today. Thanks for stopping by on this lovely Money Saving Monday!

Until next time!. . . . .

Monday, August 8, 2011

Curtains Part II

Have I mentioned that I like curtains? Well I do, I really do. I just think there is something magical about a room with curtains. OK, maybe not quit to the magical level, but I really like how it makes a room feel more welcome, more cozy, more home like. I also rather enjoy adding curtains in other areas to add a little life or color to the room or even better to hide things. So long story short, even though this wasn't very a long story, here are some curtains I have added to our apartment to add some life. . . .

Remember these ones? These are in my little girls room, and I talked more about how I made them in THIS post.
 Then I needed to do something different about our bedrooms curtains. There were some curtains already present when we moved in, but they were these super ugly ones, and I like it when curtains make the room feel warm and welcoming, not disgusting, so I changed them up a bit, and now they match our bed spread.
 Here is a look with them closed and it is brighter outside than in. I wanted to do white so I could still get some natural lighting without it making it too hot.
 Here is a better view of it when it was dark outside. Since the curtain rod is a goofy one from the old ugly one, and I didn't want to change things up too drastically (or spend too much money), I just safety pinned the material around the rod, so it will be easy to put back together when we move
Then if I want to really let in some natural lighting I can pull the white back and tie it off and then it looks so pretty, doesn't that just feel so welcoming, just by looking at it? Aw. . . . :)
 Then I have our lovely kitchen curtains that I talked more about HERE as well. But I wanted to add a little more to the kitchen, and of course had to still stick with the matchy matchy.
 We have this lovely shelf that we have added because our cupboards are so numerous they are too tiny for most of or at least a lot of our food supply. So we have this lovely get up. But it looks kind of. . . I don't know the word for it, but it just needs some life added to it. If this was tucked away in a cupboard or a pantry away from normal pathway sight I probably wouldn't care, but since it is right in the kitchen I needed something. So I put together some matchy matchy curtains for it
 It is the same material as the window curtains shown above. What do you think?
 And here is another angel look for it. I think it adds a nice little touch to the room, or maybe I am just curtain crazy :)
 Then last but not least, the bathroom. The only window in this room is in the shower so it doesn't really need a cutsie, fun curtain cuz it isn't really seen and it would probably just get wet and ruined. So I decided to make some for the shower. The blank white one was just too plain and boring, so I added the blue and green which matches perfectly with the colors in the bathroom, and if you didn't noticed it is also the same material as the kitchen's curtains. . .yeah for curtains and for matchy matchy. (and all these curtains didn't cost me one extra penny, I just used some extra random scraps and material that I already had, yeah for cheap projects!!)
And then we have our living room. It came with these big long curtains. They are alright, but I sometimes still don't like the old almost ugly look they have. But I do like that they are easy to open, cuz you just pull the string and they slide open on a track. But maybe one of these days I will add something to it, just to give it that much more life. . .we will have to see on this one and you will be sure to hear about it when I do come up with a plan for these.

Anyway, thanks again for stopping by on this lovely Money Saving Monday. I hope you have a great night.

Until next time. . . .

Monday, August 1, 2011

Little Summer Dress

So this post is long long past due. I had a friend ask me a while ago to show a little on how to make dresses without using a pattern. The one I am going to show isn't nearly as elaborate as the the original dress she was referring to, but it is a basic simple dress to start out on how easy it can be to make clothes.

Before I begin explaining how I went about making this little dress, I will put in this little disclaimer- I am certainly not a pro to any great level at all this, and I certainly make lots and lots of mistakes with all sorts of clothes I make doing it this way. I love to make things without a pattern, mostly because patterns really confuse me and I don't want to waste the money on them, but on these similar notes, I still do make lots of mistakes with it all. So if you try this out on your own, don't expect perfection, but at the same note, you can still make some fun cute things, it just takes practice and trial and error.

Not to scare with all that, but just had to put that in there.
Here was a little blanket that my little girl got, it came with an outfit set, and even though the outfits fit her great, the blanket was way too small to do her any good. So I decided to use the material for it to make her a cute summer dress.
I like the style of this dress, so I used it as my base for the pattern
But I liked these sleeves, so I used these a basic pattern for the sleeves with the rest of the dress like the brown one above.

When I make anything without a pattern I always or most always use another clothing as a guide, in order to make my portions more accurate (most things I make without another clothing item as a guide, my proportions end up being WAY off, usually, and then it ends up being a waste of an outfit). Then I always try to find the shapes that are within the already made clothing, and then cut out those shapes that I see.
Elastic can be a little tricky because it can "hide" the shape that you are trying to create, but if you stretch it as far as it can go, that can give you a general idea of how big or long you should cut the item out like I did above. I also like to cut an extra inch or so to give me a good seam allowance and to give myself a little room for mistake. If you make something too big, you can always take it in, but if you make something too small, it is a lot harder to make up for it.
Here I cut out the sleeves, and then some elastic for the sizes and shapes that looked good enough for me.
Then I used the brown dress as a guide to cut out the following shapes, the front and back. Since the brown dress is almost a little small on my girl, I give myself a few more inches on each side so that it will be big enough for her now and maybe last another month or so
Here is all my pieces cut out and ready to go. Since I used material from an already made item, the blanket, I used the hemmed edges to my advantage and implemented them to the bottom of the dress and then took them out for the sleeves (I HATE hemming, so this was a very lovely advantage). Then I sewed all the pieces together. A nice rule of thumb that my Momma always taught me is always sew the right sides together, or facing each other, so that everything will turn out nicely (I haven't always remembered this rule and it sometimes leaves me ending up with half the outfit wrong side out and all mixed up, so long story short- right sides together!)
Here is the lovely finished product, what do you think?
It did turn up being a little bit too big, so it will probably last her more than just a few more months :-)
Here is a more flat and simple sort of view, if I were to try this again, I would have made the sleeves a little longer over the shoulder so she wouldn't have to wear a onesie underneath, but oh well, you win some, you loose some :-)
And then, as I have mentioned in other posts, I used some left over scrapes of the blanket to make the lovely matching flower.

So there we have it, there is a simple version of a dress I made without a pattern, I have made much more complex outfits, and over time I will try to show more varieties than just this simple dress, but here is a start. Thanks for stopping by and I hope you have a lovely rest of your Monday evening.

Until next time. . . .

Monday, July 18, 2011

A New Me!

Hello Friends on this lovely Monday afternoon. Today's money saving Monday post I wanted to share a little from my life, that in many ways will save me money, but in other ways will save me much more than this.

I need to be better. I really do. I got to get out of this weakened stage of trying to set goals and then kind of fading out back to lazy unproductive ways. My husband officially finishes his classes this week for this year, so starting next Monday on through till January I get him to myself in the mornings before he goes to work in the evening. I am so excited to have more time with him and we can do more productive things together.
We have talked about starting to work out better once he is done with classes, since he has been so endlessly busy he just really REALLY hasn't had any time for it with school and work coming out of his ears. I am excited to have a work out buddy, I think it will make things go smoother and have that much more of a commitment system. But I also feel that I still need a commitment all on my own. I need to be willing to change even if I couldn't have my husband to be my workout buddy.
This was us on Independence day. I love that we all look happy and that this was such a fun happy day. But I don't like necessary like how I have been feeling lately. When I was pregnant I was still busy with school and work and my internship so I had things keeping me busy and keeping me walking good long distances around town. I felt fit and healthy. I think this helped me so much in loosing my baby weight so quickly, but once I had my little girl my life of productivity came to a crazy halt and the only thing I had going on anymore was just taking care of my little girl and help my husband maintain his sanity. I rarely had reasons to leave the house and my willingness to be active at home was slacking. So even though I don't look terrible in this picture, I want to look and even more so FEEL better. So I am making a commitment, I am going to be better, I am going to feel better. Since I am home with just me and the girl a lot and I can't get a better one for the moment, the above picture is sort of my "before" picture, and I am determined to look and feel better in an "after" picture later on.

Here's to a new me. I am going to eat better (although I am going to still leave a little room for slip ups, I love sugar, and especially chocolate too much to completely deny myself it, I know it would be an accident waiting to happen, I will just need to control and maintain my cravings better!!), I am going to be better at drinking water, I am going to excise 5-6 times a week, I am going to read my scriptures better, I am going to pray better (these really help in making my days feel better).
Yes, I am going to be better. I have heard many a times that if you write things down in your goal process, it helps to be more committed and helps you to see where you have come. I have also heard that if you "report" to someone it makes you that much more willing to keep up, so I am going to put my little updates here, to make myself be more committed.

As of today: My waist is 31 1/2 inches, my thighs are 21 1/4 inches, my arms are 13 inches, my hips are 39 1/2 inches and my weight is 160lbs. I know this isn't a true measurement and way of telling how well I am doing in my goal to FEEL better, but I know that all these areas could be minimized a good amount to being at a more healthier level.

Also as of today: I currently read for 5 minutes of scriptures, and I constantly fall asleep when I pray, but I have been fairly consistent at praying morning and night. I eat three meals a day, but probably one too many servings for each meal, I snack off and on throughout the day on animal crackers (they are just so yummy) and I try to eat a fruit or vegetable with each meal, but doesn't always happen. I make all our bread and I make it about 75% whole wheat. I try to cook with brown rice, lentils, beans and wheat for our meals, but I could be a little more consistent at this. I haven't counted it very well, but I probably drink about 3-5 glasses of water a day. For the past week I have been doing trampoline workouts, crunches and push-ups for about 10 minutes tops, but today I ran/walked a quarter of mile in the park for about 20 minutes with an additional 10 minutes of warm up and cool down ( I really need to get better at this). This is where I am at, and I really could be at a better level in all these areas as well.

 Overall I need more consistency in my life, I need to be better!

Here is our "Jacob Gym" that we put together earlier this year when it was super cold out and it was almost impossible to do any outdoor exercising. I wasn't the best at taking advantage of it, but again, I am going to do better.
 We have the lovely trampoline (which is my favorite to use), a tread mill and a work out ball. Then it isn't pictured, but we have a yoga mat, jump rope, and "perfect push-ups".

 I put this wall decor together to add a little color and life to our little gym. The four squares are foam and I just glued scrapbook paper to them, then also gluing the white paper lines.
 Then I made these word signs, to have a reminder about keeping my body healthy
 and remembering that this body was a gift from a loving Father, a loving Savior, and I should take good care of it.
 The middle picture is one I took some time ago of our backyard, and I entered it into a local picture contest and won first place in the adult division. I like to have this picture on the wall as a reminder that I am not a failure, that I am capable of things, great things, if I would just give myself the chance. As I mentioned in other posts I greatly struggle with feeling a sense of my self worth, so this picture is a nice reminder that I am important and I can do great things.
So this post may kind of appear pretty jumbled and random in thoughts of just trying to be better. Well I mentioned in the beginning that this would help save me money and also some other things. Well to get back to those thoughts, what has really got me thinking about wanting to be better, to have a greater change is thinking about my Momma. Today is her birthday. If my brain is working correctly and I am thinking straight, if she were here today, she would be 58 years old. If she were here maybe we would be having a fun party celebrating her and the great lady she is and all that she has meant to me and my family (well maybe not entirely this one, since I am Idaho, and I think she would still be living in Arizona, so it would have to be a long distance celebrating). If she were still here I would have called her and wished her a happy birthday, chatting and talking about things we both have going on in our lives. I would let her talk to my little girl on the phone, let her listen to her crazy squills and load babbles and adorable little self. I would have sent her a card or an email expressing my gratitude for the blessing she has been in my life and thanking her for all that she does.
 This was the last birthday she had here on earth. She was so happy, or at least she put the show that she was- she was probably in a lot of pain this day, like most days on her last days on earth.
I really miss her, some days more than others. She had cancer. She died from pancreatic cancer, one of the most deadliest out there. I don't know exactly what caused her to have it, but I want to be better now, so that I can help save myself a little longer for my family. Maybe I will die young too, you just never really know what life will bring. But I can at least do my part to be as much healthy as I can to that much help keep myself here a little longer for my family, for myself. They say our health is 50% genetics and 50% lifestyle. Even though there is still 50% I can't control, there is still a good 50% I CAN control, and I want to be better.

So to a new me- Happy Birthday Momma- I want to be healthier to hopefully give myself the years on this earth I need to live up to her legacy, to be the person God wants me to be.

Thanks for stopping by and don't forget that the "50th Venture Celebration Giveaway" has started today, and will be open for two weeks, go HERE to enter and check out details of it. In case you hadn't heard about it, I will be giving away 15 free alligator clips. And I am starting to work on making some clips, so I will share what I got going to give you some ideas of what can be done with them- so come join the fun and thanks again for coming by! :)

Until next time! . . . . .

Monday, June 27, 2011

Clothing Swap

On this Money Saving Monday, I thought I would share on some greatness that I have encountered on in this little town, and if you are around you could join in too, or it could be a great idea for something you could do in your own area as well. I think this is such a brilliant idea, especially for people that want save every ounce of their own money, but still get a little change in the wardrobe getting nice new (new to you) stuff while still cleaning out the closets.

My good friend Jana Bake (who also has a nice money saving sort of blog, that is all about hair and beauty tips that you could use without having to always go to the saloon for the looks, her blog is HERE), has already hosted a few of these, but she is doing another end of July. She hosts clothing swaps. The basic idea of it is you bring clothes to her (or you, if you want to host one in your town), she will give you tickets for every item of clothing or accessory your bring, one ticket per one item (or you could value different items- I've seen it done this way as well, for example, a shirt would be like 2 tickets, but a pair of pants would be about 4 tickets, but either way works great!). You bring/collect the items and trade them for the tickets the week prior to the swap so that there is enough time to sort through the items and make it all nice and organized.

Then the night of the swap your bring your tickets and go through all the things that people brought and pick out new clothing or accessories and pay with your tickets. It works best when you can get a good amount of people to participate and each person participating brings clothes that are still in good condition, but just don't wear it anymore (cuz really, no one wants that over sized t-shirt you got for being a volunteer at some Joe-smo activity, sorry- so bring cute fun stuff and it will go a lot more fun for everyone!).  I participated in Jana's swap she hosted I believe in April, and I got all this wonderfulness:
 Sorry for not displaying the cuteness of these clothes better for you, but I got all these, plus a few more that were in the dirty clothes hamper when I took the picture- sorry I am so lazy. But overall I got about 20 items of clothing, and a few pieces of jewelery as well. And it was such a fun feeling getting all this for FREE! All the work I had to do for the free fun value was just make sure I went through my closet, get out the un-worn lonely clothes, cuz we all got them- and then bring them by a week early. I even offered to help sort the clothes so it would be such a chaotic mess before the official swap! Isn't this such a brilliant idea!? And she still had tons left over that could be taken to the local second hand store as well.

Then not too long after this swap she held a children's toys and clothing swap. Since I only have my little girl, and so far I am gonna hold on to her things for potential future little children, I didn't really have anything to offer this swap, but because I know Jana, and they still had tons left over, she let me come by and pick through the pile without the tickets and this is what I got:
Again sorry for not displaying the cuteness of them all- but I got about 30-40 new outfits for my little girl, and they just happened to be mostly the sizes she was just about to grow into, it was perfect timing and one less MANY things that I didn't have to buy!
And she got these smashing crazy rainbow pants, they are so crazy, but I just love them! (and there is her dashing cousin, he's such a cutie!)

Overall I think this swap thing is simply brilliant and a GREAT money saving tactic. So if you are in the area of Rexburg and would like to join in you could check out the details on this FACEBOOK link (I hope this link works, let me know if doesn't), or you can email me if you want more details. Or if you aren't in the area but love this idea, then it could be a great way for you yourself to host a little party this lovely summer and have some fun sharing the money saving love, and I know you and everyone participating will really appreciate it!

On similar notes, if you are also in the area, there is a great second hand store called Mommy N Me, and they have lightly used baby, kids, and maternity clothes. And I am not sure how often they do it, but I am pretty sure it is several times throughout the summer, they have 25cent Saturday sale. They have a designated area where everything in that area is only 25 cents. It was brilliant!! I got over 30 plus items for only $8- and they were all nice looking, another great addition to my little girls clothe collection for her fast growing little body.  Plus I got this darling little shirt there too:
In case you can't read it, it says "I eat at Mom's" isn't that great!? I love it :)

Ok, ok, so long story short, here is a fun and FREE way to get some new clothes while also getting rid of some old ones! I hope you can join this up coming swap or have one of your own because they really are amazing! :)
Anyway, thanks for coming by and see ya next time!...

Monday, June 20, 2011

Stroller Sun Shade

Hello on this lovely Monday! Today's item I made a few weeks ago, but haven't had a chance to share it till today. We got a lovely little umbrella stroller from my in laws and we love it, but it didn't come with a little sun shade thing. It wasn't much of problem cuz it doesn't get too sunny most of the year in this ice land Idaho- but still thought some sun blockage would be nice for the little girl- so I put my thinking cap on and put this together:

 I found this boning type stuff at a costume sale at the college- I got all this for $2- this little fellow is what will make this whole thing possible.
See the stroller, it is a happy stroller, but a little bit lonely stroller, and needs some help
 So I measured free hand roughly how much of the boning type stuff I thought I would need and cut it. (I don't know if boning stuff normally has wire stuff inside that white plastic, but this stuff did, so I had to use wire cutters to cut it).

 Then I put on some adhesive Velcro on the ends of the boning and around the poles of the stroller. If you dare to re-create this make sure you get the right sides of the Velcro to the right parts so that they will still attach to each other :)
 Then I laid out my fabric that I wanted to use. Since I didn't use any sort of pattern to figure this all out, I measured and guessed about how much I would need.
 Then I pinned the boning on the ends of the fabric to see how it would all look before sewing it together

 After reattaching it to the Velcro it came to realization that I would need a different shape, a more round sort of look, kinda like what you see above
 See how the Velcro sits it so lovely in place?
 I had some excess material after repining, but I think it gives it a nice back sun protection

Giving it one last look before taking it off and working the magic...the sewing!
 Since the round part would be super hard to sew with the boning still in, I drew in where it needed to go, to give myself a guide for the sewing
 Then on the straight side I sewed with the boning inside, see how the scratchy Velcro is on this side? I thought it would be impossible to slide through the material because it would just catch all over it- thus my reasoning for sewing it in place like so
 After sewing the lops. I also sewed some ties on the ends to help tie the shade thing on over the Velcro- to give it a more secure holding in place- now to put it all on!
 Wall- ah! What do you think!? I made it adjustable for different heights, so the visor thing can be lower like this one and the one below
 or....
 When my little girl gets tall, or at least sits taller, we can adjust the visor higher up more away from her head like this, and because I kept the excess material on it like I mentioned earlier, it serves as a sort of back shade protection
Then to top it all off I made this little pocket thing to tie on so I can store little goodies for her, like her hat, her sippy cup or any of the likes.

So there you have it- I know it looks very home-made (it was made in my home after all :), but as long as my little girl is protected from the shade that's all I care about :) Hope you enjoy and have a lovely rest of your Monday!

Until next time!.....

Pin It!