Showing posts with label Something From Nothing. Show all posts

Friday, June 8, 2012

Sheet Holder


If you are in the mood for a real fast easy re-purposing craft, then this is the one for you. Ever since we switched to a queen bed our sheets will never stay on through the night. By morning time they are all bunched up and off the bed and it is about to drive me crazy. So if you have this problem too, this is also another winner.

First I tried looking around locally just to buy the things, but I couldn't ever find them. Then just googling them, they seem to come across really pricey as you can see HERE. They were ranging from $50-$170 just for these little guys. I am not sure why. So my next best option, make it myself! Or maybe that should have been my first best option. Oh well.

UPDATE:
So apparently my googing skills aren't the very best. And thanks to the better skills of my sister, there are these at Amazon for around $5. So if you aren't up for a domestic challenge, you can buy them here too.

As you can see there really isn't much to it. I could have probably made this from scratch, but really, it was much easier to do it this way (and probably cheaper too!)
I found a pair of suspenders from our local thrift store. Only $2, and that's it!
 I cut the straps to look like so, and cut the extra set of clips to be sewn on the ends like so...
 Just sew them down, so you have clips for both ends
And that's that! Clip them on the sheets and look forward to countless nights of sheets no longer coming off, I personally can't wait! For this project I only made two clips simply because we only have the problem on the top of the bed, if it ever becomes a problem on the end of the bed, then I know what to do now!

Thanks for stopping by! Hope you have a wonderful weekend!

Until next time!

Friday, June 1, 2012

A frame Play Tent

So I saw This darling A-Frame tent from "Cakies" blog, on Pinterest one day, and knew I must try. So I finally did, and now I will share with you. But since I am horrible at step by step photos when I am making things, I will try to explain things from my already finished project. Or if all else fails with this, you should just go to the original blog I got the idea from, because they gave great step by step instructions.

 The original used a twin sheet, so they were able to find dowels that long, I didn't get that lucky, so I just hemmed my material to the length of the dowel across, then fit as long to fit on both sides.
 Maybe it worked great for the original post, but when I did this part, it didn't fit very tight, so we bought these little clip things to help hold the dowel and frames into place better. We got them at our local hardware store.

 Then the original post didn't add these as well, bu for more durable features, we thought we should add them. We just screwed dowels on the inside of the frames to give it more support. Then it also helped with making ties for the material, and could tie it down all the way across to hold it in place. I liked the ties more than the elastic like they did on the original post. But I am sure both would work great.
 Then one last feature, I sewed a loop at the top to run the dowel through to also hold it in place better.
It has worked like a charm and my little girl loves it! And the best  part is it fold away flat nicely for when we aren't using it.

Only small disclaimer for this project if you try it at home....it turned out to be a little more pricey than I thought this little project would be. The most expensive stuff was the molding that we used for the frame, just for that it was around $20, maybe we could have shopped around and found a better deal, but the lazy in me was content with what we found. Then if you have to buy material instead of using stuff you already have, then that can add up too. But maybe in the long run it will be worth it since I can see it being use for many years and many children to come!

Anyway, thanks for stopping by!
Until next time!

Friday, May 25, 2012

DVD Coloring Case

I saw this brilliant idea on THIS blog, Handmade by Stacy, and knew that I must give it a try. We like to store all our DVDs in a folder with plastic protector sleeves so that they are are all in once place, so that leaves us with a ton of empty cases, thus this project seeming all the more appealing.

 We love all the Toy Story movies, (and actually have all of them, so I used some of the pictures from the movie covers for this cover), so I thought I would make this coloring case along that sort of theme.
 As Stacy shows it, you first need to cut out the circle part. I didn't have a fancy plastic mat to protect the outer plastic sleeve of the case, so I just used cardboard, but still needed to be a little extra careful that I didn't cut through that too.
 Finally got it all cut out
 Then I cut cardboard and glued it on the insides, I used old cereal and cracker boxes, and made them the above dimensions
 Then I used regular construction paper, and glued the little Toy Story cut outs to it, I made it the above dimensions
 And slide it in.
For the left side I just googled Disney print-ables and came across a few, made sure they fit the dimensions, printed, laminated, and it is set to go! For the right side, I just got some scrap material I had laying around, and hot glued it all together (can you tell that my crayon pocket is an old shirt cuff?) Then my favorite about these coloring pages and such is that I used Dry Erase Crayons, so that the same pictures can be colored over and over again. I bought them on Amazon Here, but I have recently seem them at Walmart (even our Non-Super Walmart) and it is much cheaper mostly because you don't have to pay shipping! I love these crayons because I never have to worry about them drying out, and they come off pretty easy!

Now I can't wait to start making lots of other goods with these cases, my creativity streaks are just bubbling with excitment for the next ones!

So there you have it! Hope you have a great long weekend!

Friday, May 4, 2012

Sensory Fun!

It has been so fun to watch my little girl grow, especially as of late seeing how much more coordinated and curious she is becoming. Back in college I got my associates in Professional Preschool Education and a Bachelors in Child Development. And as much as we covered things on younger children, my real hands on work ended up being the preschool age realm.

Now I know my little girl is still a ways from being that official preschool age of 3-5, but it has been fun to see how she is becoming more and more curious with playing with things and exploring them in realms that I learned in college.

So long story short, I thought it would be fun to put together a Sensory Table for my girl like we always had for the children in preschool. They were always a hit in my classes, because they loved feeling and exploring with their hands. Their senses at these young ages are so alert and ready to explore, so having things in a more contained environment (a table or bucket) can not only be fun for the kiddo, but for the adult, because then there isn't as much mess.

I saw these cute tables at Amazon, here and here, but as much as they looked great and fun, they also looked way out of my price range. So then I went to my next best option- the thrift store!

 I found this watermelon wooden basket thing for $2, and it has worked great, having the bigger, currently unused toys below, and it turned out to be the perfect dimensions to fit these little pink buckets neatly inside. When my little girl was born, she had her first bath in one of these little pink buckets in the hospital, and when you go home, they let you keep the bucket. Well I also saw lots of these at the store, I guess new local parents didn't feel a need to keep them. I probably didn't entirely "need" to get them all, but I thought it wouldn't hurt to get them just in case they brake, or to use for other variety of things. Long story short, the little buckets were only 50cents each!
 Then I found a little packet of summer "Sand toys" at the dollar store. She scooped those beans in and out of the small red bucket for close to an hour, and she loved every second of it!

Since I hate wasting food (even the dry stuff, we actually don't buy canned beans, we use the dry ones for our cooking, because they are lots cheaper and healthier!), I saved these beans in an empty #10 can, and we will only use them for her to play with. I plan on using these beans over and over, so that way they get a good use out of them, and they aren't entirely being wasted after one playing use. I think I will do the same with Rice and maybe even Flour (I know, a little risky, but I think she would LOVE playing with flour, and feeling the textures, and just having so fun!).
 Then since the watermelon basket was wood, I didn't want it to over do it's wear with water getting on it, so I found this random metal cage thing for $1, which works great for when she wants to do more water sensory fun. I think she had fun with the idea of playing with water and her bath toys without actually taking a bath (even though she loves baths, I think she liked the change!)
So total, with everything I bought for this fun little adventure in sensory explorations, I only spent $6, including the new toys. And she couldn't be more content loving this new set up!
Sure beats the $40 plus from the tables on Amazon especially since all these items are pretty compact-able and easy to stow away when they aren't in use, where the fancy official ones looked big and bulky, and I don't think I would know where to put it!

Now if you try this at home, I know you won't be able to find the exact set-up that I have, but stretch your mind a little, be a littel creative, and if you really want something for your kid, I know you could figure it out with random odds and ends either in your own stash of things, or putting things together at the thrift store. If you do, it will feel great saving the money, and letting your kid have a blast playing and exploring with their senses!

That's all for today!
Until next time!

Tuesday, April 3, 2012

Beauitful World of Cardboard Part I

I love cardboard. There are so many wonderful things that can be done with it. In some ways it has turned me into a little cardboard hoarder, in the idea that I will be able to make something with it, which isn't too bad, because usually I do find something. Here are few goods that have come up recently. Enjoy.


I don't know if you are like our little family, but we love to stock up on canned foods! As great as they are though, there is a down side of finding a way to store them all. So here are a few nice ways.
 In kind considerations of my lovely sister, April, she gave me her empty 12 pack soda can boxes, they are a great way to store canned foods, and if you want them to be rotated by date, you can cut a hole in the back and put the new ones there so the old ones are always in front.
 Although the only down side, is they don't always fit all kinds of cans, they should make a uniform can size. These soda can boxes are best for "Cream of" whatever cans, and can still fit two rows worth, otherwise, many other cans are too fat and can only fit one row worth. Either way it still works nice!
 Then in my browsing on pintrest, I found on THIS website, the great idea of using a magazine holder to rotate or store cans. Then in a little more browsing I saw on THIS website, to use cereal boxes as a magazine holder, so I thought "hey! Why not forgo the buying of magazine thingies and just use what I got!" so Here we have it. Although I don't know if I would entirely call these official "rotators" since the old ones won't be in front. But it can at least store a bunch in one area. And one other down side, is it also only holds certain sizes as you can see. Here I have the small tomato sauce cans, and two rows of tuna cans. It's been so nice to fit more in one spot!
 Then aside from can storing, here is a little fun with regular organizing. As an end of the semester treat last year we splurged and bought a 6 pack of bottled cream soda! And after we were done, I had this great epiphany of an idea.
 This is probably by far one of my most favorite ideas. Over several months, it is still to this day nice and organized, that means it is a real winner! Oh and a little side note, I did add a layer of cardboard and hot glue on the bottom to make it more durable and last longer, so far so Great!
 Then in my multiplying stash of cloth material, I organized my material into boxes by color, or by designs, or finished projects (or close to finished) or my old clothes ready to be something new, etc. Then I labeled on the outside with scrap papers (maybe someday I will make it cute and pretty). So far this has also been an amazing life saver in organizing. Before this I just had piles stashed and thrown in the closet and it was crazy, it almost made me never want to sew because it was so hard to find stuff. Now I am in heaven!
And last but not least, our office supply "junk" drawer. It was always cluttered, so I got old cereal boxes, cracker boxes, all the sorts, cut them to the height of the drawer so they would fit, and then put items in the different sections that best belonged together, for example, there is a "glue" box, a "scissor" box, "stamps", etc. This has also been wonderful.

The best part about all these jewels is there is now extra purchases necessary, you can just use what you have!

That's all for today! Thanks for stopping by!

Until next time!

Thursday, March 22, 2012

Milk Carton Repurposing

It's the 100th!! Yahoo!(So don't forget to join the giveaway, here, if you haven't already! :) I thought it would be fun to do some kind of spectacular post being the 100th, but it wasn't coming to me. So we'll just have another regular sort of post, but it will be a little of best of the both worlds in crafty, kid, and a little in food, (okay, maybe not the BEST of both worlds, but still pretty fun).

But first, a little fun background.

 As long as I can remember, growing up, my family has used this:
milk, Good ol Morning Moos. It is a powder form that you mix with water and Wall-ah, you have milk. Some probably only use it as an emergency sort of milk, but growing up it was THE milk. And well, believe it or not, I actually liked it growing up, so we've kept using it now that I have a family of my own. My husband has a slight form of lactose-intolerance so not having straight regular milk around that doesn't make my husband sick, it was pretty easy to convince him to incorporate it in our lives.

We did some numbers on it and it is overall somewhat cheaper than buying regular fresh gallon milk (it varies since fresh milk prices go up and down, and the powder milk prices go up and down, but overall it came out cheaper). And it has been very convenient to use, if we ran out of milk, we just made more, we don't have to worry about running to the store in the middle of night for cereal in the morning, and in some ways it is easier to cook with as well. But as a disclaimer, it does taste a little different than regular milk, I personally don't notice that much of difference, but I know others that think the difference is enough that they hate the powder and would never use it. So everyone is different, but if you think your family could use a little extra crunch in the budget, this is a small great way to go. And just for fun here is the nutrition facts for you in case you are curious about it, and they say it is comparable to 2% regular milk, and if you'd like to compare the two, here is the nutrition facts for that.

Sorry for the long background story, but I thought it would be fun to give you a little extra info in case you care to ever "venture" in the powdered world too. This is what we drink for our milk. But then we have our little girl. Now that she is over one and is finally off breast milk, she has been drinking whole milk. Since I wasn't sure if giving her our powdered milk would be the best thing, at least at her young age, we have been buying fresh milk for her. It has only been a few months of buying it and I am appauled at how many gallons we buy each month, we have milk cartons building up out the wazoo! And if you know me, you know I would have to do something with these suckers, especially since they have a fun handle on them!

 So I started out in making fun little toy carton sort of things for her. All I did was cut off the part with the lid, and cut a big enough opening for there to be an actual opening to put things in.
 With the handle sticking outward it becomes very easy for my girl to be able to go up and pull out what she wants, carry it around, and go at it. She loves carrying them around.
 Then for fun crafty and easy clean up sake, I thought it would be fun to make labeling, so I mod podged black construction paper over the regular milk label. When the mod podge dried, it becomes a great little chalk board, easy to label what is inside them, easy to put the right toys in the right carton. And if I change the toys around, I can easily simply erase and re-write the new contents.
 She loves carrying it around, planting on the floor and checking out her stuff.
And last but not least, on another crafty note, I have a nice amount of space on the back of my crafty dresser that I can stash a row of these cartons and they work great for putting my current on going projects. So many of my projects have a mix of little and big items, and I always worry about loosing them in the mix of things and messing up the projects. But now with this lovely set-up, I can easily hold the contents of my projects in individual cartons, and if I have to pause in mid project (mostly to take of my little girl's needs) then I can store then back in their container for future start up again without anything getting lost. And again, they can be labeled, reminding me what I am currently working on.

Now I know I will probably get to a point where I just can't save these things anymore, but for the time being it has been fun to re-use them in a more purposeful way.

What sort of things do you use empty milk cartons for?

Thanks for stopping by and don't forget to join the giveaway! You can go at the top of the page, or go HERE for more details! Thanks again and again for all the support, I greatly appreciate it all, so very much!

Until next time!

Tuesday, March 20, 2012

T-shirt Cape

Yep, that's right, we are on to Venture #99, which means we will hit the 100th this week, which means you should check out the giveaway, that is at the top of this page, or you can go HERE, it is officially open, and you won't want to miss out on some great goods, there are two prizes, one is an adorable apron made by April, and other is free $10 worth of great Bare Book items, but that's all I am gonna say here, if you wanna know more, you got to go check it out for yourself! Please join in, you won't regret it, it is open till March 31st!

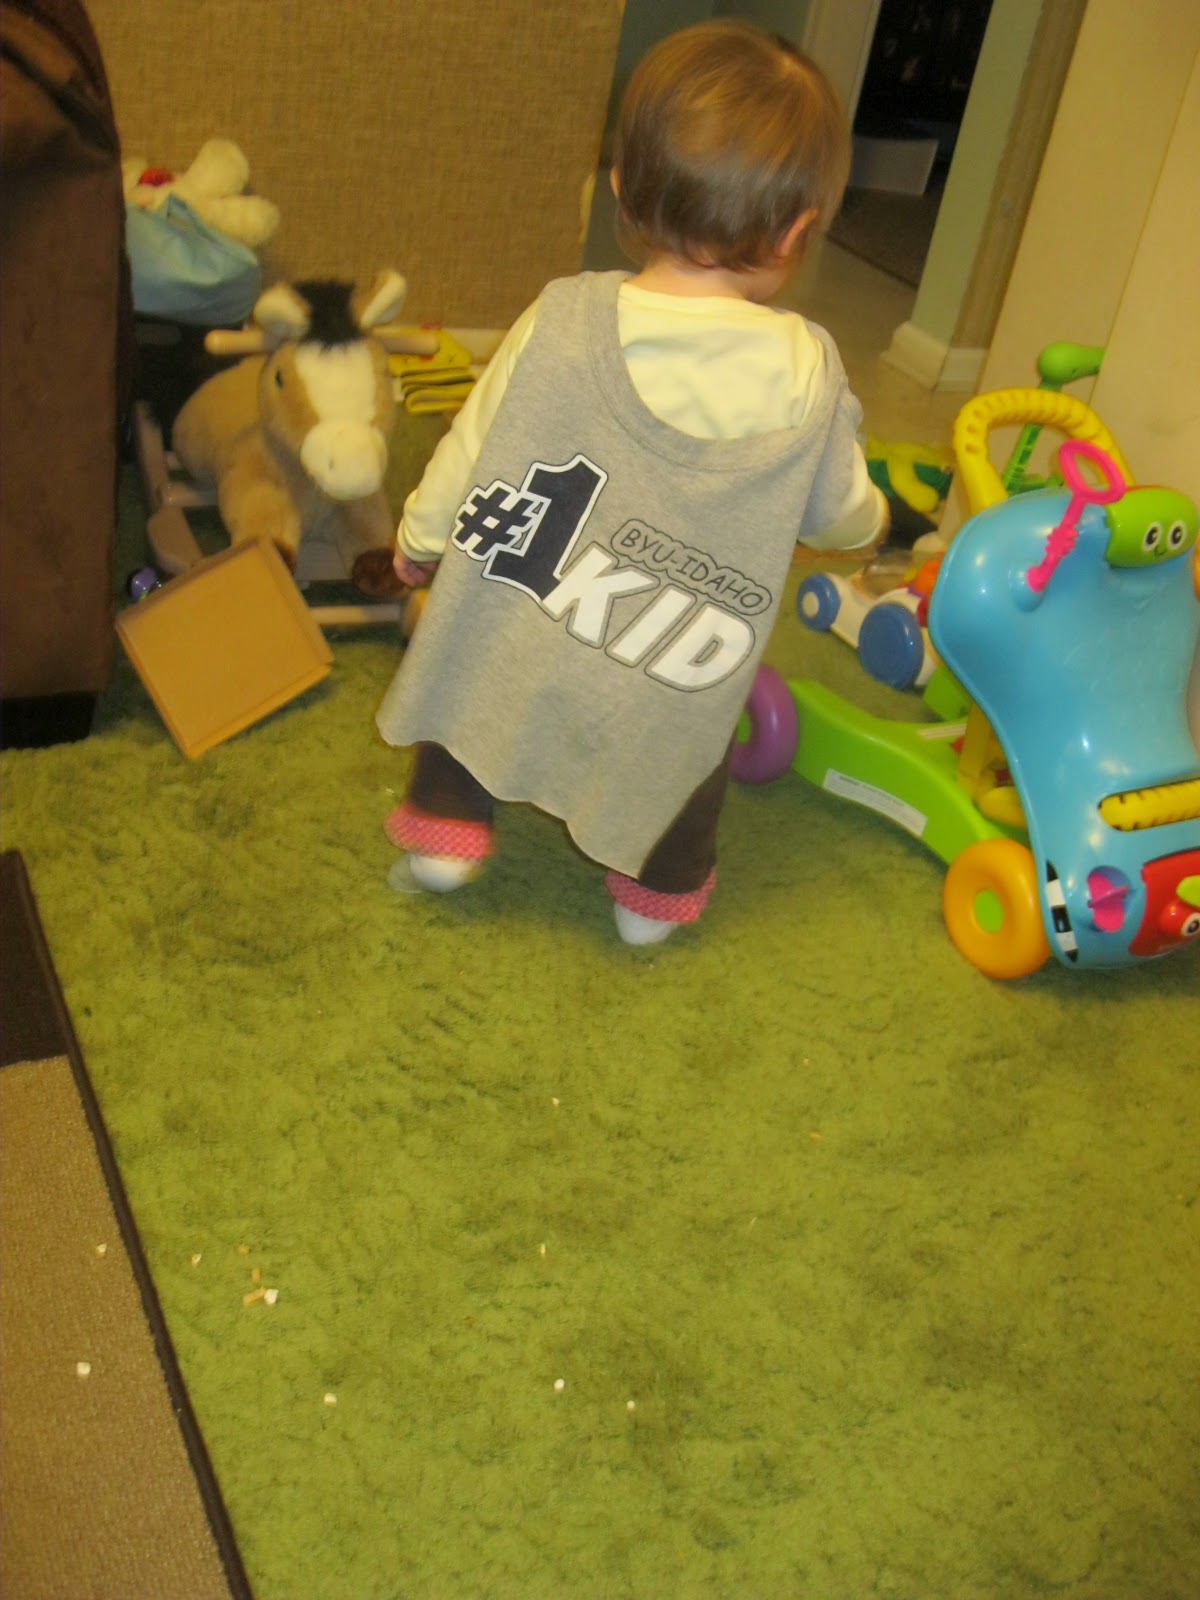
Okay, enough side tracking, now on to today's post. This is a very simple, yet a fun little adventure. I have been going through some of my clothes and getting rid of a ton (or at least moving it from my closet to my sewing stash, since I love using old clothes for sewing! ), and I thought it would be fun to make a cape for my little girl out of one of my old T-shirts.

It is super simple, and you don't even have to do any sewing! And depending on how you want it, you might not have to do any or much painting either! It's a fun win win project!

What kid doesn't like to walk around in a cape?
This is an old T-shirt I bought in my young cheesy freshman college days, it says "BYU-Idaho, #1 Kid," I bought in the baby/kind section of the bookstore, in the largest size they possibly had so it would still fit me. Well, I think now it is more fitting for an actual kid :)

 This step isn't entirely necessary, but I put the T-shirt on her first to see how it would fit her as far as the neck area, and how short I should cut it. But if you can eye-ball pretty good, then you might not need this part.

Then again, much apologies, for my horrible step by step photo skills. But the next step all you do is cut off the front (or back, which ever side you don't want to keep. I kept the front since it had the words, but if I were to paint my own design for the cape, I would probably keep the back for a nice clean back to paint a fun super hero logo, so do what works best for your project).

Also cute off the arms, and however short or long you want the cape to be. I cut off a few inches on the bottom so she wouldn't trip on it, but if you have older kids, you might not need to do this part.

Then lastly, make sure you keep the neck part intact, so that you have easy way to put over you kids head and have the cape hang on them. If you have a really stretched out neck, or just a big neck in general, but a little child's neck, you can probably cut the neck part in front and either use Velcro or tie the two pieces for a more snug cape.

Sorry if those directions aren't as clear, maybe one of these days I will draw out more detailed instructions how to do this, or maybe I will just make another cape, and paint the next one, but with much better detailed directions. To be continued.... :)
Sorry for a blurry picture here. But she sure loves it! And an even fun multi-use for this, is I bet you could even turn it around and use it as a bib too- double multi-purpose action!

So go make your kids day and make them a fun cape (it won't cost you a penny! Because we all know you have tons of T-shirts stashed in closet that you won't miss one for fun project!), I am sure they'll love it!

Thanks again for stopping by and don't forget to join in on the giveaway, I know you won't regret it!!


Until next time!

Tuesday, March 13, 2012

T-shirt to Dress

Due to the recent disappearance of my camera (which did FINALLY show up as well, it just took a few weeks :) and a mix of my absent mindedness, there aren't very good "before" pictures of this process, I really wish I would have taken some, but oh well, you win some, you loose some.

I got this shirt at a clothing exchange (so for free!! YEAH!!). I didn't feel like trying it on at the event, and upon returning home and trying stuff on, I soon realized that this one (along with many others, which will also become new dresses), didn't fit me to my liking, so they will now become to my better likings by being adorable little dresses for my girl.

I loved the designs and styles on this shirt, so it ended up a little long, so I could still keep the fun grey strip on the bottom. All I did for this was measure how much I needed to take in the sides, and sewed away, and cut excess, it was pretty cake, like crumb cake!
This shirt also came with strings to tie in the back, so I re-sewed them in as I took in the sides. Then I also did a little Velcro button on the top to take the neck in a little at the top so she wouldn't have a pludging neck line :)
I think we have a winner if I don't say so myself! And I guess the plus at this dress being so long, and a little roomy on the sides to have the tie in the back is she will hopefully fit this for a much longer time!

Well that is all for today's sharing! As you maybe have remembered I am fast approaching a 100th Venture, so to celebrate I decided to do another give-away! After much contemplation. . . . .I am still deciding on what it will be, but I will let you know as soon as I figure it out, and whatever it will be, just know it will be good!! :)

Thanks again for stopping by!

Until next time!!

Thursday, March 1, 2012

DIY Laundry Soap

As maybe some of you know I have ventured into the realm of Cloth Diapering, if you care to read more about all that you can read my other post on it, here, here, or here :)

So far things have gone pretty well in that department except for one frustrating detail: Rashes!

From much researching and experimenting I realized you can't entirely use diaper rash cream with cloth diapers because it can make the absorption defective. So when they would come up I would have to put her in disposable with the cream until it cleared up.

After much more researching I figured maybe I needed to "Strip" the diapers of all the chemical buildup of laundry soap and such. Which helped some, but she was still lingering with rashes that wouldn't ever fully go away.

So yet again, much more researching, on how to care for and clean the diapers. And amongst it all I came across a recipe that another blogger, Elisa Loves uses specifically for their cloth diapers, they also had problems with rashes and once she put together this laundry combination and it worked great for her, I knew I must try.

So just for safe keeping, I stripped the diapers one more time, and then made the soap. Simple as that and the cloth diapers are back into their normal full functioning gear, this recipe has been a real life saver. And no more rashes, bless-ed hooray day!

So to share on this lovely goodness, here is the simple life saving goods, and I am sure this combination could work great for more than just cloth diapers.

 All it is, is equal parts of the following ingredients, Pure Baking Soda, Super Washing Soda, and Sun Oxygen. I just got a 1 cup and scooped from each thing one at a time till I filled my nice #10 can (and I still have some left over in the containers to make more later), then put the lid on and gave it a good shake to make sure the powders blended well, and that is that!
A nice glance on the inside. Then for each load of diapers I just do one scoop (that came in the "Sun Oxygen" container) or two table spoons. Or if it is a small load, just one table spoon.

It's as simple as that, and it has been a wonderful life saver! Hooray!

Well that's all I have for today, join me again tomorrow for a continuation of the Bean fudge, where I will share the goods of the yummy Graham Crackers that are so good dipped in it!

Thursday, February 23, 2012

Bottle craft

Ever have sparkling cider for New Years or Valentines and have an extra bottle lying around? Turn it into a cute vase!

These are the supplies you will need for this simple craft. Make sure the sticker letters are 3-D or puffy, not flat.

Put the stickers on the bottle. Use any saying you want. I used "Une Fleur" on one side and "des fleurs" on the other. You don't have to do both sides.
Spray paint the bottle in your choice of color. I wanted flat-white.
It will take a couple of coats. Let it dry thoroughly or it will have a bubble, like in this picture. One side...

Other side! Put in a flower or two and enjoy!

Tuesday, February 21, 2012

Stuffed Animals into Puppets!


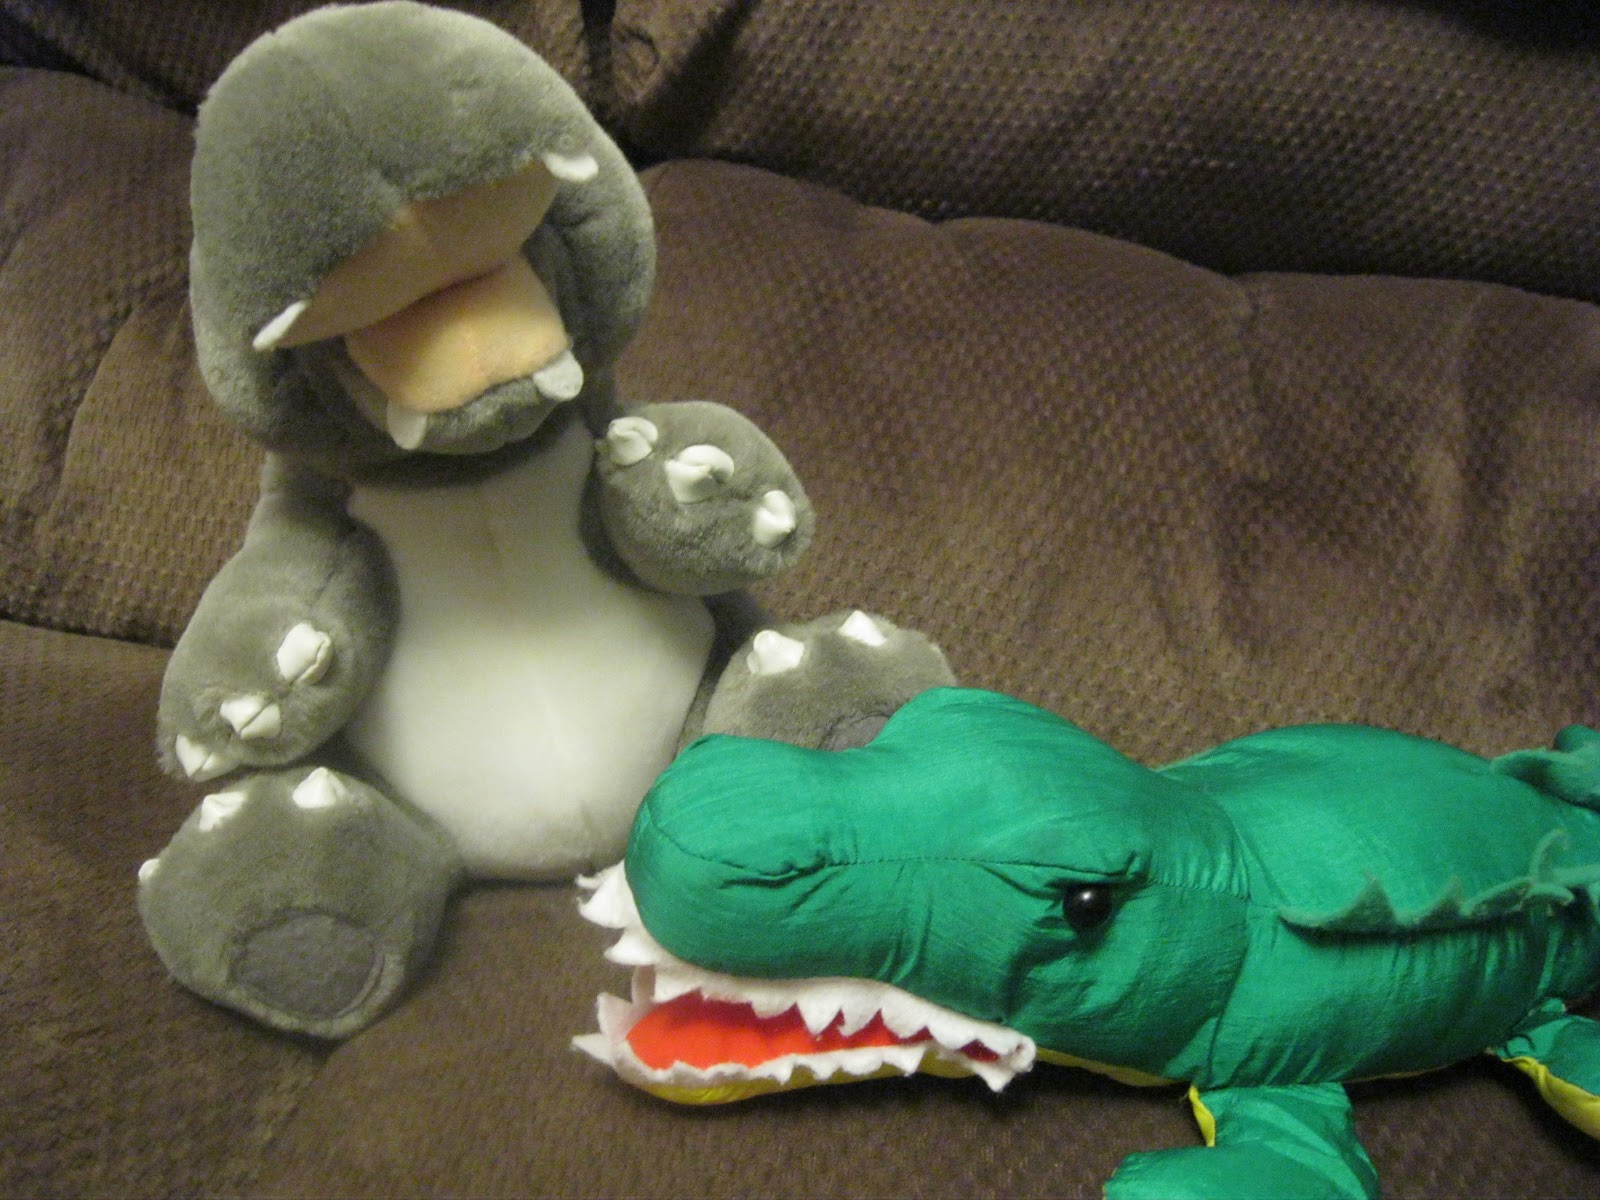
My little girl loves puppets. So after much observation and contemplation I figured I could transform some of her stuffed animals into puppets. Just a heads up before/if you try this at home, I am not sure sure this will work for all stuffed animals. I did it on ones that already had some kind of mouth that would be open-able, like these two bellow. . .
 See how their mouths have a natural opening? These kind will work best. Here's how I did it.
 Using my seam ripper I cut open and gutted (not all the cotton, just enough that I could easily fit my hand in without it being too stight) where I wanted the opening for my hand to go.
 Here are the items I used. I used some random material that was big enough to fit my hand around, plus several more inches just for extra cushy room, along with them being about as long as the animal, and if ends up being too long you can cut excess off (as seen below). I sewed the material so that all but one short side is open. I also cut a piece of cardboard from a cereal box for the bottom of the alligator's mouth to give it a little more support.
 I then put the enclosed sewn material on my hand and pushed it through till it all fit comfortable in the mouth from the inside.
 Then I folded the insides together to be sewn
 It was an extremely tight squeeze fitting this stuffed animal around/near my machine, so I had to do much of this by hand, although the alligator was much easier to sew with the machine, so use your own judgement if you can fit it to sew it there.
 For the alligator my internal piece turned out a little extra long, so I cut off a good chunk, but still left enough to fold inside and sew, like below
 I know, it isn't the best sewing job on the block, but it works, so I am not gonna complain.
Rrrr! All Finished and ready to play with my little girl. My all time favorite with these is that she likes to wear them too and just walk around the house with them on her arm (yes arm, because they are short it consumes her whole arm, it is so fun! ).

Thanks again for stopping by! Hope you have a wonderful day!

Until next time. . . .

Pin It!