Showing posts with label Makeover. Show all posts

Tuesday, February 21, 2012

Stuffed Animals into Puppets!


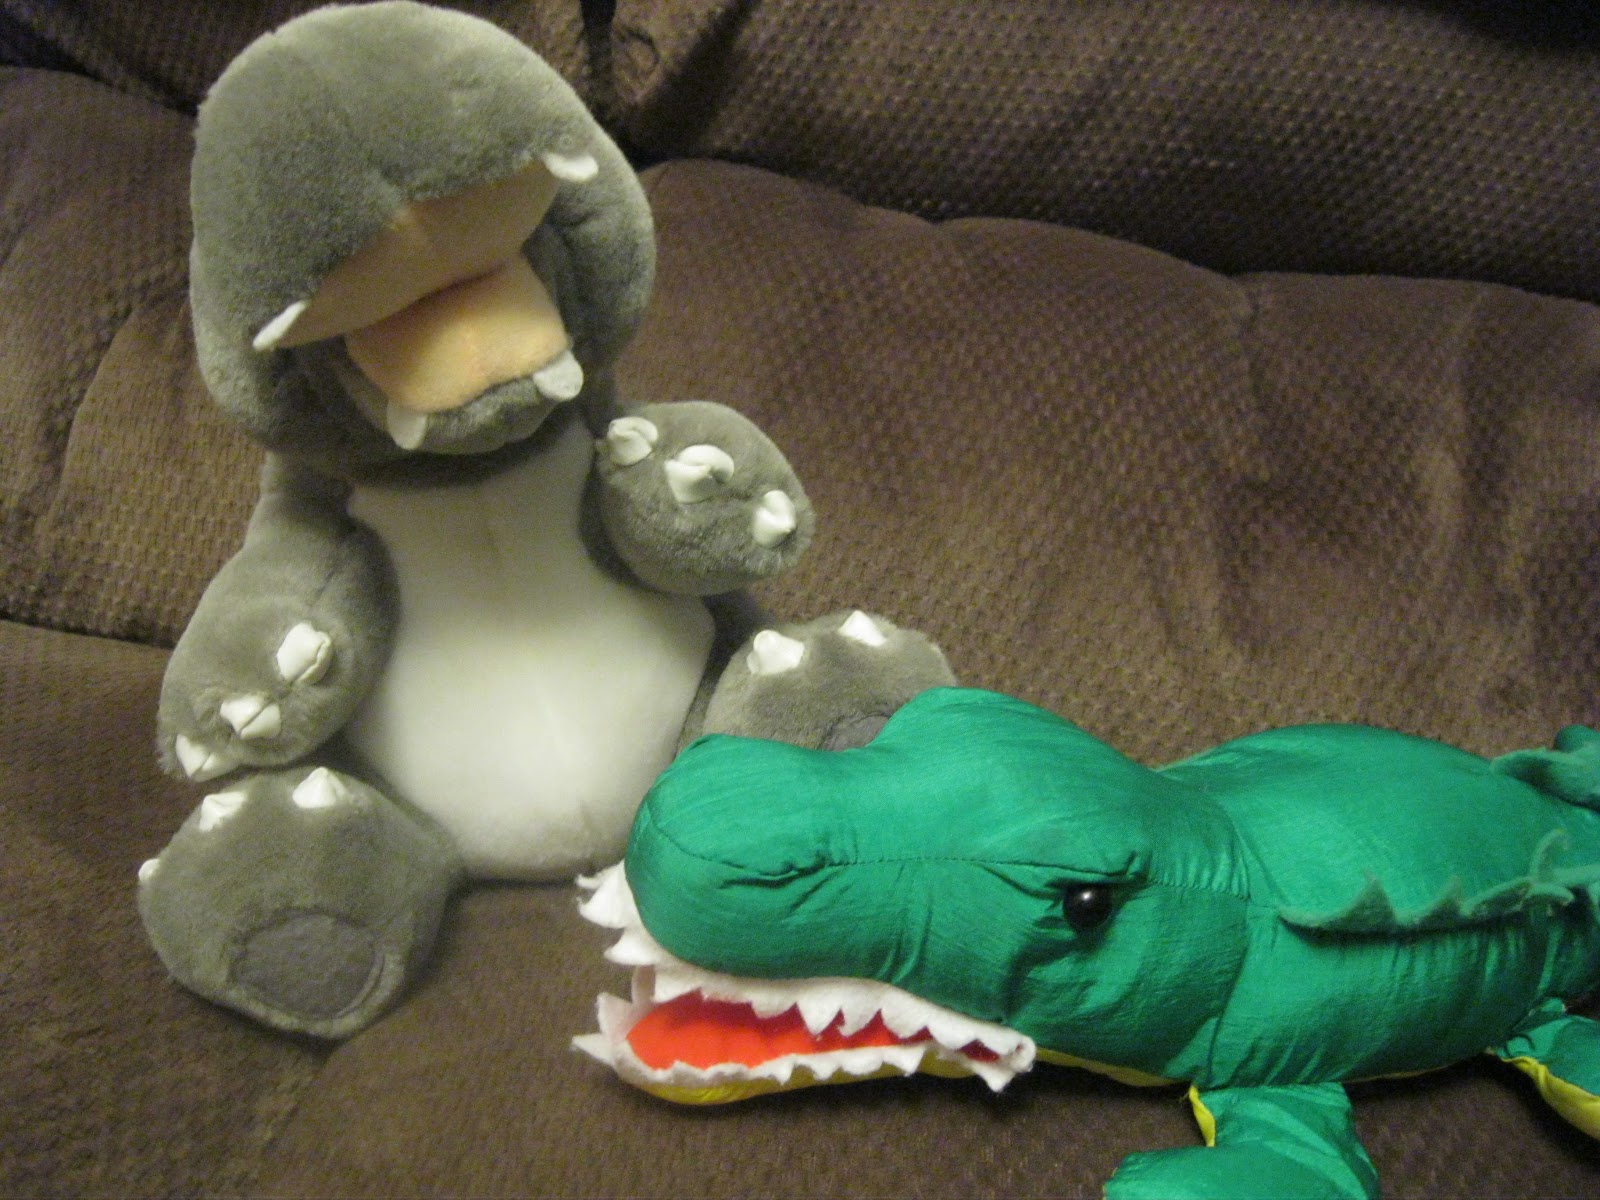
My little girl loves puppets. So after much observation and contemplation I figured I could transform some of her stuffed animals into puppets. Just a heads up before/if you try this at home, I am not sure sure this will work for all stuffed animals. I did it on ones that already had some kind of mouth that would be open-able, like these two bellow. . .
 See how their mouths have a natural opening? These kind will work best. Here's how I did it.
 Using my seam ripper I cut open and gutted (not all the cotton, just enough that I could easily fit my hand in without it being too stight) where I wanted the opening for my hand to go.
 Here are the items I used. I used some random material that was big enough to fit my hand around, plus several more inches just for extra cushy room, along with them being about as long as the animal, and if ends up being too long you can cut excess off (as seen below). I sewed the material so that all but one short side is open. I also cut a piece of cardboard from a cereal box for the bottom of the alligator's mouth to give it a little more support.
 I then put the enclosed sewn material on my hand and pushed it through till it all fit comfortable in the mouth from the inside.
 Then I folded the insides together to be sewn
 It was an extremely tight squeeze fitting this stuffed animal around/near my machine, so I had to do much of this by hand, although the alligator was much easier to sew with the machine, so use your own judgement if you can fit it to sew it there.
 For the alligator my internal piece turned out a little extra long, so I cut off a good chunk, but still left enough to fold inside and sew, like below
 I know, it isn't the best sewing job on the block, but it works, so I am not gonna complain.
Rrrr! All Finished and ready to play with my little girl. My all time favorite with these is that she likes to wear them too and just walk around the house with them on her arm (yes arm, because they are short it consumes her whole arm, it is so fun! ).

Thanks again for stopping by! Hope you have a wonderful day!

Until next time. . . .

Tuesday, February 14, 2012

Bucket Labels

In my random spurts of free time and desires for matchyness, I decided to add a little life and color to my kitchen by adding nice labels to my simple buckets.
 In a previous curtain venture, I added the curtains to give a little life, but it was time for a little more. We like to get our food in bulk, so we have many a buckets in our kitchen. So to add a little life and niceness to them I  .. . .
 simply mod podged a scrap book paper, and then a construction paper on. Then when it was dry I wrote on with chalk what item of food was in the bucket. Who says you need chalk board paint anyway?
 Then since we have weird limited room in our kitchen, a bucket became our trash can a while ago, so I also labeled it too.
 Then on top of our fridge I have these fun random tin buckets that I used to hold my recipe books, and I also wanted to change things up a little for them so I  . . ..
 Painted them and mod podged a quote on to them (and then in more ambitious moods I also moved the fridge to a new location).
 The smaller can: "Let your Faith be Bigger than your Fear."
 And the bigger can: "Yesterday is history, tomorrow is a mystery, but today is a gift, that is why it is called the Present."
 Then I also have these fun jars in courtesy of my sister April (who has also been around here on this lovely blog :), and I also wanted to add a little to them too. So I . . . .
 Again mod podged construction paper, and then when it was dry, again wrote with chalk for the food that is inside the jar. And then also labeled on my tall white sugar containers, just for fun
And last but not least. We also have a small trash container on our counter for random small trash when we are doing dishes or cooking, which is just an old ice cream bucket. Sometimes it can be a little confusing to some that it is in fact a trash can, so I thought it would be fun to label it as well.


So there you have it, my fun labeling ventures. And now you know, you don't always have to divulge into buying chalkboard paint because a mod podged construction paper works wonders! Hope you have a happy Tuesday, a Happy Valentines Day, and last but not least, a Happy Arizona's 100th Birthday (I am Arizona native, so I just have to wish it a good one!)!!

Thanks for stopping by, until next time!

Saturday, January 21, 2012

Painted Rug!

Yep, you read that right, this post is about our rug, that I painted! Much thanks again to Pintrest I saw this cute rug paint job from the Idea Room, you can check it out here.

I don't know that I am as brave to go with such bold designs and colors as the Idea Room went with on her rug. I just love my matchy matchy, and if I were to do one thing in an intense new look, I'd want to revamp the whole environment to make it match. So for the time being, I just painted our rug much more simply and to match how the environment currently is set up. Plus, I am not always the best with using stencils and I would be really nervous about messing something like this one up, since once it's ruined, there's no turning back. Another plus in my wanting to paint this rug, is that it's an older one and has some stains on it, so me painting it gave it a nice new "make-over" sort of look!

Okay, so enough jabbering and on to showing. Here are some before, during and finished pictures of my newly painted rug!

I didn't have time to do minor touch up editing on the pictures, so just enjoy as is! :)
 See the first rug that has the brown on the sides? Well this was the look I was going for, so that we could have matching rugs. The rug under our table in the distant is the one I painted.
 So I took the table and chairs off (for obvious reasons), put newspapers underneath to help keep paint from going everywhere. See how not so pretty those stains are? I wanted to hide most of them!
 But to make it still match the other rug I couldn't hide all of the stains, oh well. I put tape down to make sure I wouldn't end up going too crazy in my painting! :)
 I should have took a picture after each coat, but this is after my second coat of paint. And just a side note if you try this at home: The first coat I just painted right on, but it was getting a little of a stiff kind of feel ( go figure, since it's paint after all). And I still wanted the rug to feel somewhat soft-ish. So the second coat I watered it down a lot, so it more like stained the rug with the brown, and it gave it this look. Also another side note if you try this at home, it became very wet (from watering it down), so I put plastic bags underneath the painted part to keep it from bleeding to the regular carpet!
 Since it was so wet and was taking forever to dry, I hung it on our chairs, it took about a total of 24 hours to completely dry before I could lay it back down.
 Now its all down, and lovely modeled and accompanied by my little princess.
And even better, it is matchy matchy!!


Now as a wonderful new little side note, I am getting another new helper with this blog. One of my sisters, April, will be joining in as an author for this blog. I have shared some of her goodness before, but now she'll be a more official post-er on here too. She has a much more busier life than me with her family of 4 kids, college, and now just got a job, so her appearances will not be as frequent as mine, but it will still be great to have her appearance once in a while with her fun great ideas! And I will let her introduce herself a little more when she'll be able to squeeze in a post!

Well that's all for this week! Thanks again for stopping by! And come join me next week for some new decor I made and some super yummy banana treats (these are probably by far a new favorite treat and I can't help but make them at least once a week now!!).

Until next time!!

Friday, January 13, 2012

New Makeover! (for our desk)

Isn't paint a lovely thing. I love the new look a good paint job can bring. I am a fan of whoever decided to make paint.

This project was finished a few months ago, but haven't been able to share until now. This project has been a great one, simple yet wonderful. You see, I have a hard time coming up with stuff that my husband and I can do together. Yes we like to do some of the basics like eating, cooking, watching movies, etc together, but we like to add a little more to our norm. But that isn't always easy since he doesn't entirely have the passion for crafty stuff like I do, and I don't exactly have the passion for computer stuff like he does...so this "computer" desk + "new paint job" = perfect project for our different interests.

Okay... long story short, here's how it went. . .

Remember the lovely storeage boxes I made? Well they were set in this lovely poopy green desk. I love this desk. But not so much the color. So it was time for a change. . .
My lovely husband working so faithfully on the sanding down, he did most of this work, because i HATE sanding, the sound is like scratchy nails on a chalkboard, gives me the chills like NO other!
All ready to be painted!
And wall-ah! The newly, freshly painted desk. (I know it still kinda has a greenish look in the picture, but it is actually very brown in real life!) And the fun part about it aswell is that because the paint we bought is very flat like, I think this desk could also be used in a "Chalkboard" like way (who needs to buy chalkboard paint, when you can have really flat paint?). So when my little girl gets older and more hankering to color everything. . . I can have her color the desk (with chalk) instead, and it will wipe right off. I am stocked.

Anyway, thanks for stopping by and seeing our random ventures. I hope you have a wonderful day! And don't forget to come back tomorrow for Sun-Up Saturday!

Pin It!